Pressure washing can make a dirty house look fresh again in a short time. It can remove mold, mildew, algae, dust, bird droppings, and old grime from siding, brick, stucco, and more. But the same force that cleans well can also damage paint, crack siding, force water behind walls, and even injure you if you use it the wrong way.
If you want to know how to pressure wash a house safely, the main goal is simple: use the right pressure, the right nozzle, and the right cleaning method for the surface. A house is not a driveway. It needs more care, more patience, and more planning.
This guide will walk you through the full process step by step. You will learn what to check before you start, how to prepare the home, how to clean each area the safe way, and how to avoid the most common mistakes. If you follow these steps, you can get a clean result without causing damage.
What you should know before you start
Before you begin, understand one important fact: most house washing jobs do not need extreme pressure. In many cases, the best method is a mix of water, cleaning solution, and gentle rinsing. High pressure is only useful in certain spots, and even then, it must be controlled carefully.
Also, not every house can be washed the same way. Vinyl siding, painted wood, brick, stucco, and fiber cement all react differently. A safe wash starts with knowing the surface and choosing the right approach.
Pressure washing is not the same as soft washing
Pressure washing means using a machine to spray water at high force. Soft washing uses much lower pressure and depends more on cleaner and a gentle rinse. For many homes, especially painted or older ones, soft washing is safer for large areas. You may still use pressure in small controlled spots, but the whole house should not be blasted like a sidewalk.
This is one of the biggest beginner mistakes. People think stronger pressure means better cleaning. In reality, too much pressure often creates more problems than it solves.
Check the house material first
Different surfaces need different care. Here is a simple guide:
| Surface | Safe approach | Main risk |
|---|---|---|
| Vinyl siding | Low pressure with wide spray | Water behind panels |
| Painted wood | Very gentle pressure or soft wash | Paint removal and wood damage |
| Brick | Moderate care, test first | Mortar damage |
| Stucco | Low pressure only | Cracking and water intrusion |
| Fiber cement | Gentle wash with caution | Surface wear and water entry |
If you are unsure about your surface, test a small hidden area first. That small test can save you from a costly repair.
Know when not to pressure wash
Do not use strong pressure on damaged siding, loose paint, cracked stucco, open electrical areas, rotten wood, or old windows with failing seals. If the house has visible structural issues, fix those first. Water can make hidden problems worse.
If your home has lead paint, asbestos materials, or major deterioration, stop and get professional advice. Safety matters more than speed.
Gather the right tools and safety gear
Good results depend on using the right equipment. You do not need the most expensive machine, but you do need the right setup for the job.
Tools and supplies you may need
- Pressure washer with adjustable pressure
- Garden hose
- Wide-angle spray nozzles
- House wash detergent or cleaning solution made for exteriors
- Extension wand, if needed
- Soft-bristle brush for stubborn spots
- Bucket
- Plastic sheeting or tape for covering outlets and delicate items
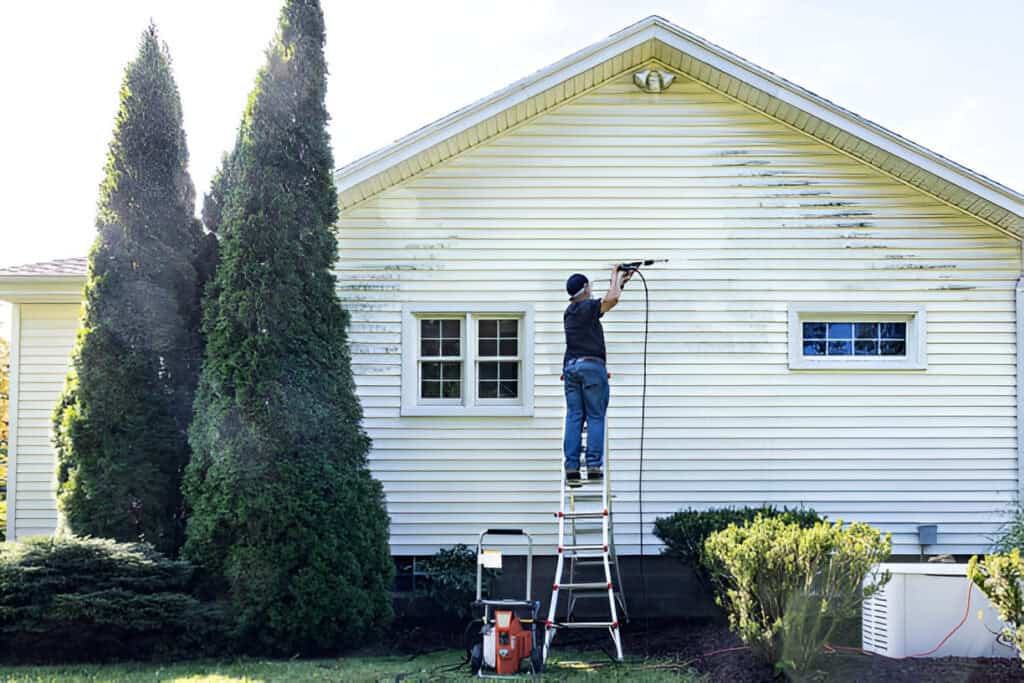
- Sturdy ladder, if needed, though many areas can be cleaned from the ground
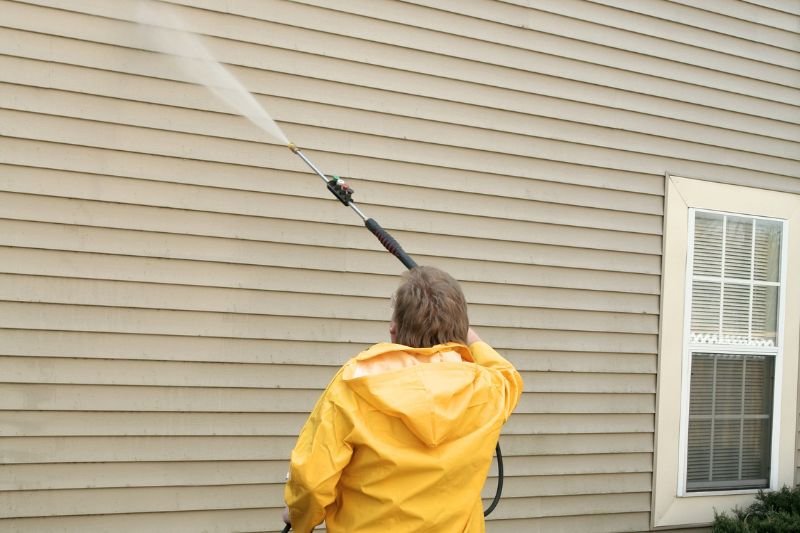
Wear proper safety gear
Never skip protection. A pressure washer can cut skin, send debris into your eyes, or make you slip.
- Safety glasses or goggles to protect your eyes
- Closed-toe shoes with good grip
- Long pants and sleeves
- Gloves for grip and protection
- Hearing protection if your machine is loud
One non-obvious tip: wet surfaces can be very slippery even when they do not look slick. Move slowly and plan your footing before you start spraying.
Choose the right nozzle
Nozzle choice matters more than many beginners think. A narrow spray can dig into siding or strip paint. A wider spray spreads the force and is usually safer for house walls.
As a general rule, start with the widest practical fan spray and test first. If the dirt is not coming off, use cleaning solution and time, not more pressure.
Prepare the house before spraying
Preparation is not wasted time. It protects your home, lowers the risk of damage, and makes cleaning faster.
Credit: homegnome.com
Close and cover key areas
Make sure all windows and doors are shut tightly. Cover outlets, light fixtures, vents, and other sensitive spots if needed. Move outdoor furniture, grills, and decorations away from the work area.
Take down fragile items like wreaths, signs, or hanging lights. It is also smart to cover plants near the house if you plan to use cleaning solution. Some products can harm leaves if they are not rinsed quickly.
Clear the area around the home
Pick up toys, tools, hoses, and anything else that can become a hazard. Trim back light branches if they block access. If there are pets or children nearby, keep them away from the work zone.
Inspect the exterior closely
Walk around the home and look for loose siding, cracked windows, damaged caulk, rotting wood, and exposed wires. Mark these areas so you can avoid them. It is better to patch small problems before washing than to force water into them.
This is another point beginners often miss: water does not just clean the outside. If there is a weak point, pressure can push moisture deep inside the wall system.
Mix your cleaning plan before you turn on the machine
Water alone can remove loose dirt, but it usually will not remove mildew, algae, or sticky stains well. That is why a cleaning solution often helps. Use a product made for exterior house washing and follow the label directions carefully.
Use the right cleaner for the surface
Vinyl, brick, painted wood, and stucco may need different cleaners. Some formulas are made to fight mildew and organic buildup. Others are better for general dirt. Do not mix chemicals unless the label clearly allows it.
If you are using bleach-based cleaner, handle it with care. Never mix bleach with ammonia or other random household cleaners. That can create dangerous fumes. For general safe-use guidance, the U.S. Environmental Protection Agency is a helpful authority on safe chemical handling and environmental care.
Test the solution first
Apply a small amount in a hidden area. Wait a few minutes and check for color change, spotting, or damage. Testing is especially important on painted surfaces and older homes.
Do not skip dwell time. Many cleaners need time to work. If you spray and rinse too quickly, the dirt will stay in place and you may be tempted to use too much pressure.
How to pressure wash a house step by step
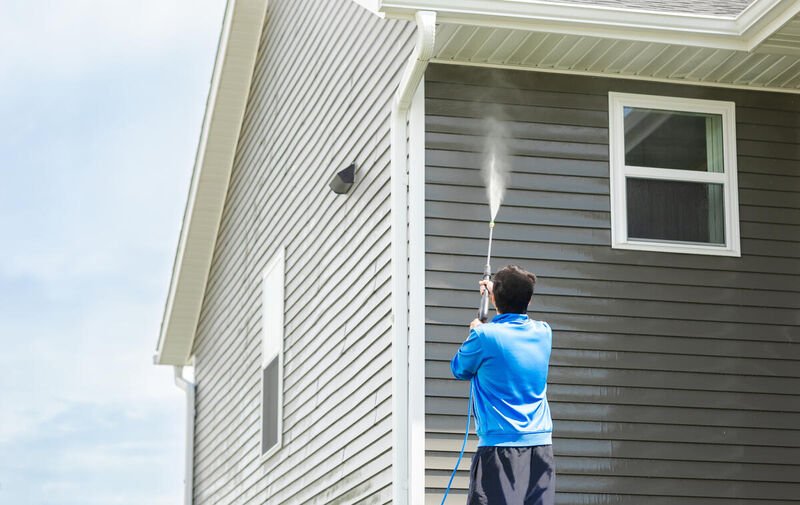
Now that the setup is ready, you can start cleaning. Work slowly and from the top down. This lets dirty water run downward over areas you have not cleaned yet.
1. Start with a low-pressure test
Turn on the machine and test the spray on a small, hidden section. Hold the wand at a safe distance and see how the surface reacts. If the water marks the siding, lift paint, or creates a harsh line, stop and reduce pressure or switch to a wider nozzle.
Do not point the spray straight into seams, vents, windows, or door edges. That can push water inside the home.
2. Wet the surface gently
Begin by lightly wetting the wall. This helps the cleaning solution spread evenly and lowers the chance of streaking. Keep the spray moving. Never stay in one place for too long.
3. Apply cleaning solution
If your washer has a soap attachment, apply cleaner according to the machine instructions. If not, use a pump sprayer or other safe applicator. Cover the area evenly, but do not flood it.
Let the cleaner sit for the recommended dwell time. This is where the work happens. The solution breaks down grime so you do not have to rely on high force.
4. Clean from top to bottom in sections
Work in manageable sections, such as one wall at a time. Clean the upper area first, then move downward. This helps prevent streaks and missed spots.
Keep the wand at a steady distance. Move in slow, even passes. Overlapping strokes slightly can help create a uniform finish. If dirt remains, apply more cleaner and gentle brushing instead of increasing the pressure too much.
5. Rinse thoroughly
Once the dirt has loosened, rinse the area with clean water. Make sure all soap is removed. Leftover cleaner can leave marks or affect nearby plants and surfaces.
Check around windows, trim, corners, and under eaves. These areas often trap residue. A careful rinse also helps you spot places that need a second pass.
6. Handle stubborn stains separately
Some stains need extra attention. Algae, mildew, rust, and oxidation do not always come off in one wash. Use the right cleaner for the stain, and scrub gently with a soft brush if needed.
Do not try to erase deep stains with pressure alone. That can damage the finish while still leaving the stain visible.
How to handle different parts of the house
Each part of the exterior has its own risk. Knowing the weak spots helps you avoid mistakes.
Credit: lawnstarter.com
Siding
For siding, keep the spray angle slightly downward or parallel to the surface. Never spray upward into the lap joints. That can drive water behind the panels. This is one of the most common causes of hidden water damage after a wash.
Windows
Use very light pressure near windows. Avoid spraying directly at seals, frames, or screens. Older windows can leak easily, especially if the caulk is cracked.
Doors and trim
Painted trim and doors may chip if hit with a strong stream. Use extra care at edges and joints. If trim paint is already peeling, the wash may remove loose flakes, which is normal, but do not force it.
Brick and mortar
Brick is strong, but mortar can be weak. Clean with caution and never use a narrow jet close to the joints. If mortar is crumbly, pressure washing can make it worse.
Stucco
Stucco needs a gentle touch. High pressure can open small cracks and let moisture inside. Use low pressure only, and do not linger in one place.
Common mistakes that can damage the house
Many house washing problems come from a few simple errors. Avoid these and your chances of damage drop a lot.
- Using too much pressure – This can strip paint, scar siding, and force water into the wall.
- Using the wrong nozzle – A narrow spray is too harsh for most house surfaces.
- Spraying upward – Water can enter seams, vents, and window openings.
- Skipping cleaner – Dirt and mildew may stay behind, so you overuse pressure.
- Cleaning in direct hot sun – Solution can dry too fast and leave marks.
- Ignoring hidden damage – Loose siding, cracked seals, and rotted wood can become bigger problems.
Here is a useful rule: if a surface is not coming clean, do not assume it needs more pressure. It may need more dwell time, the right cleaner, or gentle brushing.
Best time and weather for the job
The best day for washing is mild, dry, and not too windy. Morning or late afternoon is often better than midday. Cooler temperatures help the cleaner stay wet long enough to work, and they reduce streaking.
Do not pressure wash in freezing weather. Water can freeze on surfaces and create a slip hazard. Very windy days are also a bad choice because spray drift can hit windows, plants, or electrical parts.
Watch the forecast carefully
Light rain after washing is usually fine, but heavy rain can wash cleaner into places you do not want it. Strong sun can dry the cleaner too quickly, which reduces its effect and may leave spots.
What to do after washing
After the house is clean, do a full walk-around. Look for missed spots, residue, streaks, and any signs of damage. Check windows, vents, trim, and the foundation. If water entered any unwanted area, open it up and dry it as soon as possible.
Let the exterior dry fully before putting items back in place. If you moved furniture, decorations, or plants, return them only after the area is safe and dry.
Take a moment to inspect the results in natural light. Some marks only show up after the surface dries. A quick touch-up now is easier than fixing a problem later.
When to hire a professional
Sometimes the safest choice is to hire a pro. That is especially true if your house is very tall, has delicate materials, has severe mold growth, or needs special stain removal. Professionals also know how to handle complex jobs without flooding or damaging the structure.
If you are uncomfortable on ladders, unsure about chemical use, or worried about older paint or siding, a professional may be the smarter option. Paying for experience can be cheaper than repairing damage.
Credit: sandiegopressurewashing.com
Simple maintenance that keeps the house cleaner longer
Pressure washing should not be something you do only after years of buildup. A little regular care makes the next wash easier and safer.
- Rinse off light dirt before it builds up
- Trim plants so moisture does not stay against the walls
- Check gutters so dirty water does not run down siding
- Fix caulk and seal gaps early
- Wash mildew spots before they spread
One useful habit is to inspect the shady side of the house more often. Shade holds moisture longer, so mold and algae grow faster there.
When you understand how to pressure wash a house the right way, the job becomes much less risky. The key is not brute force. It is preparation, patience, and careful control. Cleaners do most of the hard work, while pressure should support the process, not dominate it.
If you follow the steps in this guide, you can clean your home safely, protect the exterior surfaces, and get a result that lasts. Work slowly, test first, and treat each part of the house with respect. That is the best way to clean well and avoid damage.
FAQs
1. What pressure setting should I use to wash a house?
Use the lowest effective pressure for the surface. For most house exteriors, wide spray settings and gentle pressure are safer than high force. Always test a hidden area first.
2. Can I pressure wash vinyl siding?
Yes, but carefully. Use low pressure, a wide spray, and never spray upward into the siding seams. Too much force can send water behind the panels.
3. Do I need soap to pressure wash a house?
Soap or an exterior cleaner is often helpful because it breaks down mildew, algae, and grime. Water alone may not remove stuck-on dirt well.
4. How often should a house be pressure washed?
Most homes only need washing every 1 to 3 years, depending on climate, shade, and nearby trees. Homes in damp or dusty areas may need it more often.
5. Is it safe to pressure wash near windows?
Yes, but only with very light pressure and careful aim. Do not spray directly at seals, frames, or edges where water can enter the home.
