A clean deck can change the whole look of your yard. It can also make outdoor spaces safer by removing dirt, mildew, algae, and slippery grime. But a pressure washer can also damage wood, strip coatings, and leave ugly marks if you use it the wrong way.
If you want a smooth, fresh finish, you need more than strong water pressure. You need the right prep, the right nozzle, the right distance, and a steady hand. That is why learning how to pressure wash a deck the safe way matters just as much as the cleaning itself.
This guide shows you how to do the job step by step. You will learn what to check before you start, how to wash without harming the wood, and how to finish the job so the deck dries clean and ready for sealing or staining.
What to know before you start
Before you pull the trigger on a pressure washer, look closely at the deck itself. Not every deck should be cleaned the same way. Wood condition, board type, old coatings, and fastener damage all affect the result. A deck that looks dirty may actually have soft wood, loose nails, or flaking stain that needs a gentler touch.
One of the biggest mistakes beginners make is thinking more pressure means better cleaning. In reality, too much force can raise the wood grain, carve lines into the surface, and make the deck rough under bare feet. The goal is not to blast the wood. The goal is to clean it evenly.
Also, think about your end goal. If you plan to stain or seal the deck, the wash job must remove dirt and loose coating without leaving deep marks. If you only want a seasonal cleanup, you can be a little less exact, but you still need to protect the wood.
Check the deck material first
Most outdoor decks are made from softwood like pine, cedar, or fir, or from composite material. Softwood needs more care because it scars easily. Composite decking can also be damaged if you use the wrong nozzle or hold the wand too close.
If you are not sure about the material, test a small hidden area first. This simple test can save you from making a permanent mistake across the whole deck.
Look for damage before washing
Walk the deck slowly and check for loose boards, popped screws, cracked wood, soft spots, and nails that stick up. Water pressure can make these problems worse. It can also drive water deeper into weak areas.
Fixing small issues before cleaning makes the entire process safer. It also gives you a better final finish because the washer will not catch on broken edges or uneven boards.
The tools and supplies that make the job easier
You do not need a huge list of gear, but the right tools matter. A good setup helps you clean faster and lowers the chance of damage. For most jobs, you need a pressure washer, a wide spray nozzle, a deck cleaner, a garden hose, a stiff brush, and basic safety gear.
| Item | Why it matters | Simple tip |
|---|---|---|
| Pressure washer | Provides the cleaning force | Use a unit with adjustable pressure if possible |
| 25-degree or wider nozzle | Spreads water to reduce damage | A narrow nozzle is usually too harsh for decks |
| Deck cleaner | Helps loosen dirt and mildew | Choose a cleaner made for your deck material |
| Stiff bristle brush | Helps clean stubborn spots | Use it before washing, not after damage is done |
| Safety glasses and gloves | Protects hands and eyes | Water and cleaner can splash back fast |
| Garden hose | Rinses away cleaner and dirt | Keep it nearby for quick cleanup |
If your washer has adjustable pressure, that is a major advantage. It lets you start low and increase only if needed. That is much safer than using a fixed high-pressure machine.
For a reliable safety reference on pressure washing practices, you can also review guidance from the NIOSH website, especially if you want to understand equipment safety and protective gear.
Prepare the deck the right way
Good cleaning starts before the spray begins. Prep work protects your house, your plants, and the deck itself. It also makes the wash much more even.
- Remove furniture, rugs, grills, planters, and decor from the deck.
- Sweep off loose dirt, leaves, and debris.
- Cover nearby plants and delicate landscaping if needed.
- Close doors and windows near the work area.
- Check for loose screws, raised nails, and broken boards.
- Pre-wet surrounding surfaces if overspray may be a problem.
Take a little extra time to sweep well. Dry leaves and dust can turn into muddy paste once water hits them. Removing surface debris first helps the cleaner reach the wood instead of fighting through loose material.
Credit: healthycarpetsnow.com
Choose the best weather
Pick a dry day with mild temperatures and light wind. Strong sun can dry cleaner too fast, which leaves streaks or spotty results. Wind can blow cleaner onto plants, windows, or siding.
A cloudy or cooler day is often better. The wood stays wet long enough for the cleaner to work, and you have more time to rinse evenly.
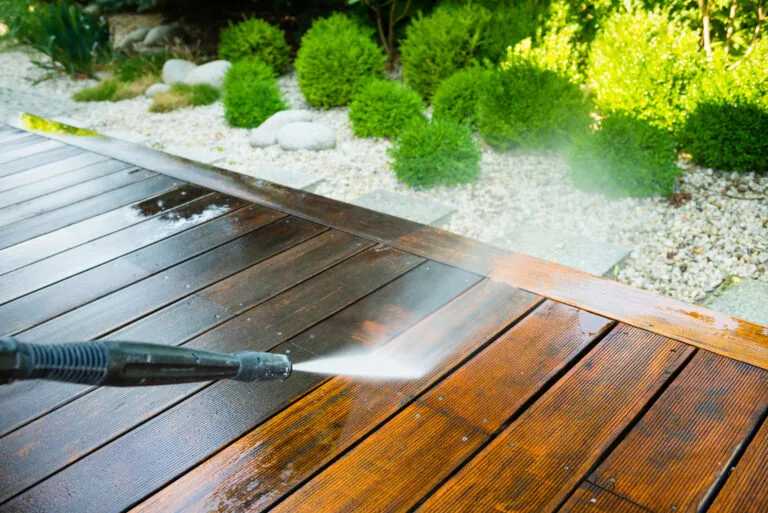
Use the right pressure, nozzle, and distance
This is the part where many deck projects go wrong. The machine is useful, but only if you use the correct settings. For most wood decks, a fan spray at moderate pressure is the safest starting point.
As a general rule, begin with the widest spray you have and test on a hidden area. Hold the wand at least 12 inches from the surface, then adjust only if needed. If the wood starts to fuzz or the grain lifts, your pressure is too high or you are too close.
Pressure guidelines that help avoid damage
Most deck cleaning jobs work best with lower pressure than people expect. Softwoods need especially careful handling. Composite boards also need caution because harsh spray can leave swirl marks or texture damage.
- Start low and increase slowly only when needed.
- Use a wide fan nozzle, not a pinpoint stream.
- Keep the wand moving at all times.
- Do not hold the nozzle directly against the wood.
- Test a small area before cleaning the full deck.
Non-obvious insight: The most common damage does not come from one big mistake. It often comes from small pauses. If you stop the spray in one spot even for a second too long, the wood can get etched in a visible line. Smooth movement is more important than raw power.
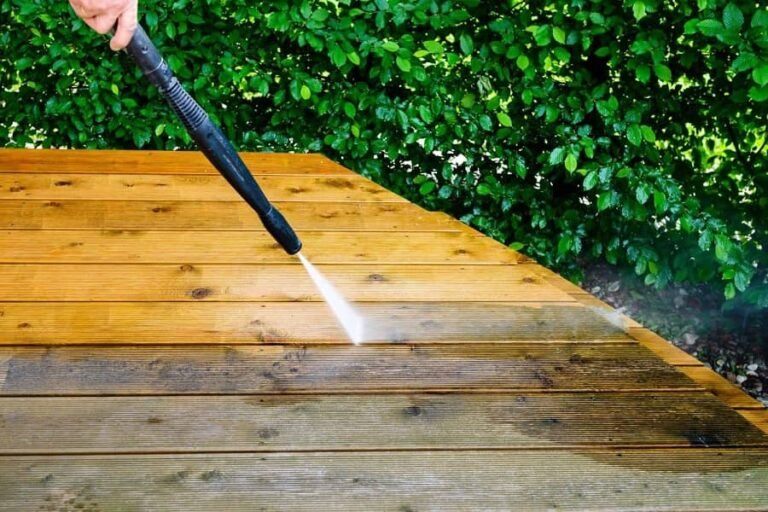
Work with the grain
When possible, spray along the direction of the wood grain rather than across it. This gives a more natural look and reduces the chance of visible streaks. It also helps the water carry dirt off the board instead of pushing it deeper into the surface.
Move in steady, overlapping passes. Think of mowing a lawn. Each pass should slightly overlap the last one so you do not leave stripes.
How to pressure wash a deck step by step
Once the deck is ready, cleaner is applied, and your washer is set correctly, you can begin the main cleaning. The exact process may vary a little based on the product you use, but the basic flow is the same.
- Wet the deck lightly with plain water if the surface is very dry.
- Apply deck cleaner according to the label directions.
- Let the cleaner sit for the recommended time, usually a few minutes.
- Scrub problem spots with a stiff brush.
- Rinse or wash the deck with your pressure washer using a wide fan spray.
- Keep the wand moving in smooth, even passes.
- Work from one end of the deck to the other in sections.
- Rinse off any leftover cleaner completely.
Do not rush the cleaner step. Cleaner loosens grime so the washer does not have to do all the work. That usually means less pressure, less risk, and a better finish.
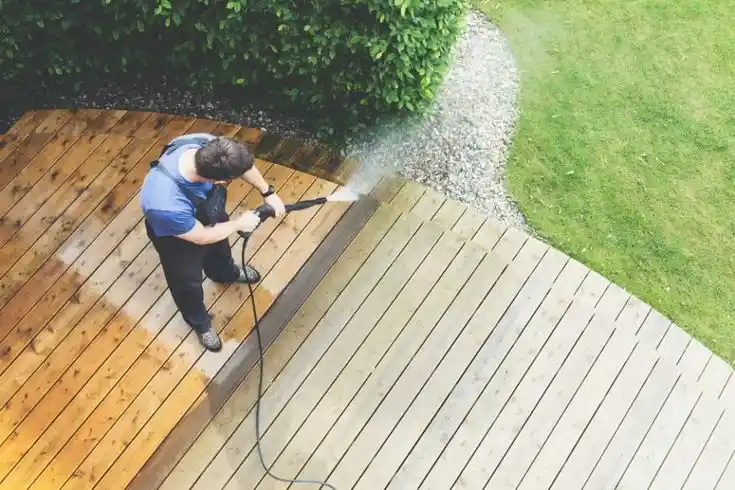
Work in sections, not randomly
Cleaning the deck in sections helps you stay organized. It also prevents cleaner from drying before you rinse it. A good pattern is to start at the farthest point and work back toward your exit so you do not step on freshly cleaned areas.
Each section should be small enough that you can clean it before the product dries. This is especially important on warm days.
Treat mold and mildew carefully
Dark spots in corners or around shaded boards often need extra treatment. Do not try to remove heavy mildew only with pressure. That may clean the top layer but leave the stain behind. Use a cleaner made for organic growth, then rinse gently.
Non-obvious insight: If mildew keeps returning to one area, the problem may be shade and trapped moisture, not cleaning quality. Fix drainage, improve airflow, or trim nearby plants if you want the deck to stay cleaner longer.
Common mistakes that ruin deck surfaces
Many homeowners think the deck looks fine right after washing, then notice rough patches, fuzzy boards, or visible stripes once it dries. These issues often come from a few simple mistakes.
- Using too much pressure.
- Holding the nozzle too close.
- Using a narrow spray tip on soft wood.
- Stopping in one spot too long.
- Skipping cleaner and relying only on water.
- Cleaning in full sun so the solution dries too fast.
- Failing to rinse all cleaner residue away.
Another mistake is washing too aggressively on older wood that already has raised grain or thin spots. In that case, even moderate pressure can make the damage more visible. If the deck is aged, think “gentle cleanup,” not “deep restoration.”
Credit: bisonclean.com
How to fix light damage
If the deck feels a little rough after washing, allow it to dry fully, then lightly sand the raised grain with fine-grit sandpaper. This does not undo deep etching, but it can smooth out minor fuzzing and improve the feel underfoot.
If you see deep grooves or repeated lines, the pressure was too high. Those marks usually need sanding across a wider area, or in severe cases, board replacement.
Drying the deck and finishing the job
Washing is only half of the process. A deck that is cleaned well but not dried well can still cause problems later. Sealer, stain, or paint should never go on damp wood unless the product label says it is safe.
Give the deck enough time to dry fully. In many cases, 24 to 48 hours is a safe range, but weather, shade, and board thickness can change that. The wood should feel dry, look even, and have no dark damp patches before finishing.
Why drying matters more than people think
If you seal too soon, moisture can get trapped inside the wood. That can lead to peeling, poor stain absorption, or a cloudy finish. A clean deck only looks “like new” for long if the finish bonds properly.
Run your hand across the boards once they are dry. If the surface still feels fuzzy, a light sanding before staining can help create a smoother final result.
Should you stain or seal after pressure washing?
If your goal is a like-new finish, the answer is usually yes. Washing removes dirt, but stain or sealer protects the wood and helps the fresh look last longer. Bare wood weathers quickly, especially in sun and rain.
Choose a product that matches the deck’s age and condition. Clear sealers show more of the natural wood. Semi-transparent stains add color and cover small imperfections better. If the wood is uneven in color, a stain can make the finish look more uniform.
The best time to apply protection is soon after the deck is fully dry and fully checked for damage. Waiting too long gives dirt and pollen a chance to settle again.
When pressure washing is not the best choice
Pressure washing is useful, but it is not always the right answer. Some decks are too old, too soft, or too damaged for strong water cleaning. In those cases, a scrub brush, a low-pressure rinse, or a gentler cleaning solution may be better.
If the wood is flaking badly, deeply cracked, or already splintering, pressure washing can make the problem worse. The same is true if previous cleaning has left visible damage. Sometimes the safest path is a lighter wash and then repair work.
Composite decks also deserve caution. They can often be cleaned well, but only with the right pressure and a manufacturer-safe cleaner. Always check care instructions if you have them.
Simple care tips to keep the deck cleaner longer
A freshly cleaned deck will stay nice longer if you build a few habits into your routine. These small actions reduce dirt buildup and delay the next heavy wash.
- Sweep the deck often, especially after storms.
- Move flower pots sometimes so moisture does not stay trapped underneath.
- Trim nearby plants to improve airflow and sunlight.
- Clean spills quickly before they stain.
- Check for mold in corners and shaded areas after wet weather.
One small but useful habit is to rinse the deck lightly during pollen season. This can prevent the yellow layer from bonding tightly to the surface and makes the big cleaning job much easier later.
Credit: pressurekinginc.com
Final thoughts on getting a like-new result
Learning how to pressure wash a deck safely is really about control. The deck should come out clean, not scarred. That means using the right prep, cleaner, nozzle, distance, and speed. It also means paying attention to the wood as you work.
If you move carefully and clean in sections, you can remove dirt, mildew, and old grime without damaging the surface. Then, once the wood is fully dry, you can seal or stain it for a smoother, fresher finish that lasts.
The best results come from patience, not force. Keep the spray gentle, keep the wand moving, and let the cleaner do part of the work. That is how you turn an older deck into one that looks cared for and close to new again.
FAQs
1. How much pressure should I use on a wood deck?
Start with low pressure and a wide fan nozzle. Most wood decks do better with gentler cleaning than people expect. Test a hidden area first and increase only if needed.
2. Can I pressure wash a deck without using cleaner?
You can, but the result is usually not as good. Cleaner helps loosen dirt, mildew, and old residue so you can use less pressure and get a more even finish.
3. How far should I hold the nozzle from the deck?
A good starting point is about 12 inches away. If the wood looks fuzzy or the grain lifts, move farther back and lower the pressure.
4. How long should a deck dry after pressure washing?
In many cases, 24 to 48 hours is enough, but the real drying time depends on weather, shade, and wood type. The deck must feel fully dry before staining or sealing.
5. What if my deck already has old stain on it?
Old stain can make cleaning trickier. Pressure wash carefully to remove loose material, but do not try to strip the whole surface with high pressure alone. If the coating is failing badly, a proper stripper or sanding may be needed first.
