Nail pops in a ceiling can look small, but they often make a room look old and damaged. The good news is that most of them are easy to fix if you use the right steps. You do not need to be a professional for every case. In many homes, a careful repair can make the ceiling look smooth again in a short time.
If you want to know how to fix nail pops in ceiling, the key is to repair the visible bump and also deal with the reason it happened. If you only cover the spot without securing the drywall or plaster, the problem may come back. That is why a proper repair matters more than a fast repair.
This guide will show you simple steps, the tools you need, common mistakes to avoid, and when a nail pop may be a warning sign of a bigger issue. By the end, you should feel confident handling small ceiling nail pops the right way.
What causes nail pops in a ceiling
A nail pop happens when the fastener under the ceiling surface pushes outward and creates a small bump or crack. In drywall ceilings, this often means the nail or screw has shifted a little. In plaster ceilings, the same problem can happen when old fasteners loosen over time.
Several things can cause this:
- House movement: Homes settle slowly, and that movement can loosen fasteners.
- Temperature and moisture changes: Wood framing expands and shrinks with the weather.
- Poor fastening during installation: Nails that were not driven deep enough can move later.
- Drywall board flexing: Ceilings can sag slightly over time, especially if the board was not secured well.
One important detail many beginners miss is this: a nail pop is often not caused by the nail itself alone. The real issue may be the wood framing behind it. If that framing moves, even a good patch can crack again. Another detail is that fresh paint can make a weak ceiling spot show faster, because the new finish highlights every tiny bump.
How to tell if it is really a nail pop
A nail pop usually looks like a small round bump with a visible nail head or a tiny crack near it. If you press lightly around the spot, it may feel slightly raised. Some ceiling bumps are caused by joint compound, old paint, or even water damage, so do a careful check before you repair anything.
If the area feels soft, stained, or crumbly, stop and inspect for leaks first. Repairing over moisture damage will not solve the real problem.
Tools and materials you will need
Before you start, gather everything first. That saves time and keeps the repair neat. For most small ceiling nail pops, you only need basic tools.
| Item | Why you need it |
|---|---|
| Utility knife | To cut loose paint or cracked compound |
| Putty knife | To apply joint compound smoothly |
| Screwdriver or drill | To drive in a screw near the loose fastener |
| Drywall screws | To secure the ceiling board firmly |
| Joint compound | To fill and smooth the repair |
| Sandpaper or sanding sponge | To smooth the dried patch |
| Primer | To prepare the spot for paint |
| Paint | To match the ceiling finish |
| Safety glasses and dust mask | To protect your eyes and lungs |
If you want a trusted general reference on drywall repair, the Family Handyman site has useful home repair guidance that can help you compare techniques. Still, the steps below are enough for most simple ceiling nail pops.
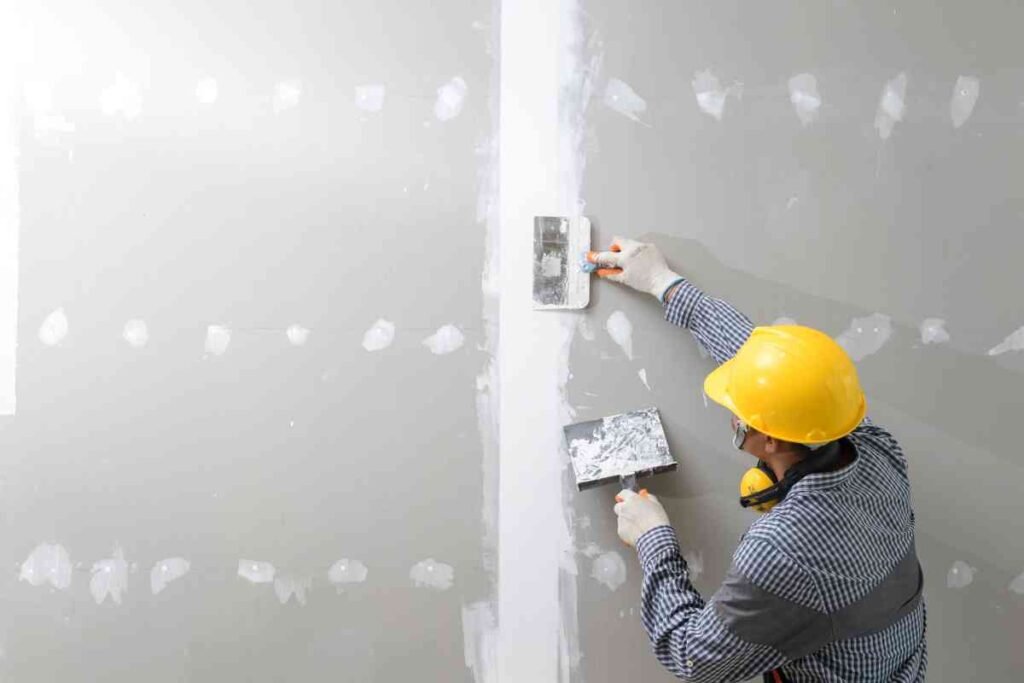
How to fix nail pops in ceiling step by step
The repair has two goals. First, stop the fastener from moving. Second, make the ceiling surface smooth again. Do both, and the repair will last longer.
Credit: diypaintingtips.com
1. Clear the area and inspect the damage
Move furniture out of the way or cover it with a sheet. Place a drop cloth under the area. Then look closely at the nail pop. Check if the ceiling around it feels solid. If the drywall is broken badly, sagging, or stained, you may need a larger repair.
If the bump is small and the rest of the ceiling feels firm, you can continue with a standard patch.
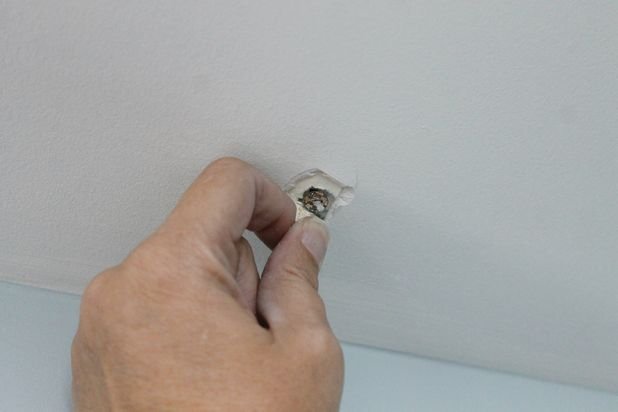
2. Remove loose material
Use a utility knife to gently cut away loose paint, cracked joint compound, or any raised edges around the pop. Do not cut too deeply. You only want to remove what is already failing.
This step matters because new compound sticks best to a clean, stable surface. If you skip it, the patch may peel later.
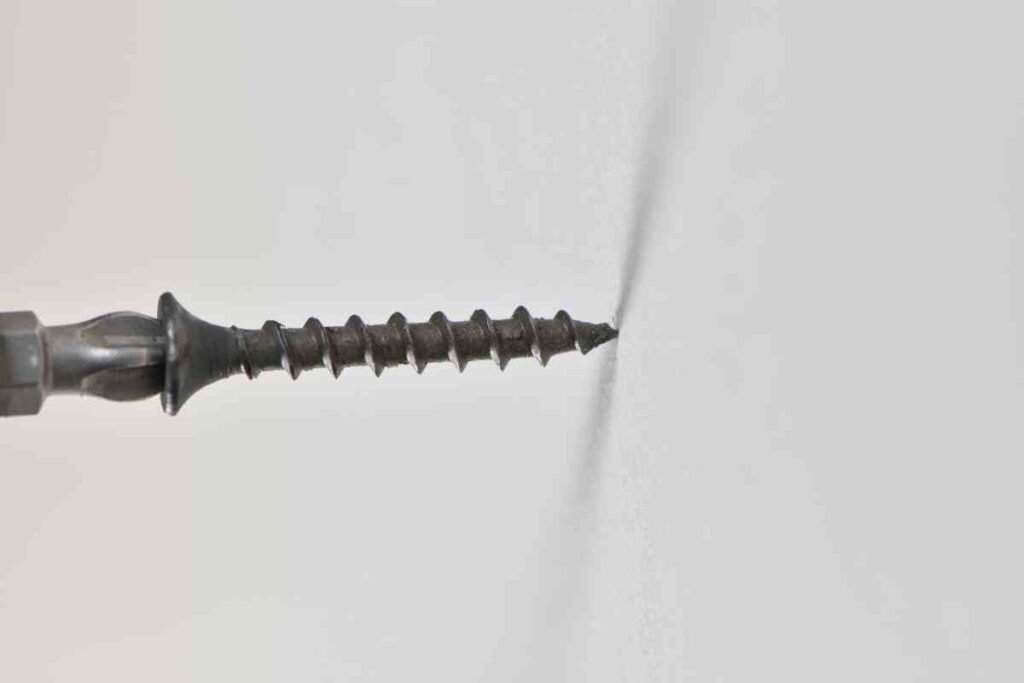
3. Drive the old fastener back in or remove it if needed
If the nail head is visible, you have two common options. If the nail is still holding reasonably well, you can sometimes tap it gently back below the surface. Use a nail set or the end of a screwdriver with care. Do not hit so hard that you break the drywall paper.
In many cases, a better repair is to add a screw near the nail pop rather than relying on the old nail alone. This is one of the most useful parts of learning how to fix nail pops in ceiling properly. A drywall screw gives stronger, more reliable support.
Best practice
Drive a drywall screw into the ceiling joist or framing member about 1 to 2 inches away from the nail pop. Make sure the screw head goes just below the surface, but do not tear the paper facing. If the old nail is loose, you can leave it in place and focus on the new screw.
That is another detail many people miss: the screw should not be placed right on top of the nail head. Offset it slightly so the new fastener grabs fresh material and helps stabilize the board.
4. Sink the fastener properly
The screw should sit just under the ceiling surface. If it is too high, you will still see a bump. If it is too deep, it can break the surface paper and weaken the hold.
The goal is a shallow recess that can be filled with compound. If you used a nail set, make sure the nail is slightly below the surface too.
5. Apply joint compound in thin layers
Use a putty knife to spread joint compound over the fastener and the surrounding area. Keep the first coat thin. A wide, smooth layer is better than a thick blob. Feather the edges so the patch blends into the ceiling.
Do not try to build the final shape in one coat. Thin layers dry better and shrink less. This is one of the simplest ways to get a smoother finish.
6. Let it dry fully
Drying time depends on the product, room humidity, and coat thickness. Many small patches dry in a few hours, but some need overnight. Read the product label and do not rush it.
If the compound is not fully dry, sanding will leave a mess and may tear the patch.
7. Sand the patch smooth
When the patch is dry, sand it gently with fine-grit sandpaper or a sanding sponge. The goal is to smooth the patch into the ceiling, not to remove the repair. Use light pressure and stop often to check your work.
A useful trick is to run your hand over the area after sanding. Your fingers often detect bumps better than your eyes.
8. Apply a second coat if needed
Some repairs need a second thin coat to hide the fastener and blend the patch completely. This is normal, especially if the ceiling has a flat or textured finish. Let the second coat dry and sand it again lightly.
Do not chase a perfect finish with heavy sanding. You are trying to make the surface even, not thinner.
9. Prime the repaired area
Before painting, apply primer to the patched spot. Primer helps the paint cover evenly and prevents the repair from flashing through. This is especially important on ceilings because light hits them from many angles.
Skipping primer can make the patch show even after painting, especially if the compound absorbs paint differently from the rest of the ceiling.
10. Paint to match the ceiling
Once the primer is dry, paint the repair with a matching ceiling paint. Use a small roller or brush, depending on the size of the patch. If the ceiling is very old, the new paint may still look slightly different because of age, dust, or texture changes.
For the cleanest result, paint a larger area if needed so the touch-up blends better.
How to make sure the repair lasts
Many people fix the visible bump but forget the structural side of the problem. That is why some nail pops return. If you want a repair that lasts, focus on stability first and appearance second.
Here are a few habits that help:
- Always use a screw to secure loose drywall near the pop.
- Check for ceiling movement before patching.
- Use thin coats of compound instead of one thick coat.
- Prime before painting.
- Keep the room dry and well ventilated.
Another often missed point is that texture matters. If your ceiling has a popcorn, orange peel, or hand-trowel texture, a simple smooth patch may stand out. In that case, you may need to recreate some texture before painting. Even a small mismatch can draw attention to the repair.
Credit: diypaintingtips.com
Common mistakes to avoid
Small ceiling repairs go wrong when people rush. A careful repair is not hard, but it does need patience. Here are the mistakes that cause the most trouble.
Using too much compound
Thick compound takes longer to dry and often leaves a visible hump. Thin layers are easier to sand and blend.
Not securing the board
If you only cover the nail pop without adding a screw, the same movement can push the fastener out again.
Skipping primer
Unprimed patches often flash through paint and look dull or different from the rest of the ceiling.
Sanding too hard
Hard sanding can damage the ceiling paper and make the repair larger than it needs to be.
Ignoring water damage
If there is a stain, softness, or mold smell, fix the leak first. A nail pop caused by moisture will not stay repaired if the moisture continues.
When a nail pop is not a simple DIY fix
Most ceiling nail pops are minor. Still, some signs mean you should look deeper before repairing. If you notice several pops in one room, the ceiling may have larger movement problems. If there are long cracks, sagging areas, or visible bowing, the board may be loose from the framing.
You should also be more careful if the ceiling has:
- Active water stains
- Soft or crumbling plaster
- Large cracks spreading away from the pop
- Obvious sagging
- Repeated nail pops in the same area
These signs do not always mean a major repair, but they do mean the problem may go beyond a simple patch. In that case, checking the framing, insulation, roof, or plumbing may be smarter than covering the spot again.
Helpful repair tips for better results
If you want a cleaner finish, a few small tricks can make a big difference. First, work in good light. A bright lamp or flashlight held at an angle will show bumps and low spots that regular room light may hide. Second, use a wider putty knife for the final coat. Wider knives spread compound more evenly and help the patch blend into the ceiling.
Third, match the existing ceiling texture before painting if texture is present. Even a basic texture spray can help hide the repair. Fourth, keep your patch area slightly larger than the nail pop itself. A tiny patch often leaves a small edge that catches light. A wider feathered patch blends better and looks more natural.
These small details are easy to ignore, but they often separate a repair that “looks okay” from one that disappears into the ceiling.
Credit: pinterest.com
Simple summary of the repair process
If you want the shortest version of how to fix nail pops in ceiling, it is this:
- Inspect the area and make sure there is no water damage.
- Remove loose paint or compound.
- Secure the ceiling board with a drywall screw near the pop.
- Cover the fastener with joint compound in thin coats.
- Let it dry, sand it smooth, and repeat if needed.
- Prime and paint the repaired area.
That sequence gives you both strength and a clean finish. If you skip the screw or rush the finish, the problem may come back or stay visible.
FAQs
How do I know if a ceiling nail pop is serious?
If the pop is small and the ceiling feels solid, it is usually a simple repair. If you see sagging, stains, cracks spreading outward, or repeated pops in the same area, the problem may be bigger than a basic patch.
Can I just paint over a nail pop?
No. Paint will not fix the bump or hold the fastener in place. The pop will still show through, and the problem may get worse later. You need to secure the board and fill the spot first.
Should I use a nail or a screw for the repair?
A drywall screw is usually better because it grips the framing more securely. In most ceiling repairs, the best method is to add a screw near the old nail pop instead of relying on the old nail alone.
How long does the repair take?
The active repair may take 30 to 60 minutes for a small spot, but drying time adds more. Many repairs are best spread over one or two days so the compound can dry fully before sanding and painting.
Why does the nail pop keep coming back?
It often comes back because the ceiling board is still moving. The old fastener may not be secure enough, or the framing may shift with temperature and house movement. Adding a properly placed screw usually helps prevent repeat pops.
