Drilling through metal looks simple from far away. Put in a drill bit, press the trigger, and make a hole. In real work, it is not that easy. Metal is harder than wood, drill bits can slip, and a small mistake can leave a messy hole, a broken bit, or even a damaged part.
The good news is that how to drill through metal becomes much easier when you use the right tools and a steady process. You do not need special talent. You need the correct bit, the right speed, good marking, and a little patience. Those small details make the biggest difference.
In this guide, you will learn a clean and accurate method that works for most metal projects, from thin sheet metal to thicker steel. You will also see common mistakes, practical tips, and a few details beginners often miss.
What You Need Before You Start
Good results begin before the drill ever touches the metal. If you prepare the surface and choose the right tools, the job becomes safer and cleaner. If you rush this step, even a strong drill can give poor results.
Basic tools and materials
- Drill with variable speed
- Drill bits for metal, especially HSS or cobalt bits
- Center punch and hammer
- Clamps to hold the workpiece
- Cutting oil or drilling lubricant
- Safety glasses
- Work gloves for handling sharp edges
- Marker or scribe
- Scrap wood for backing support
- Deburring tool or metal file
Choosing the right drill bit
Not all bits are made for metal. A wood bit may work for a very soft sheet, but it will often slip or dull fast. For better results, use a bit made for metal.
High-speed steel (HSS) bits are a solid choice for general use. Cobalt bits are better for harder metals like stainless steel. They cost more, but they stay sharp longer under heat. If you drill metal often, cobalt bits are worth having.
One beginner mistake is using a worn bit and blaming the drill. A dull bit creates heat fast, wanders off the mark, and leaves rough edges. A sharp bit cuts better, needs less pressure, and gives a cleaner hole.
Pick the right drill speed
Metal usually needs a slower speed than wood. High speed creates heat, and heat is the enemy. It can ruin the bit, harden the work area, and make the hole ugly.
As a simple rule, larger bits and harder metals need slower speed. Smaller bits in softer metal can use a little more speed, but it is still safer to stay controlled. If your drill has a speed dial, start lower than you think you need.
| Metal type | Recommended bit type | Speed approach |
|---|---|---|
| Aluminum | HSS | Moderate speed, light pressure |
| Mild steel | HSS or cobalt | Slow to moderate speed |
| Stainless steel | Cobalt | Slow speed, steady pressure, cutting oil |
| Sheet metal | HSS, step bit for larger holes | Moderate speed, support underneath |
Prepare the Metal the Right Way
The cleanest holes start with a good setup. Before drilling, mark the spot carefully and stop the bit from walking. This matters more than many people think. If the bit slips even a little at the start, the hole may end up off-center.
Mark the drilling point
Use a marker, scribe, or center mark to identify where the hole should go. If the measurement must be exact, measure twice. For visible work, a tiny marking error can become a major problem later.
When possible, check the mark from more than one angle. A line that looks correct from the front may be wrong when seen from the side. This is one of those small checks beginners often skip.
Use a center punch
A center punch makes a small dent in the metal. That dent gives the drill bit a place to start. Without it, the bit may slide across the surface before it bites in.
Place the punch on the mark and tap it lightly with a hammer. You only need a small indentation, not a deep hole. For harder metals, the punch mark is very important. For soft aluminum, it still helps a lot.
Support the metal properly
Always clamp the workpiece. Never hold it in your hand while drilling. Metal can spin if the bit grabs, and that can hurt you fast. A clamped piece also gives a cleaner result because it stays still.
If you are drilling through sheet metal, place scrap wood under it. The backing board helps reduce tear-out and supports the metal as the bit exits. This simple step can make the back side much cleaner.
How to Drill Through Metal Cleanly
Now the real work begins. The goal is not just to make a hole. The goal is to make a hole in the right place, with smooth edges, without damaging the bit or the part.
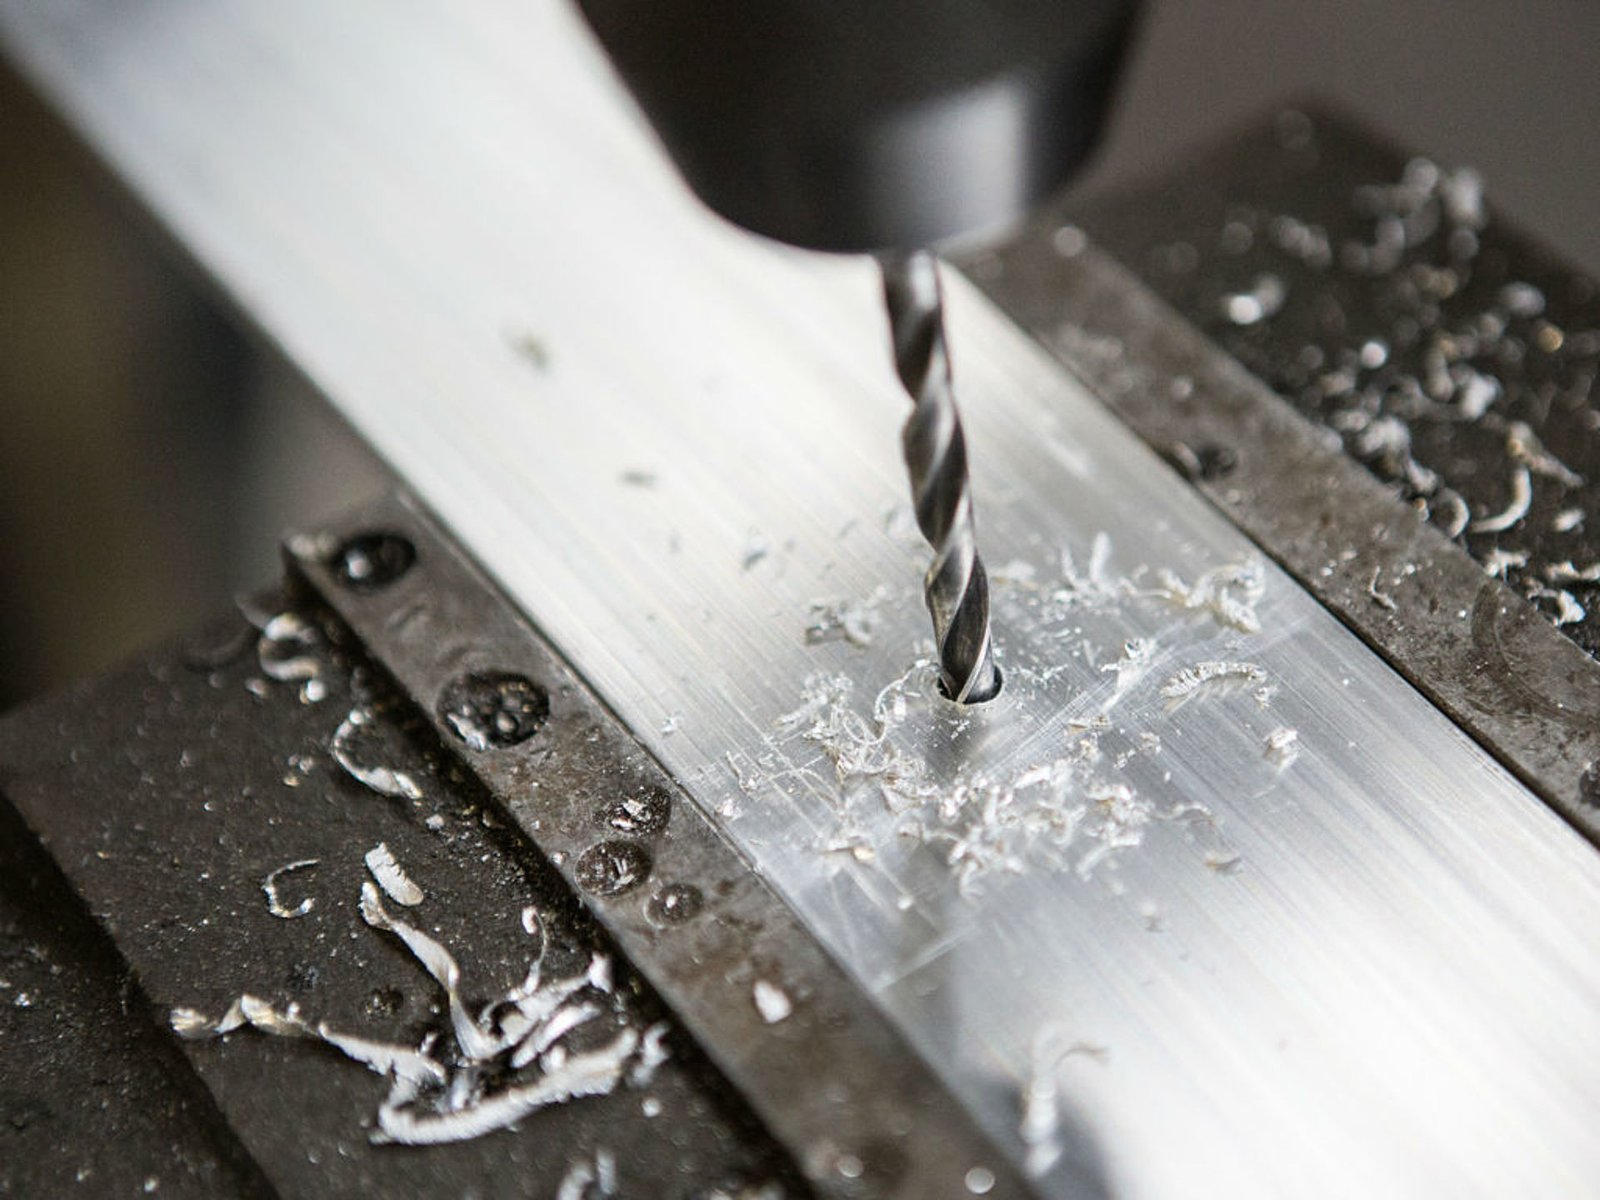
Credit: einhell.de
1. Start with a pilot hole
For many jobs, begin with a smaller bit first. This is called a pilot hole. It helps the larger bit stay centered and reduces the chance of wandering.
For example, if you need a 10 mm hole, you might start with a 3 mm or 4 mm bit first. Then enlarge it step by step. This is especially useful in steel and stainless steel.
2. Apply cutting oil
Use a few drops of cutting oil on the mark before drilling. Lubrication lowers friction, cools the bit, and helps the bit cut instead of scrape. That means less heat and a smoother hole.
Do not flood the area. A small amount is enough. Reapply it when the bit starts to sound dry or hot. If you are working with aluminum, lubrication still helps, even though many people think it is only for steel.
3. Hold the drill straight
Keep the drill at a 90-degree angle to the surface unless the project asks for a different angle. A tilted drill can make an oversized or uneven hole. It also puts extra stress on the bit.
If you want better accuracy, look at the point where the bit meets the metal from the side and the front before starting. A steady start improves the entire hole.
4. Begin slowly
Let the tip settle into the punch mark first. Start the drill at low speed and apply light pressure. Once the bit has a clean bite, you can increase pressure a little, but do not force it.
Forcing the drill is a common mistake. If you push too hard, the bit overheats, the hole gets rough, and the drill can snag. Let the bit do the cutting work.
5. Keep steady pressure
Use firm, even pressure. You want enough force to keep the bit cutting, but not so much that it stalls. A good sign is a steady stream of small chips, not smoke or a squealing sound.
If the drill starts to slow down too much, reduce pressure and check the speed. Too much heat usually means the bit is spinning too fast or not cutting well enough.
6. Back the bit out now and then
Every few seconds, pull the bit out slightly while it is still spinning. This clears chips from the hole. It also helps cooling and reduces clogging.
This step is especially important in thicker metal and deep holes. Metal chips can pack into the flutes of the bit. If that happens, cutting gets harder and the bit may overheat.
7. Slow down near the exit
As the bit gets close to breaking through the other side, reduce pressure. This helps prevent rough tear-out and sudden grabbing. If you are drilling sheet metal, the backing board underneath will help a lot here.
When the bit finishes the cut, let it come out gently. A sudden exit can leave a jagged edge or pull the workpiece.
Make the Hole the Right Size
Sometimes the first hole is not the final hole. Many metal projects need a precise diameter, and the best way to reach it is in stages.
Use step drilling for larger holes
If you need a bigger hole, do not jump straight to a large bit unless the metal is very soft and the hole is not critical. Instead, use several bit sizes in order. This is called step drilling.
Step drilling reduces stress on the bit and gives better control. It is one of the simplest ways to improve accuracy. Beginners often try to save time by using the final bit first, but that usually creates more work later.
Consider a step bit for thin metal
For sheet metal, a step bit can be a great tool. It cuts clean, round holes and is easy to control. It works especially well for electrical panels, brackets, and thin steel or aluminum.
Step bits are not ideal for thick metal, so use them in the right situation. They are a special tool for a special job, not a universal answer.
Common Mistakes That Ruin Metal Holes
Many bad holes come from a few simple mistakes. If you know them early, you can avoid most problems before they start.
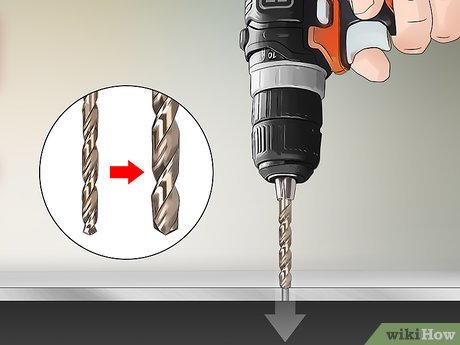
Credit: wikihow.com
Using the wrong bit
A general-purpose bit may seem fine, but metal needs a bit designed for it. A poor bit will skate across the surface, heat up fast, and wear out quickly.
Drilling too fast
Fast speed is one of the main reasons bits burn or turn dull. Metal does not reward speed the way wood sometimes does. Slow down and stay controlled.
Skipping the center punch
This is a small step with a big effect. Without a punched mark, the bit can wander and ruin your placement.
Not clamping the work
A loose workpiece is dangerous. It can move, spin, or jam the drill. Always secure the metal before starting.
Ignoring heat
If the bit becomes very hot, stop and let it cool. Heat shortens bit life and can damage the metal surface. A little pause is better than a ruined bit.
How to Handle Different Types of Metal
Not all metal behaves the same. The right method depends on what you are drilling. This is another detail beginners often miss. The same drill setting that works on aluminum may fail on stainless steel.
Aluminum
Aluminum is softer than steel, but it can gum up the bit. Use a sharp HSS bit, moderate speed, and a little lubricant. Clear chips often. For larger holes in thin aluminum, a step bit works very well.
Mild steel
Mild steel needs more patience than aluminum. Use a sharp bit, slower speed, and cutting oil. A pilot hole is often a smart choice. If the steel is thick, backing out the bit during drilling matters even more.
Stainless steel
Stainless steel is tougher and generates more heat. Use cobalt bits if possible. Keep speed low, pressure steady, and lubrication constant. If the bit starts squealing, stop and recheck your speed and oil.
Cast iron
Cast iron is hard but brittle. It can drill well with the right bit and slow speed, but it makes sharp chips and dust. Wear eye protection and clean the area carefully after drilling.
Safety Tips You Should Never Skip
Metal drilling creates sharp chips, heat, and spinning tools. A few simple safety habits protect both you and your project.
- Wear safety glasses every time.
- Keep loose clothing and jewelry away from the drill.
- Clamp the metal before drilling.
- Do not touch the bit right after drilling. It may be hot.
- Use gloves when handling raw metal, but avoid loose gloves near rotating tools.
- Clear chips with a brush, not your hand.
Also, make sure your drill cord or battery is in good condition. A weak tool can bind more easily, which makes control harder. Good safety is not only about protection gear. It is also about working in a calm, organized way.
Finishing the Hole for a Cleaner Result
The job is not fully done when the bit comes out. A clean finish makes the hole safer and better looking.
Remove burrs
Drilled holes often have raised edges called burrs. These can be sharp and messy. Use a deburring tool, round file, or larger hand bit turned lightly by hand to smooth the edge.
This small finishing step makes parts fit better too. If you are bolting pieces together, burrs can stop hardware from sitting flat.
Check the fit
Test the fastener, bolt, or part that will go through the hole. If the fit is too tight, you may need a slight enlargement. If it is too loose, you may need to rework the hole or use a different mounting method.
Clean the area
Brush away chips and wipe off oil. Metal chips can scratch surfaces later or get into moving parts. A clean work area also helps you inspect the hole more clearly.
Helpful Tips for Better Accuracy
Small habits create better results. These are not flashy tricks, but they improve accuracy in real work.
- Use a sharp bit and replace dull bits early.
- Mark from a measured edge, not by eye alone.
- Use a pilot hole for thicker or harder metal.
- Keep the drill perpendicular to the surface.
- Use backing support for thin sheet metal.
- Let the bit cool if drilling many holes in a row.
One useful insight is that bit quality often matters more than drill power. A mid-range drill with a sharp, proper metal bit can outperform a powerful drill using the wrong bit. Another overlooked point is chip control. If chips are not leaving the hole cleanly, you are usually building heat and reducing accuracy.
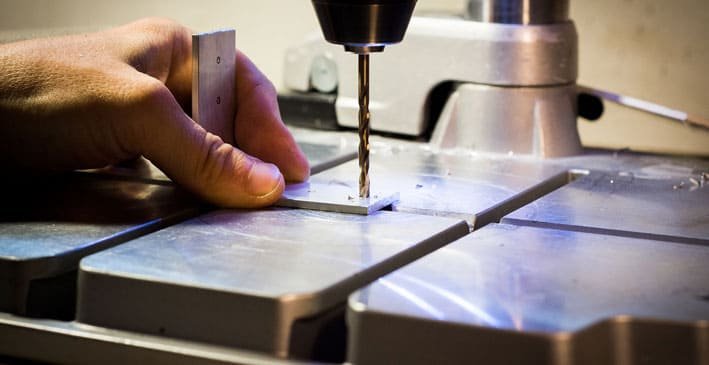
Credit: celofixings.com
Quick Reference for Clean Metal Drilling
When you want a simple mental check before drilling, think in this order: mark, punch, clamp, lubricate, drill slowly, clear chips, finish the edge.
That sequence is easy to remember and works for most jobs. If one step feels tempting to skip, it is usually the one that saves time later.
For deeper guidance on safe tool use and bit selection, you can also review resources from Oregon OSHA, which offers helpful safety information for workshop tasks.
Final Thoughts
Learning how to drill through metal is mostly about control. Use the right bit, keep the speed sensible, hold the metal firmly, and let the tool cut at its own pace. Clean holes are not the result of brute force. They are the result of a careful process.
Once you understand the basics, metal drilling becomes much less stressful. Your holes will look better, your bits will last longer, and your work will feel more professional. Start slowly, stay patient, and focus on accuracy from the first mark to the final deburr.
FAQs
1. What is the best drill bit for drilling through metal?
For general metal work, HSS bits are a good choice. For harder metals like stainless steel, cobalt bits are usually better because they handle heat and wear more effectively.
2. Do I need to use cutting oil when drilling metal?
Yes, in most cases. Cutting oil reduces heat, helps the bit cut more smoothly, and can extend bit life. It is especially useful on steel and stainless steel.
3. Why does my drill bit keep slipping on metal?
This usually happens when the surface is not punched first or when the bit is dull. Use a center punch to make a starting dent and make sure the bit is sharp.
4. Can I drill metal with a regular hand drill?
Yes, a regular variable-speed hand drill works for many metal jobs. The key is using the right bit, a lower speed, and steady pressure.
5. How do I stop rough edges after drilling metal?
Use a deburring tool, metal file, or a larger hand tool to smooth the edge after drilling. Drilling slowly near the exit point also helps reduce tear-out.
