Cutting clean angles on a table saw can feel tricky at first. But once you understand the setup, it becomes a very reliable way to make accurate cuts. The key is not force. It is control, measurement, and a safe process that you repeat the same way every time.
If you are learning how to cut angles on a table saw, the good news is that you do not need a lot of advanced skill. You need the right method. Small changes in blade angle, fence position, and board support can make a big difference in the final result. That is why careful setup matters more than speed.
In this guide, you will learn how to make angle cuts with confidence, how to avoid common mistakes, and how to get better results from your saw. Whether you are making bevel cuts, miter-style cuts, or angled rips, the steps below will help you work more accurately and safely.
Understand what kind of angle cut you need
Before you touch the saw, decide what type of angle cut you want. Many beginners use the word “angle” for different cuts, but not all angle cuts are the same. The wrong setup can waste material fast.
A bevel cut is made by tilting the blade. The blade stays in line with the fence, but the edge of the blade leans to one side. This is common for trim, picture frames, and joinery.
An angled rip is usually made by setting the fence at an angle while the blade stays upright. This is less common, but useful for special shapes and tapers. Some cuts combine both the fence and blade angle, but that should be done only when the project truly needs it.
Here is a simple way to think about it:
- Blade tilt changes the cut angle across the face of the board.
- Fence angle changes the direction of the cut along the board.
- Both together create more complex geometry and need extra care.
Non-obvious insight: many poor angle cuts are not caused by bad cutting. They happen because the wood was measured from the wrong reference edge. Always decide which edge or face is your reference before you set the saw.
Prepare the saw and the workpiece the right way
Accurate angle cutting starts before the blade spins. A clean saw, a stable fence, and a flat board make your job much easier. If your material rocks, twists, or has debris on it, your result will not be reliable.
First, unplug the saw before making any setup changes. Then check that the blade is sharp and clean. A dull blade can burn the wood and pull harder than it should. It can also leave a rough edge that looks like a bad angle, even if your settings are correct.
Next, make sure the table is clear. Sawdust, scrap wood, and resin buildup can change how the stock moves across the surface. That tiny movement may seem small, but it can change the angle enough to ruin a tight joint.
Check your board as well. Use material that is straight, dry, and free from severe warp. If the board is bowed, the angle may look correct on the saw but still fail during assembly.
Use a measuring tool you trust. A combination square, digital angle gauge, or protractor can help, but the important part is consistency. Pick one method and use it from start to finish.
Tools that make the job easier
You do not need many accessories, but a few tools can improve results a lot:
- Combination square
- Digital angle gauge
- Push stick or push block
- Featherboard
- Clamps for test pieces
- Safety glasses and hearing protection
One useful habit is to keep a small scrap board nearby for test cuts. This lets you verify the angle before you cut the real piece. It may save a lot of material.
Set the blade or fence to the correct angle
This is the part most people rush. Do not rush it. The best way to learn how to cut angles on a table saw is to set the angle carefully, then confirm it with a test cut.
If you are making a bevel cut, release the blade tilt mechanism and set the blade to the desired angle. Many saws show markings on the scale, but the scale is not always perfect. Use a gauge if you need better accuracy.
If you are angling the fence, move it slowly and lock it firmly. Make sure it is square to the table in the direction you need. A fence that is even slightly loose can drift during the cut and create an unsafe situation.
Here is a practical guide for common cuts:
| Cut type | What changes | Typical use |
|---|---|---|
| Bevel cut | Blade tilts | Trim, joinery, angled edges |
| Angled rip | Fence angle changes | Tapers, special shapes |
| Compound-style cut | Blade and fence both set | Advanced woodworking tasks |
Non-obvious insight: the angle setting on the saw scale is only a starting point. Woodworkers who get the best results often sneak up on the final angle with a test piece rather than trusting the scale alone.
How to confirm the angle is correct
After setting the angle, use a scrap piece that matches the real workpiece. Make the cut, then check the result with your measuring tool. If the angle is off, adjust in very small steps and cut again.
This is especially important for frames, boxes, and furniture parts where one small error becomes very visible. A 1-degree mistake may not look large on paper, but it can create a gap you can see from across the room.
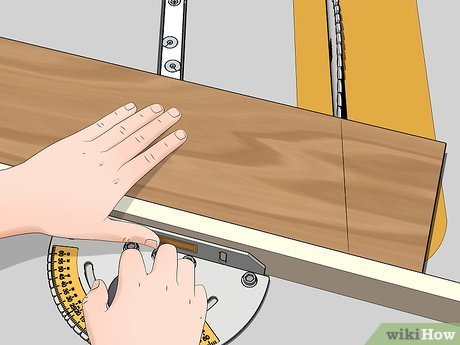
Mark the cut clearly before you start
Good marking reduces mistakes. You should never rely on memory alone, especially when making more than one angled piece. Mark both the cut line and the waste side so there is no confusion.
Use a sharp pencil or marking knife. A thin line is better than a thick one because it gives you a clearer reference. When precision matters, mark the line from the same face each time. That keeps every piece consistent.
If you are making repeated cuts, label the boards before you begin. For example, write “top,” “inside,” or “waste side.” This helps avoid flipping a board the wrong way and cutting the angle in the opposite direction.
Another smart habit is to check the finished orientation before each cut. Ask yourself: Which face stays against the fence? Which edge rides the table? Which side is waste? These questions take only a few seconds and prevent many expensive mistakes.
Credit: wikihow.com
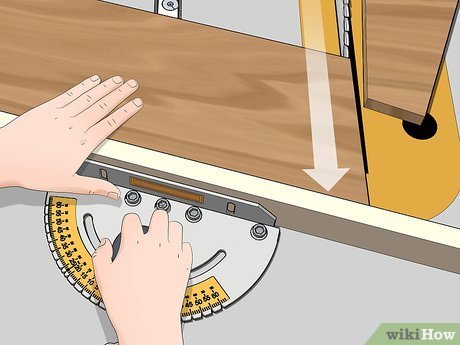
Make the cut safely and with control
Now you are ready to cut. Stand in a balanced position and keep your body out of the blade path. Turn on the saw and let it reach full speed before feeding the wood into the blade.
Feed the board at a steady pace. Do not push too fast. A fast feed can cause rough edges, chatter, and blade deflection. Do not feed too slowly either, because that can burn the wood. The right pace feels controlled, not forced.
Keep the board flat on the table and against the fence if the cut requires it. If the stock lifts or twists, stop and reset. Never reach over or behind the blade while it is moving.
Use push sticks or push blocks when your hands would get too close to the blade. This is not just a safety step. It also helps you maintain a straight, steady feed, which improves accuracy.
If your piece is long or heavy, support the end with an outfeed stand or helper. A piece that drops at the end of the cut can shift the angle before the cut is finished. That can leave a bad edge or pinch the blade.
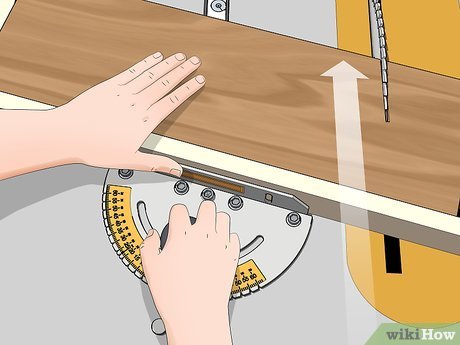
Keep your focus on the cutoff side
When making angle cuts, beginners often stare only at the blade. That is a mistake. Watch the line of the cut, the fence contact, and the movement of the cutoff piece. These are the areas that tell you whether the cut is staying true.
If the cutoff starts to bind, stop the saw after the blade is clear and reassess. Do not force a stuck piece through the cut. Binding can come from a warped board, a fence issue, or the wrong angle setting.
Use test cuts to fine-tune accuracy
Test cuts are one of the best ways to improve your results. They save lumber and reduce stress. If you need a perfect angle, do not trust the first setup without testing it.
Cut a short scrap that is the same thickness as your real material. Then join two test pieces together if the project needs a pair of matching angles. This reveals gaps, mismatch, or slight errors more clearly than measuring alone.
Here is a good process:
- Set the saw to your target angle.
- Cut a scrap piece from the same material.
- Check the angle with your tool.
- Join test pieces if needed.
- Adjust in small steps and repeat.
This approach is especially useful for miters and frames. Even a tiny angle error can leave a visible corner gap. A test cut shows the problem before it reaches your final piece.
Non-obvious insight: when two angled pieces must fit together, each cut may need to be slightly more precise than you think. Tiny errors can add up from both sides. That is why test-fitting pairs is better than checking one cut alone.
Common mistakes when cutting angles on a table saw
Most angle-cut problems come from a short list of errors. Once you know them, you can avoid them much more easily.
Credit: wikihow.com
Trusting the scale without checking
Saw scales are helpful, but they are not perfect on every machine. Small differences in assembly, wear, or setup can affect the reading. Use the scale as a guide, not as your only proof.
Using a warped or twisted board
A twisted board can move during the cut and change the result. If the wood is not flat, the cut angle may look correct on the saw but be wrong after assembly.
Feeding too fast
Fast feeding can push the board off line and increase tear-out. It also raises the risk of kickback. A smooth pace is safer and more accurate.
Cutting without a test piece
This is one of the biggest beginner mistakes. A quick scrap cut can reveal an angle error before you waste a full board.
Forgetting which face is the reference
If you measure from one face and cut from another, the angle can be off even when the saw is set correctly. Always mark the reference face.
For general table saw safety guidance, the Woodworkers Source table saw safety guide is a helpful starting point.
How to get cleaner results on repeated angle cuts
If you need multiple matching parts, consistency matters more than speed. Make one strong setup and repeat it without changing anything unless you must.
For repeated cuts, use stop blocks, marked fences, or clearly labeled parts. This reduces measuring errors. It also helps you keep the same orientation on every board.
If the project needs mirrored parts, cut them as a pair when possible. This helps both pieces match naturally. Just be sure the setup is safe for the board size and direction of feed.
Another useful trick is to create a sample corner or mock-up before cutting all final parts. This is common in furniture and trim work. It gives you a fast visual check and can expose a small angle mismatch early.
Safety habits that protect both you and the cut
Good angle cutting is not only about accuracy. It is also about control. The table saw is powerful, so your safety habits matter every time.
Wear eye and hearing protection. Keep your hands away from the blade path. Never remove the guard or safety devices unless your saw design and process truly require it and you understand the risk.
Do not stand directly behind the board in line with the blade. That is the path a kicked-back board can travel. Stand slightly to one side, with a balanced stance.
Never cut freehand on a table saw. The fence or miter system should guide the work. Freehand cuts are a fast route to inaccuracy and danger.
Keep your area organized. A cluttered saw station makes it easy to place a hand in the wrong spot or lose focus while handling the stock.
Finish the cut and check the result
After the cut is complete, let the blade stop fully before removing the workpiece. Do not reach near the blade while it is still moving. That final moment matters just as much as the cut itself.
Then inspect the edge. Look for burn marks, roughness, drift, or a visible angle mismatch. If the cut is not right, do not panic. Small adjustments usually solve the issue.
If the edge is rough, check your blade sharpness and feed speed. If the angle is off, revisit your setup and test again with scrap. Accurate woodworking often comes from tiny corrections, not big changes.
Once you have a good result, write the setting down if you may need it again later. This is especially useful for repeating a project or matching a set of parts. Saving a successful setup can make the next job much easier.
What beginners usually miss about angle cuts
The biggest hidden lesson is that accuracy starts with the whole system, not just the blade angle. Fence stability, board flatness, marking method, and feed control all affect the final result. If one part is weak, the cut can fail even when the saw is set correctly.
Another important point is that angle cutting gets harder when the workpiece is small. Small pieces are less stable and more dangerous to hold. When possible, cut larger blanks first, then trim them down to final size later. That gives you more control and less risk.
Finally, many woodworkers improve faster when they stop aiming for “good enough” on the first try. A test cut, a small adjustment, and a second test often save more time than fixing a bad final piece.
Credit: wikihow.com
Conclusion
Learning how to cut angles on a table saw is much easier when you treat the process as a series of careful steps. First, identify the exact cut you need. Then prepare the saw, mark the wood, set the angle, and test before you cut the final piece. That simple habit can turn an uncertain task into a repeatable one.
When you slow down and check your setup, you get cleaner cuts, better joints, and fewer mistakes. That means less waste and more confidence every time you use the saw. With practice, angle cuts stop feeling difficult and start feeling routine.
FAQs
1. What is the easiest way to start learning how to cut angles on a table saw?
The easiest way is to begin with simple bevel cuts on scrap wood. Set the blade to a common angle, make a test cut, and check the result before using real material. This helps you learn the saw without wasting lumber.
2. Can I cut angles with the fence instead of tilting the blade?
Yes, you can make angled rips by adjusting the fence on some cuts. This is useful for special shapes and tapers. However, always make sure the setup is stable and the board stays fully controlled during the cut.
3. Why does my angled cut not match the protractor reading?
The saw scale may not be exact, or the board may be moving slightly during the cut. Blade sharpness, fence alignment, and board flatness can also affect the final result. A test cut is the best way to confirm accuracy.
4. Is it safe to cut very small angled pieces on a table saw?
Small pieces are harder to control, so they are more risky. If possible, cut the part larger first and trim it to final size later. Always use push tools and keep your hands far from the blade.
5. How do I avoid gaps when joining two angled cuts?
Use the same reference face for both pieces, make test cuts, and adjust in very small steps. Even a tiny angle error can create a visible gap, so matching the setup on both sides is very important.
