If you want a smooth round cut, a jigsaw can do the job well when you use the right method. Many beginners think a jigsaw is only for straight lines, but it can make clean curves too. The key is not force. The key is control.
Learning how to cut a circle with a jigsaw is useful for shelves, speaker holes, tabletops, craft projects, and many home repairs. It also saves money because you do not always need a special tool for curved cuts. With a few smart steps, you can make a circle that looks neat and accurate.
The trick is to prepare the wood, mark the circle clearly, and guide the saw in a steady way. If you rush, the blade may wander and leave a rough edge. If you work carefully, the result can look far better than most people expect from a jigsaw.
What you need before you start
Good results begin before the saw turns on. The right setup makes the cut easier, safer, and more accurate. You do not need expensive tools, but you do need the right ones for the material and the size of the circle.
Basic tools and materials
- Jigsaw with a fine wood-cutting blade
- Circle layout tool such as a compass, string, or homemade trammel
- Clamps to hold the workpiece still
- Drill for a starter hole if needed
- Pencil or fine marker
- Sandpaper or sanding block
- Safety glasses and hearing protection
For most wood projects, a blade with fine teeth gives a cleaner edge. If the wood is thick, choose a blade made for thicker stock. A dull blade is one of the biggest reasons cuts look rough, so start with a sharp one.
Pick the right blade
Blade choice matters more than many beginners realize. A blade with large teeth cuts fast, but it can leave chipped edges and make the saw harder to control on a curve. For circles, a narrower blade is usually better because it turns more easily.
If you are cutting plywood, use a fine-tooth blade to reduce tear-out. For solid wood, a clean wood blade works well. For plastic or laminate, use a blade made for that material to reduce cracking. This small choice can change the final look a lot.
Know the size of the circle
Small circles are harder than large ones. When the curve is tight, the blade must turn more sharply. If the circle is very small, a jigsaw may still work, but you may need to make relief cuts or switch tools. For medium and large circles, a jigsaw is a practical option.
Mark the circle the right way
A clean cut starts with a clean line. If the line is weak, the saw can drift and the circle may end up uneven. Spend a few extra minutes on layout. That time pays off later.
Use a compass or string method
For small circles, a compass is simple and accurate. Set the radius, place the point in the center, and draw the circle. For larger circles, tie a string to a pencil and use a nail or screw at the center point. Another option is a homemade trammel made from wood and a few holes at set distances.
Before drawing, measure twice. A circle can look wrong even if it is only slightly off. If the project must fit inside another piece, check the actual opening first, not just the drawing.
Mark the waste side clearly
Draw the cutting line, then mark which side will be removed. This helps when the blade width matters. The jigsaw blade removes a little material, so cutting exactly on the line is not always the best choice. In many projects, staying just outside the line and sanding to final size gives better control.
Non-obvious tip: If appearance matters, put the best face of the material facing down when cutting with a standard jigsaw blade. Many blades cut upward on the return stroke, which can cause more tear-out on the top side. Cutting from the back often gives a cleaner visible face.
Prepare the workpiece and workspace
Before making any cut, make the material stable. A moving board is dangerous and also ruins accuracy. The more solid the setup, the smoother the curve will be.
Clamp the piece firmly
Place the material on a workbench or stable surface with the cut area hanging slightly over the edge if needed. Use clamps so the wood cannot shift. Do not hold the piece by hand alone. Even a small movement can twist the blade and leave a jagged circle.
Make sure the area under the cut is clear. The blade needs space to move freely. If the saw hits the bench, the cut can stop suddenly and damage the blade or the wood.
Support large sheets
If you are cutting from a large panel, support both sides of the cut. A sagging sheet can pinch the blade, especially near the end of the cut. Foam boards or scrap wood under the sheet can help keep it flat.
Wear basic safety gear
Safety glasses are important because sawdust and small chips can fly up. Hearing protection is also useful, especially during longer cuts. If your material creates a lot of dust, add a dust mask too. Safe work is better work.
How to cut a circle with a jigsaw
Now comes the main part. The method is simple, but each move matters. The goal is to follow the curve without forcing the saw. Let the blade work at its own speed.
Credit: christofix.com
Step 1: Create a starter hole if needed
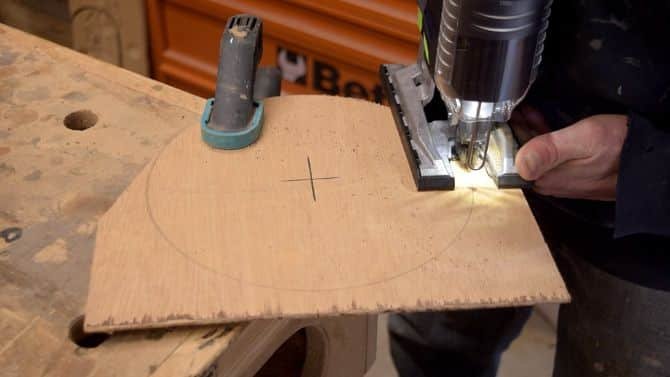
If the circle is inside a board, like a hole for a speaker or sink opening, you need a starter hole. Drill a hole just inside the cut line large enough for the jigsaw blade to fit through. This allows you to begin inside the circle instead of cutting from the edge.
For outside cuts, such as making a round disc from a board, you can start from the edge of the material. In that case, no starter hole is needed.
Step 2: Set the blade and speed
Install the correct blade and make sure it is secure. Set the jigsaw to a medium speed if the tool has variable speed control. Too much speed can burn the edge or make the blade wander. Too little speed can feel jerky and hard to guide.
If your jigsaw has orbital action, use a lower setting or turn it off for cleaner curved cuts. Orbital action cuts faster, but it often leaves a rougher edge. For circles, clean control is usually more important than speed.
Step 3: Start the cut smoothly
Place the shoe of the jigsaw flat on the workpiece before starting the motor. Let the blade reach full speed before touching the wood. Then move forward gently. Do not push hard. A light, steady feed is better than force.
If you feel the blade fighting the curve, slow down. Let the saw follow the line naturally. A jigsaw works best when it is guided, not dragged.
Step 4: Turn the saw gradually
To make a circle, you must turn the saw in a smooth motion. Move your hands and body together. Do not twist the saw sharply. Sharp turns cause the blade to bend, which creates a wavy edge.
The best method is to take small forward steps along the line. Cut a short section, then rotate the saw slightly, then cut again. This creates a controlled path around the circle.
Step 5: Stay just outside the line
It is safer to cut a little outside the final line and refine the shape later. This gives you room to smooth the edge by sanding. If you cut inside the line by mistake, the circle may become too small and the error is hard to fix.
Non-obvious tip: For better accuracy, stop a few times during the cut and check your position. Many people only notice drift at the end, when it is too late to correct. Small checks during the cut help keep the curve true.
Step 6: Finish the cut slowly
As you near the end of the circle, the piece may become loose. Support it with your free hand if it is safe to do so, or ask someone to help. If the cut piece falls or breaks free suddenly, it can splinter the edge.
When you complete the circle, stop the saw only after it has fully cleared the wood. Then lift it away cleanly.
Make the edge smooth and accurate
A jigsaw cut is rarely perfect right off the tool. That is normal. The final look depends on how you finish the edge after cutting.
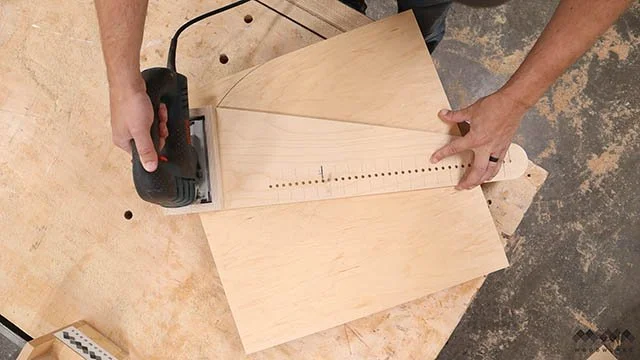
Sand the edge to the line
Use medium-grit sandpaper first, then finer grit for a smoother finish. Wrap the sandpaper around a sanding block for better control. Sand in a circular motion that follows the curve, not across it.
If you have only a small amount to remove, a sanding block is enough. If the edge needs more correction, use a rasp or file first, then sand. Do not try to force a rough edge into shape with only fine sandpaper. That takes too long and gives poor control.
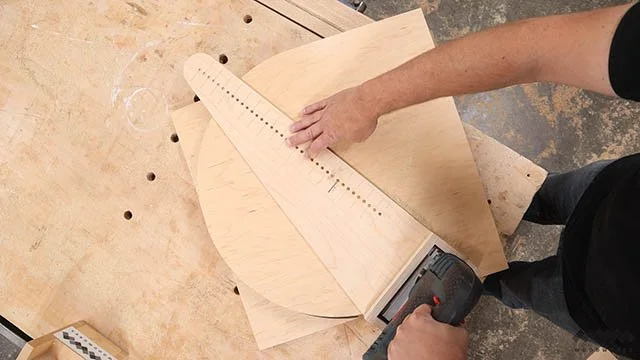
Check the circle with a simple test
Place the cut circle on a flat surface and rotate it gently. If it rocks or looks uneven, mark the high spots. Sand those spots a little at a time until the shape looks balanced. This is especially helpful for tabletop inserts, lids, and decorative round pieces.
If the circle must fit into another part, test the fit often. Small sanding changes can make a big difference. A piece that is slightly too large is easier to fix than one that is too small.
Common mistakes to avoid
Most poor cuts come from a few simple errors. If you know them early, you can avoid wasting material and time.
Credit: mwawoodworks.com
Forcing the saw through the curve
This is the most common mistake. A jigsaw blade is thin, so it can bend if you twist too hard. That creates an uneven circle and may damage the blade. Guide the saw gently and let it cut at its natural pace.
Using the wrong blade
A blade that is too coarse will tear the edge. A blade that is too wide will not turn well. For circle cutting, a fine, narrow blade is usually the best choice. Match the blade to the material, not just the saw.
Starting with a bad layout
If the center point is off, the whole circle will be off. If the radius is wrong, the cut will not fit. Take time to measure carefully. Good layout is one of the cheapest ways to improve your result.
Not supporting the material
When the board flexes, the blade can bind. This leads to rough edges and can even make the saw jump. Always keep the workpiece supported and clamped.
Cutting too fast on the finish face
If the visible surface is important, use a slower, cleaner approach. A fast cut may save time now, but it creates more sanding later. In many projects, a slightly slower cut gives a much better finish.
When a jigsaw is the right tool, and when it is not
A jigsaw is useful, but it is not the best tool for every circle. Knowing its limits helps you choose the right method from the start.
| Situation | Jigsaw works well | Better tool may be needed |
|---|---|---|
| Medium or large circles in wood | Yes | No |
| Very small circles | Only with care | Hole saw, router, or bandsaw |
| Rough construction cuts | Yes | No |
| Perfect decorative circles | Yes, with sanding | Router circle jig for highest precision |
| Very thick hardwood | Sometimes | Bandsaw or router may be better |
If you need extremely accurate circles for furniture or fine woodworking, a router with a circle jig can give a cleaner and more exact result. Still, for many home projects, the jigsaw is easier, faster, and more flexible. The official safety guidance from Wood Magazine also stresses blade choice and control as key parts of clean curved cuts.
Practical examples that help beginners
It helps to see how the process works in real projects. The same basic method can be adjusted for different jobs.
Making a round shelf
First, draw the circle on a plywood or solid wood board. Clamp it firmly. Start the cut from the edge if the shelf is cut from a larger panel. Use a fine blade, cut just outside the line, and sand to final size. If the shelf will be painted, small edge marks are less important. If it will be stained, take extra care with tear-out.
Cutting a speaker opening
Mark the center point and radius carefully. Drill a starter hole inside the circle. Insert the jigsaw blade and cut slowly along the line. Since speaker openings are often visible, keep the cut as clean as possible. A template can help if you need more than one identical opening.
Creating a circular tabletop insert
For this kind of piece, accuracy matters because the insert must fit another shape. Cut slightly outside the line, then test the fit. Sand the edge little by little until it slides in properly. Do not try to fix a tight fit by forcing it into place. That can chip the edge.
Small details that make a big difference
Some improvements are easy to miss, but they can raise the quality of your cut a lot.
Credit: mwawoodworks.com
Use painter’s tape on the cut line
Applying painter’s tape over the area before marking can reduce splintering on some woods and laminates. Draw your line on the tape, then cut normally. This does not replace a good blade, but it can help with delicate finishes.
Keep the saw base flat
If the base tilts, the blade cuts at an angle and the edge becomes uneven. Keep the shoe flat against the surface at all times. This is especially important when turning around the circle.
Let the blade cool
If you are making several cuts, stop now and then. A hot blade can dull faster and burn the wood. A cool, sharp blade cuts cleaner and lasts longer.
Practice on scrap first
If the final material is expensive, test your technique on a scrap piece of similar thickness. This gives you a feel for speed, blade choice, and turning pressure. A short practice cut can save a costly mistake.
Final thoughts on getting perfect curves
Learning how to cut a circle with a jigsaw is really about control, not speed. A steady hand, the right blade, and careful marking matter more than strength. Once you understand the rhythm of the saw, round cuts become much easier.
The best results usually come from a simple pattern: measure carefully, clamp well, cut slowly, and finish with sanding. That approach works for many projects and helps even beginners get cleaner, more professional-looking circles.
Do not worry if your first circle is not perfect. Most people improve quickly after one or two tries. The more you practice, the better you will judge blade pressure, turning speed, and final cleanup. That is how a rough cut becomes a smooth curve.
FAQs
1. Can a jigsaw really cut a clean circle?
Yes, a jigsaw can cut a clean circle when you use the right blade, move slowly, and sand the edge after cutting. It is best for medium and large circles, not very tiny ones.
2. What blade is best for cutting a circle with a jigsaw?
A narrow fine-tooth wood blade is usually the best choice. It turns more easily and leaves a smoother edge. For plywood, a fine blade helps reduce splintering.
3. Should I cut on the line or outside it?
In most cases, cut slightly outside the line. This gives you room to sand the edge to the exact size. Cutting too far inside can make the circle too small.
4. How do I keep the jigsaw from wobbling on curves?
Keep the base flat, use a sharp blade, and do not push too hard. Make small, smooth turns instead of sharp twists. Supporting the workpiece well also helps reduce wobble.
5. What can I do if the circle is not perfectly round?
Mark the high spots, then sand or file them little by little until the shape looks even. Test the piece on a flat surface and check the fit often if precision matters.
