A table saw works best when the blade is sharp, clean, and free from built-up grime. Over time, wood resin, pitch, dust, and even tiny bits of metal can stick to the blade teeth. When that happens, the saw may cut slower, burn the wood, or leave rough edges. Many people think the blade is “dull,” but the real problem is often simple buildup.
If you want smoother cuts and less strain on your saw, learning how to clean a table saw blade is one of the easiest upgrades you can make. It does not take long, but it makes a big difference. A clean blade cuts cooler, runs more efficiently, and helps reduce kickback risk caused by poor cutting action.
In this guide, you will learn the safest and most effective way to clean your blade, what products work best, what mistakes to avoid, and how often to do it. You will also learn a few small details most beginners miss, such as why soaking time matters and why the type of cleaner can affect blade life.
Why a Clean Blade Cuts Better
A table saw blade does not have to look dirty to be underperforming. Even a thin layer of pitch can change how the blade moves through wood. The teeth stop slicing cleanly and start pushing harder against the material. That extra friction creates heat, and heat is the enemy of good cutting.
Here is what a dirty blade can cause:
- Slower cutting speed
- Burn marks on wood
- Rough or fuzzy edges
- More motor strain
- Shorter blade life
A clean blade also helps your saw feel more accurate. If the blade is coated with buildup, the cut can drift slightly because the teeth do not engage the wood evenly. This matters most when you make long rip cuts or work with expensive lumber.
Non-obvious insight: many woodworkers blame blade dullness first, but resin buildup can mimic a dull blade very closely. Before paying for sharpening, check the blade surface. Sometimes a good cleaning restores much of the original cutting feel.
What Causes Table Saw Blade Buildup
Most buildup comes from the material you cut. Softwoods, plywood glue, pressure-treated wood, and some hardwoods all leave residue behind. If you cut a lot of resin-rich wood like pine, your blade may collect sticky pitch very fast.
Heat makes the problem worse. When the blade gets hot, resin softens and sticks more easily. Then dust settles on top of it and forms a harder layer. After that, every new cut adds more grime.
Other common causes include:
- Using too much feed pressure
- Cutting wet or damp wood
- Leaving the blade dirty after work
- Using the wrong blade for the material
Non-obvious insight: a blade that stays dirty faster than usual may point to a setup issue. If your fence is misaligned, the blade can rub more than it should. Extra rubbing creates extra heat, and extra heat attracts more residue.
What You Need Before You Start
Before you begin cleaning, gather everything first. That keeps the process safer and faster. You do not need fancy tools, but you do need the right ones.
| Item | Why it helps |
|---|---|
| Blade cleaner or degreaser | Breaks down pitch and resin |
| Plastic tub or shallow container | Useful for soaking the blade |
| Soft nylon brush or old toothbrush | Cleans teeth without scratching |
| Microfiber cloths or paper towels | Wipes away residue and dries the blade |
| Gloves | Protects your hands from sharp teeth and cleaner |
| Safety glasses | Protects your eyes from splashes |
You can also use a commercial blade cleaner made for saw blades. These products are usually the easiest choice because they are designed to remove pitch without harming carbide teeth or the blade body. For general safety guidance on blade handling and saw maintenance, one useful reference is the Woodsmith/WOOD Magazine blade cleaning guide.
Avoid steel wool, metal scrapers, or harsh abrasives. They can scratch the blade surface and may damage the carbide tips over time.
How to Clean a Table Saw Blade Step by Step
Credit: mellowpine.com
1. Turn off and unplug the saw
This is the first and most important step. Never clean a blade while the saw is connected to power. Even if the saw is off, accidental startup can happen. Unplug the machine and remove the switch key if your saw uses one.
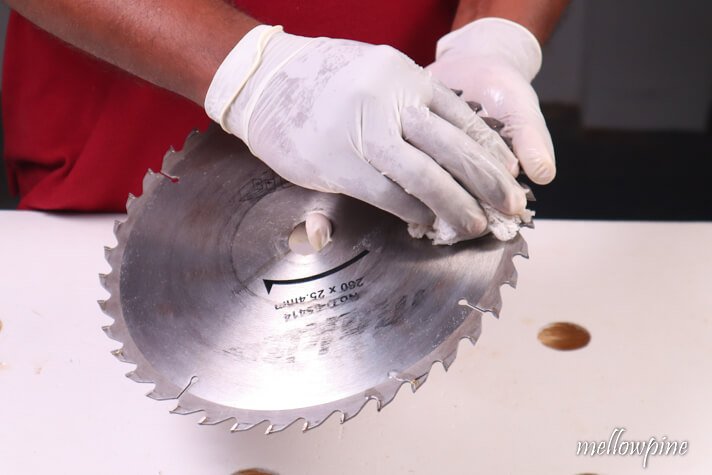
2. Remove the blade carefully
Wear gloves and handle the blade by the center hole and outer rim, not by the teeth. If your saw uses washers or spacers, keep them in order so reassembly is simple. It helps to place the parts on a clean cloth so nothing rolls away.
If you are not comfortable removing the blade, you can clean it while it is still mounted. But removal usually gives better access and a more complete cleaning.
3. Inspect the blade first
Before cleaning, look at the teeth and the body of the blade. Check for chipped carbide, bent teeth, rust spots, or cracks. Cleaning will not fix damage, so this is a good time to decide whether the blade should be replaced or sharpened later.
Also check the type of buildup. Sticky yellow residue is usually pitch or resin. Dark brown spots can be burned residue. Gray dust packed between the teeth may need a short soak before brushing.
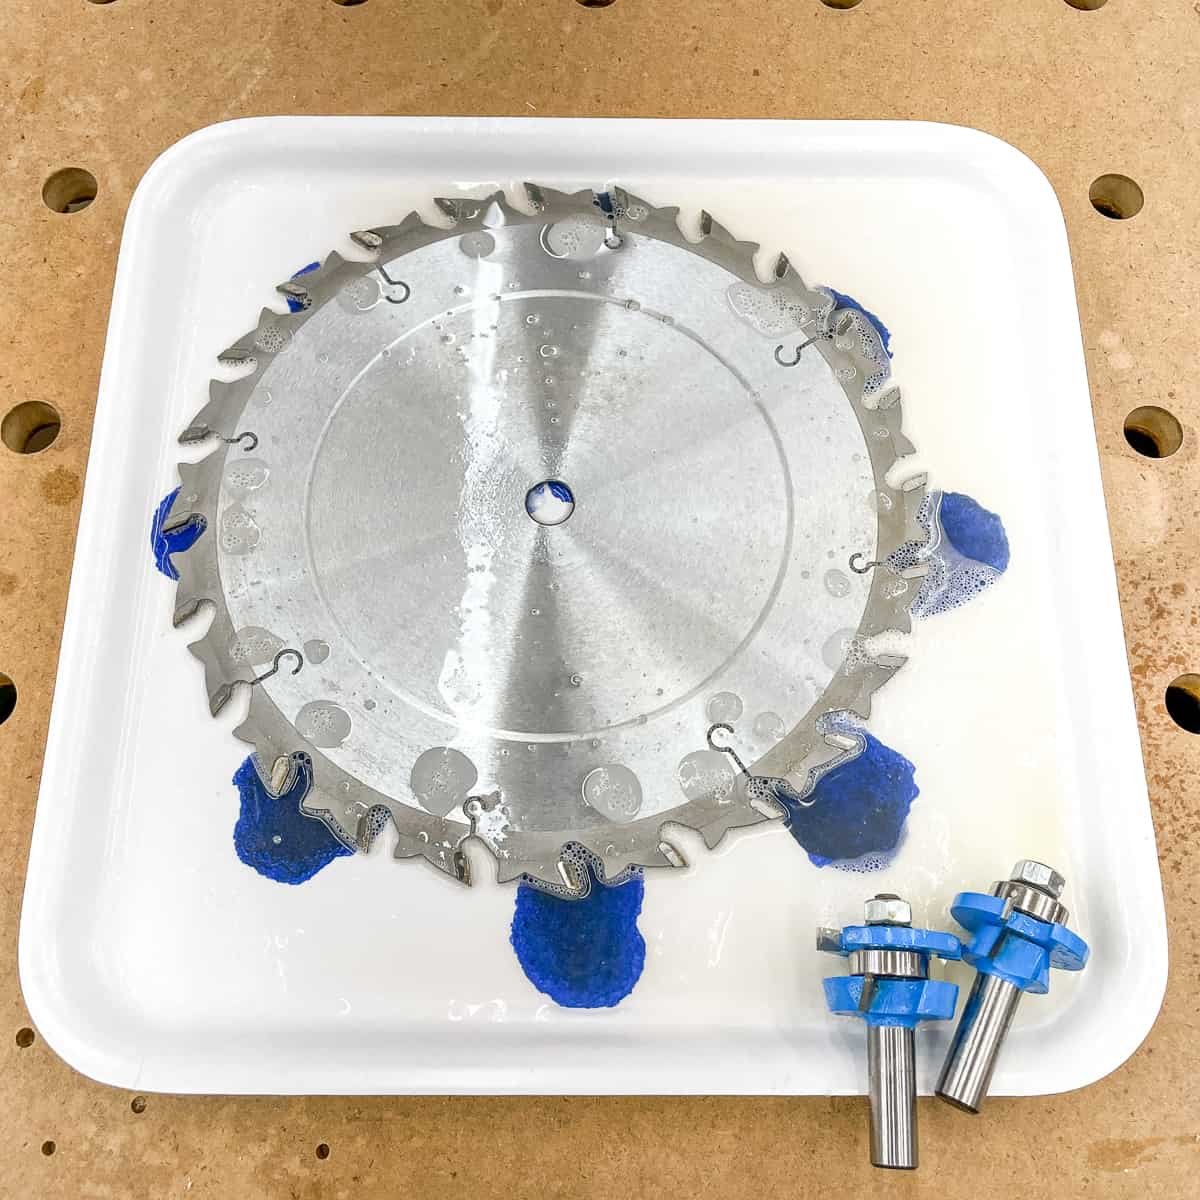
4. Apply the cleaner
Spray or brush the cleaner onto both sides of the blade. Make sure the teeth are well covered. If you are using a soak method, place the blade in a shallow container and pour in enough cleaner to cover the cutting area. Follow the product instructions if you are using a commercial solution.
If you are using a homemade cleaner, keep it mild. A simple degreasing solution can work for light buildup, but avoid anything too harsh that could corrode the metal.
5. Let the cleaner work
This step matters more than many people think. Give the cleaner time to loosen the residue. For heavy buildup, a few minutes of soaking may be needed. For lighter dirt, a short wait is enough.
Non-obvious insight: rushing this step often leads people to scrub too hard. That is where scratches start. A little patience reduces the need for pressure and protects the blade finish.
6. Scrub the teeth and gullets
Use a soft brush to clean between the teeth and around the gullets, which are the curved spaces between teeth. Work in small sections. Brush along the edge rather than across the carbide tips. If buildup is stubborn, reapply cleaner and let it sit a bit longer before brushing again.
Pay attention to both the front and back of the blade. Many people clean only one side, but buildup often forms on both.
7. Rinse or wipe clean
If your cleaner requires rinsing, do that carefully with water or as directed by the product label. If you used a wipe-on cleaner, remove all residue with a damp cloth and then dry the blade fully. Any leftover cleaner can leave a film on the blade or cause light corrosion over time.
8. Dry the blade completely
Drying is not optional. A blade that stays damp can rust, especially around the steel body. Use a microfiber cloth and dry each face, the arbor hole, and the tooth area. If needed, let the blade air dry for a few more minutes.
For extra protection, you can apply a very light rust inhibitor after drying. Use only a thin coat and avoid the carbide tips if the product instructions warn against it.
9. Reinstall and test
Put the blade back on the saw in the correct direction. Tighten it properly, but do not overtighten. Once installed, spin it by hand to make sure it turns freely.
Then make a test cut on scrap wood. A clean blade should cut more smoothly, leave fewer burn marks, and feel easier on the motor. If the cut still looks poor, the blade may need sharpening or your saw may need adjustment.
Best Cleaning Methods for Different Levels of Buildup
Not every blade needs the same treatment. Light dust, sticky resin, and baked-on pitch all call for slightly different methods.
Light dirt and dust
For a blade that is only lightly dirty, a spray cleaner and soft cloth may be enough. This is the fastest option and works well for regular maintenance after a few jobs.
Sticky resin and pitch
This is the most common problem. A soak-and-brush method usually works best. The cleaner needs time to break the sticky layer before you scrub. If the residue is soft, it should come off without much force.
Heavy, burned-on buildup
For thick buildup, you may need a longer soak. Repeat the cleaning process once or twice rather than scrubbing aggressively. If the blade still looks dark or glazed after cleaning, it may also need sharpening.
Rust spots
Light rust can sometimes be removed with a cleaner made for metal tools. Do not use rough abrasives on carbide teeth. If rust is deep or pitted, replacement may be the safer choice, especially on an older blade.
Common Mistakes That Hurt Blade Performance
Cleaning a blade sounds simple, but a few small mistakes can reduce the value of the work or even damage the blade.
- Using metal tools to scrape buildup Metal scrapers can nick the blade surface and chip carbide tips.
- Cleaning with the blade still connected to power This creates an obvious safety risk and should never be done.
- Skipping the drying step Moisture left on the blade can cause rust very quickly.
- Using too much force If buildup does not come off easily, let the cleaner work longer instead of pressing harder.
- Ignoring damage during cleaning Cleaning is the best time to spot chips, cracks, and bent teeth before they affect a cut.
One mistake many beginners make is cleaning only when the saw starts cutting badly. By then, the blade has often been running dirty for a long time. A simple maintenance routine prevents that slow drop in performance.
Credit: thehandymansdaughter.com
How Often Should You Clean the Blade?
The right schedule depends on what you cut. If you work mostly with dry hardwood and make small projects, you may only need to clean the blade every few weeks. If you cut pine, plywood, or resin-rich boards often, you may need to clean it much more often.
A practical rule is this: clean the blade whenever you notice burn marks, slower cutting, or visible buildup on the teeth. For heavy users, a quick wipe after each session and a deeper clean every few uses works well.
Do not wait for the blade to look terrible. Small amounts of buildup are easier to remove and less likely to cause performance loss.
How to Know If Cleaning Is Not Enough
Sometimes a blade is dirty, but sometimes it is simply worn out. Cleaning will not fix every problem.
You may need sharpening or replacement if you notice:
- Missing or chipped carbide teeth
- Persistent burning even after cleaning
- Ragged cuts in multiple wood types
- Wobble or vibration from a bent blade body
- Teeth that feel smooth instead of sharp
A blade can look clean and still perform poorly if the cutting edges are dull. That is why cleaning and inspection should go together. Think of cleaning as maintenance, not a cure for wear.
Simple Habits That Keep the Blade Cleaner Longer
Good maintenance does not stop at washing the blade. A few habits can slow buildup and help the blade stay sharp longer.
Use the right blade for the job
A blade made for ripping softwood is not the same as a blade for plywood or fine crosscuts. When you use the right blade, there is less heat and less residue.
Keep the saw aligned
A poorly aligned fence or miter gauge can force the wood against the blade. That adds friction and leaves more residue behind. Proper alignment also improves cut quality.
Let the blade reach full speed before cutting
Starting the cut too early can create more drag. Give the saw a moment to come up to speed before feeding the material.
Store blades properly
When a blade is stored loose in a dusty corner, it collects dirt before it even goes back on the saw. Keep blades in a clean case or hang them where they stay dry.
These habits may seem small, but they help a lot. The cleaner the blade stays, the less time you will spend scrubbing it later.
Why Blade Cleaning Improves Safety Too
Most people clean blades for better cuts, but safety matters just as much. A dirty blade can grab the wood unevenly, which increases the chance of binding. It can also force you to push harder, and that reduces control.
Cleaner cutting means less heat, less drag, and less surprise in the cut line. That does not make the saw harmless, of course, but it does make the machine behave more predictably. Predictable tools are safer tools.
Non-obvious insight: when a blade is dirty, some users compensate by feeding wood faster or harder. That reaction often creates more problems than the buildup itself. Clean tools tend to produce calmer, more controlled work.

Credit: craftedgarage.com
Quick Recap for Better Results
If you want better cutting performance, the process is simple: remove power, take off the blade, inspect it, apply the right cleaner, let it work, brush off the buildup, dry the blade fully, and reinstall it correctly. Then test the cut on scrap wood.
The key is consistency. If you clean the blade regularly, you will get smoother cuts, less burning, and less strain on the saw. You will also know sooner when the blade truly needs sharpening instead of just a cleaning.
Learning how to clean a table saw blade is not just about making the blade look nice. It is about keeping your saw accurate, efficient, and safer to use. A few minutes of care can save you money and improve every project that follows.
FAQs
1. What is the best cleaner for a table saw blade?
A commercial blade cleaner made for saw blades is usually the best choice. It removes pitch and resin well without being too harsh on carbide teeth or the blade body. For light buildup, a mild degreasing solution may also work.
2. Can I clean a table saw blade without removing it?
Yes, you can clean it while it is still on the saw, but removal gives better access and a more thorough result. If you clean it in place, make sure the saw is unplugged and you protect the motor and table from cleaner drips.
3. How do I know if my blade needs cleaning or sharpening?
If the blade has sticky residue, burn marks, or visible grime, it likely needs cleaning. If it is clean but still cuts poorly, feels dull, or leaves rough edges, it may need sharpening. Many blades need both over time.
4. Is it safe to use household cleaners on a table saw blade?
Some mild household cleaners may work for light dirt, but they are not always the best option. Avoid strong chemicals that may cause rust or damage the blade finish. A product made for saw blades is usually safer and more effective.
5. How often should I clean my table saw blade?
It depends on what you cut. If you use resin-rich wood, plywood, or cut often, clean it more frequently. A good habit is to clean the blade whenever you notice buildup, slower cuts, or burn marks.
