If you need to change a blade on an angle grinder, speed matters. But safety matters more. A small mistake can cause a bad cut, a damaged tool, or serious injury. The good news is that the job is simple when you follow the right steps.
This guide shows you how to change blade on angle grinder safely and quickly. You will learn what to check before you start, how to remove the old blade, how to install the new one, and how to avoid common mistakes. The steps are simple, but each one has a purpose.
Many beginners rush this task and trust the blade lock too much. Others use the wrong disc or tighten the nut too hard. These small errors can make the grinder unsafe. If you take a minute to do it right, you will save time later and protect both yourself and your tool.
What you should check before touching the grinder
Before you replace anything, make sure the grinder is fully safe to handle. Do not skip this part just because the job looks easy. An angle grinder can start accidentally if it is still powered or if the switch is bumped.
Start by unplugging the tool. If it is cordless, remove the battery pack. Then let the disc stop moving completely. Even a slow-spinning blade can hurt you if you touch it too soon. Also, give the grinder time to cool if it was used recently. Metal discs and flange parts can stay hot.
Next, look at the grinder and the blade type. Not every disc is the same. Cutting discs, grinding wheels, diamond blades, and flap discs are made for different jobs. Using the wrong one can damage the workpiece or even break the disc.
Here is a simple check that helps before you begin:
| What to check | Why it matters |
|---|---|
| Power source removed | Prevents accidental startup |
| Blade fully stopped | Avoids cuts and burns |
| Correct disc type | Keeps the tool safe and effective |
| No visible damage | Damaged discs can fail during use |
| Spanner or wrench ready | Makes the change faster and easier |
One detail many people miss is the direction of the locking nut. On some grinders, the outer flange and nut are designed to tighten in a certain direction when the tool runs. That means the disc may feel very tight if you try to loosen it the wrong way. Knowing this before you begin saves a lot of effort.
Tools and safety gear you need
You do not need many tools for this task, but the right ones make the job faster and safer. A proper setup also helps you avoid using makeshift tools that can slip or damage the grinder.
Basic items
- The correct replacement blade or disc
- The grinder’s spanner or wrench
- Safety gloves
- Safety glasses or a face shield
- Clean cloth to wipe dust from the spindle area
Gloves are helpful, but they should not be bulky. Thick gloves can reduce your grip and make it harder to hold small parts. Safety glasses are not optional. A tiny metal chip or dust particle can still reach your eye when you remove the disc.
If you want general safe-use advice from a trusted source, the OSHA website has useful guidance on tool safety and protective equipment.
Helpful but not required
- Soft brush for cleaning the flange area
- Small container for keeping the nut and washer together
- Workbench or stable surface
A stable surface makes a big difference. Many people try to change the blade while holding the grinder in the air. That is slower and less steady. Lay the tool on a bench or table so both hands stay in control.
How to change blade on angle grinder step by step
The process is simple once you understand the parts. Most angle grinders have a spindle lock, an outer flange or nut, and a blade or disc that sits between the flanges. Your goal is to release the old disc, place the new one correctly, and tighten it enough to hold firmly without forcing anything.
Credit: mygrinderguide.com
1. Disconnect the power
Unplug the grinder or remove the battery. This is the first and most important step. Never trust the switch alone. A switch can be bumped, and a tool can start when you do not expect it.
2. Let the disc stop completely
If the grinder was used just before, wait until all movement stops. Some discs keep spinning longer than they seem to. Do not touch the blade edge or nearby metal until it is still and cool.
3. Press the spindle lock
Find the spindle lock button on the grinder body. Hold it down to keep the spindle from turning. On many models, you may need to rotate the disc slightly by hand until the lock clicks into place. Once locked, the disc should stay still while you loosen the nut.
A beginner mistake here is pressing the lock too hard or forcing the disc to move too much. The lock is meant to stop the spindle, not to take strong force. If it does not click easily, rotate the disc a little until it lines up.
4. Loosen the outer nut or flange
Use the spanner that came with the grinder. Fit it into the holes or slots on the outer nut. Turn it in the loosening direction. On many grinders, you may need to turn it clockwise to loosen, but this depends on the model. Check the arrow markings if your tool has them.
If the nut is stuck, do not use a pipe or hammer right away. That can damage the tool. Try a firm, controlled turn first. If needed, remove dust around the threads and try again. A stuck nut is often caused by dirt, rust, or over-tightening from the last use.
5. Remove the old blade
Once the nut is loose, take off the outer flange and lift the blade away. Keep the parts together so they do not get lost. If the disc is cracked, worn thin, or chipped, do not reuse it.
This is a good time to inspect the spindle, inner flange, and outer nut. Look for dirt, damage, or wear. A clean mounting surface helps the new blade sit flat. If the parts are dirty, wipe them with a dry cloth or soft brush.
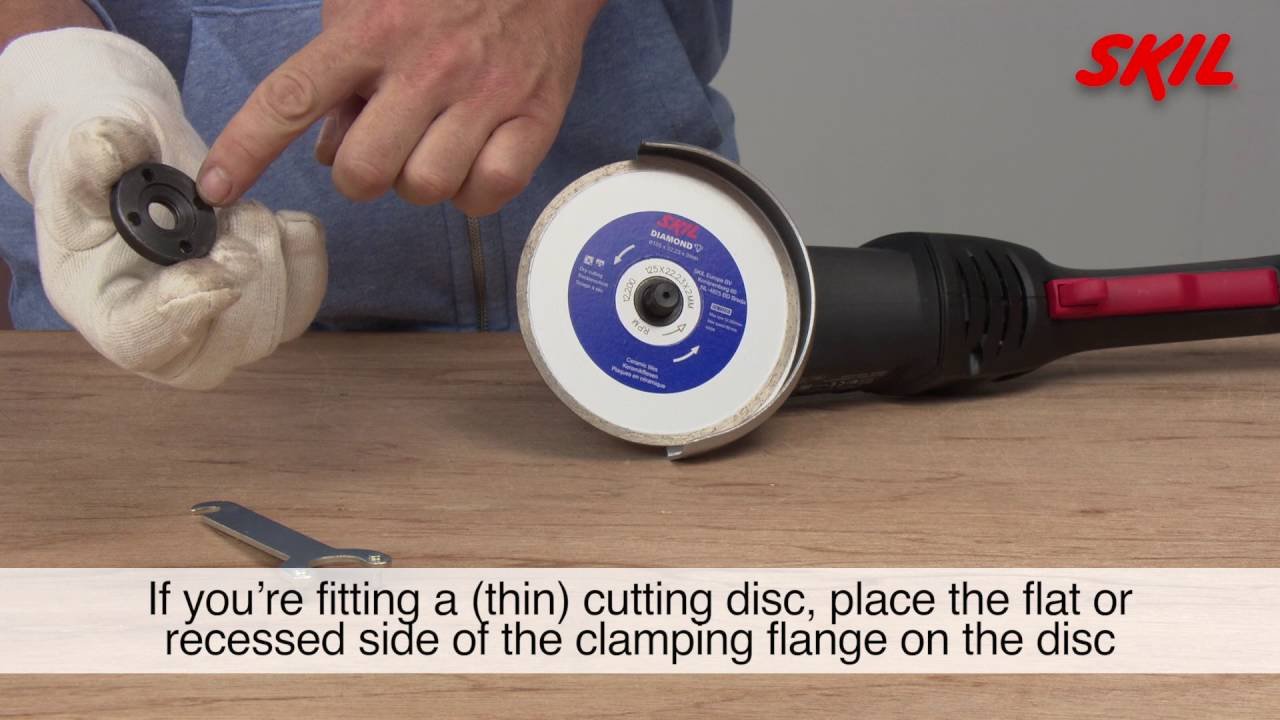
6. Place the new blade correctly
Check the arrow or label on the new blade. Some discs have a direction arrow showing which way they should rotate. Place the disc on the spindle with the printed side facing the correct direction, if marked. Also make sure the hole in the disc fits the spindle properly.
The most overlooked point is disc type. A cutting disc is thin and designed for slicing. A grinding wheel is thicker and built for material removal. Do not mix them up. Using the wrong disc can reduce control and increase the risk of breakage.
7. Refit the flange and tighten it
Put the outer flange or nut back in place. Hold the spindle lock again and tighten the nut with the spanner. Tighten it firmly, but not with extreme force. The disc should be secure, but over-tightening makes later removal difficult and can stress the parts.
Many users think “tighter is always better.” That is not true here. A properly fitted blade should stay secure because the flanges clamp it evenly, not because you forced the nut as hard as possible.
8. Check that the blade is seated flat
Before you power the tool back on, spin the disc by hand slightly. It should move freely without wobbling. Look from the side and confirm that the disc sits flat and centered. If it looks crooked, remove it and reseat it.
This is one of the most important beginner checks. A blade that is not seated flat can vibrate badly during use. That vibration makes cutting less accurate and puts more strain on the tool and your hands.
9. Test the grinder briefly
Reconnect power or reinstall the battery. Hold the grinder safely and switch it on for a few seconds. Let it run without touching the workpiece. Listen for unusual sounds and watch for vibration. If everything sounds smooth, the blade change is done.
If you hear scraping, rattling, or heavy wobble, switch off immediately and inspect the disc again. Do not begin cutting until the grinder runs smoothly.
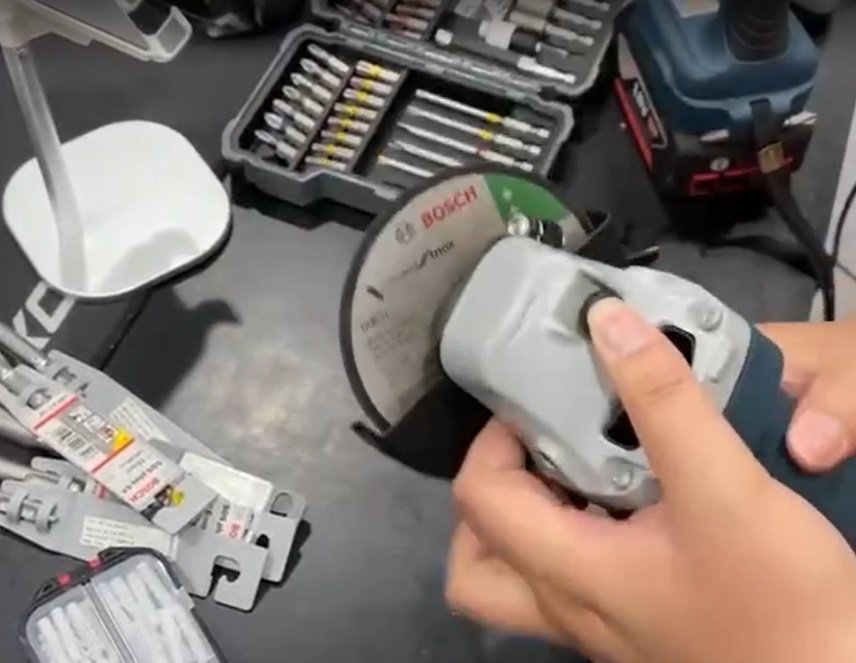
How to do it faster without losing safety
Speed comes from preparation, not from rushing. The fastest workers are usually the ones who keep their tools clean and ready. They know where the wrench is, which disc they need, and how the spindle lock works on their grinder model.

Credit: reddit.com
Keep the spanner with the tool
One simple habit saves time every time: store the spanner near the grinder. Many people waste time looking for it. If it stays in the tool case or hangs on the workbench, the change is much faster.
Clean the nut area after every use
Dust and metal particles can build up around the flange. That makes removal harder next time. A quick wipe after use keeps the threads cleaner and helps the nut come off without fighting it.
Know your grinder’s thread direction
This is a small detail, but it matters a lot. Some grinders loosen in the opposite direction from what you expect. If you know the thread direction ahead of time, you will not waste time turning the nut the wrong way.
Use the right disc size from the start
If the disc is the wrong size, the job stops before it starts. A 4.5-inch grinder cannot take every disc size. Always check the label on the tool and the replacement disc. Matching the size prevents delays and unsafe fits.
Common mistakes that make the job unsafe
Most mistakes happen because people assume the change is too simple to go wrong. That is exactly when problems happen. A few quick habits can keep you safe and avoid damage.
- Forgetting to disconnect power before touching the blade
- Using the wrong disc type for the material
- Over-tightening the nut and making future removal difficult
- Installing the disc crooked so it wobbles during use
- Using damaged or cracked discs that may fail under load
Another mistake people miss is ignoring the washer or flange orientation. Some grinders use a specific shape on the inner and outer pieces. If they are reversed, the blade may not seat properly. Always keep the parts in the same order unless your grinder manual says otherwise.
Also, never stand directly in line with the blade when testing a new disc for the first time. If there is a problem, you want your body out of the main path. A small change in stance improves your safety a lot.
When you should replace the blade instead of reusing it
Do not keep using a disc just because it still looks usable. Some signs are clear. If the blade is cracked, bent, chipped, or worn down close to its limit, replace it. A damaged disc can break without warning.
For cutting discs, thin edges are a warning sign. For grinding wheels, look for uneven wear or missing pieces. For diamond blades, watch for worn segments and poor cutting speed. When a blade stops working well, that is often a sign it is near the end of its safe life.
Here is a simple rule: if you are unsure about the blade’s condition, replace it. The cost of a new disc is much lower than the cost of an injury or a damaged grinder.
Practical tips for different grinder types
Not every angle grinder works the same way. The core process is similar, but a few details can change depending on the tool.
Credit: rockpower.com.cn
Corded grinders
Always unplug them first. Do not assume the switch is enough. Corded tools also tend to be heavier, so place them on a stable surface before changing the disc.
Cordless grinders
Remove the battery completely. A battery left in place can allow accidental startup. Store the battery away from the work area while you change the blade.
Small compact grinders
These often have tighter spaces around the spindle lock and nut. Use the correct thin spanner if the tool has one. Do not force a larger wrench into place.
Large heavy-duty grinders
These may have stronger torque and tighter locking nuts. Clean the flange area well and use steady pressure. If your model has a side handle, keep it attached for better control during the test run.
A simple safety rhythm to remember
If you want a quick mental checklist, use this order: power off, disc stop, lock spindle, loosen nut, remove disc, clean parts, fit new blade, tighten, test. This rhythm is easy to remember and works for most grinders.
What matters most is not speed alone. It is fast, clean, repeatable work. Once you get used to the process, you can change a blade in a few minutes without cutting corners on safety.
The best habit you can build is to treat every blade change the same way. When your method is consistent, you make fewer mistakes. That is how experienced users work quickly and safely at the same time.
FAQs
1. How often should I change the blade on an angle grinder?
Change it when the disc is worn, cracked, chipped, or no longer cuts well. There is no fixed time. It depends on how often you use the grinder and what material you cut.
2. Can I change the blade without using the spindle lock?
It is not a good idea. The spindle lock helps hold the shaft still while you loosen the nut. Without it, the disc can turn and make the job harder and less safe.
3. Do all angle grinders use the same blade size?
No. Different grinders use different disc sizes and arbor holes. Always check the label on the tool and match the replacement blade to the correct size.
4. Why is my angle grinder blade so hard to remove?
It is often stuck because of dust, rust, or over-tightening. Make sure the spindle lock is engaged, use the correct spanner, and clean the flange area before trying again.
5. What is the safest way to test a new blade after installation?
Run the grinder for a few seconds without touching the workpiece. Stand slightly away from the blade’s line and listen for wobble, noise, or vibration. If it runs smoothly, it is ready to use.
