If you want a safer, cleaner, and more useful workshop, a good table saw bench is one of the best upgrades you can make. It gives your saw a stable home, adds support for long boards, and helps you work with less strain. The best part is that you do not need a large budget to build one.
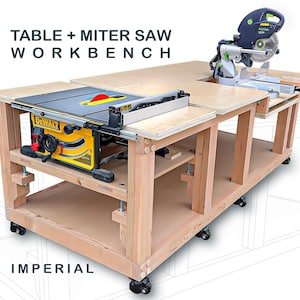
With free diy table saw workbench plans, you can turn a basic saw into the center of a smart workshop setup. A well-built workbench can save floor space, improve cutting accuracy, and add storage where you need it most. Even a simple design can make your work feel easier and more controlled.
This guide will help you understand what matters before you start building, how to choose the right design, and how to avoid the mistakes many beginners make. You will also find practical build advice, key dimensions, and small design ideas that can make a big difference in daily use.
What a table saw workbench should really do
A table saw workbench is more than a stand. It is a working base that affects how your saw performs and how comfortable your shop feels. If the bench is weak, uneven, or badly sized, your cuts can suffer. If it is well planned, the whole workspace becomes easier to use.
At a basic level, the bench should do five jobs well:
- Hold the saw firmly without shaking
- Keep the saw top at a useful working height
- Support sheet goods and long boards
- Make storage easy for blades, push sticks, and tools
- Fit your shop without blocking movement
Many beginners focus only on the saw itself. That is a mistake. The bench shape, height, and layout matter just as much. For example, if the top is too high, pushing stock becomes tiring. If it is too low, your back and shoulders may hurt during longer work sessions.
A smart bench also helps with safety. Stable support means less vibration. Good outfeed support means less chance of tipping a board during a cut. Clear storage reduces clutter around the blade area, which lowers the chance of mistakes.
Why a DIY build often works better than a store-bought stand
Many factory stands are made to be simple and cheap. That is not always bad, but they often miss the small details that make a workshop feel efficient. A DIY build lets you set the height you want, add side wings, install drawers, and match the layout to your exact saw model.
You can also build around your real space. A garage shop, basement shop, and outdoor work area all have different needs. Free plans let you start with a solid idea, then adjust the size without paying for features you may never use.
Choosing the right design before you cut wood
Before you buy lumber, think about how you actually work. The best bench for one person may be wrong for another. A compact mobile cart is great in a small garage. A wide cabinet-style base may be better in a permanent shop.
Here are the main design choices that matter most.
Fixed bench or mobile bench
A fixed bench is strong and usually easier to build. It stays in place and often gives better stability for heavy cutting. A mobile bench is more flexible. If your shop shares space with a car, bikes, or stored items, mobility can be a big advantage.
If you choose a mobile design, use good locking casters and make sure the frame sits flat when locked. A bench that rolls easily but wobbles during use is not a real solution.
Cabinet base or open frame
A cabinet base gives you storage and adds weight, which can improve stability. It is a strong choice if you want a more finished workshop setup. An open frame is lighter, cheaper, and often faster to build. It is also easier to modify later.
One useful rule: if your saw is small and your shop is tight, an open frame may be enough. If your saw is heavy and your tools need storage, a cabinet base is often worth the extra effort.
Bench height and working comfort
The right height depends on your body and your saw. A common mistake is to copy a random plan without checking the height. Instead, measure from the floor to the saw table and think about your elbow height. Many woodworkers like the saw surface close to wrist or slightly below wrist level when standing naturally.
That said, there is no single perfect number for everyone. If you do lots of sheet cutting, a slightly lower surface may feel better. If you prefer small project work and storage drawers, a slightly higher bench may feel more comfortable.
Space for infeed and outfeed
One of the most overlooked parts of a table saw bench is board support. You may build a great base and still struggle if long boards dip at the front or back. Plan for enough space to move lumber through the blade safely.
If your shop is small, use folding wings, removable supports, or a bench with open space behind the saw. Even a simple roller stand at the right height can make a huge difference.
| Design choice | Best for | Main benefit | Common drawback |
|---|---|---|---|
| Fixed bench | Permanent shops | Strong and stable | Hard to move |
| Mobile bench | Shared or small spaces | Easy to reposition | Needs good locking casters |
| Cabinet base | Tool storage needs | Extra storage and weight | Takes more time to build |
| Open frame | Simple builds | Lower cost and easier changes | Less built-in storage |
What to include in free DIY table saw workbench plans
Good plans should do more than show a frame. They should help you build a bench that works in real use. When you download or sketch your own free diy table saw workbench plans, look for these details.
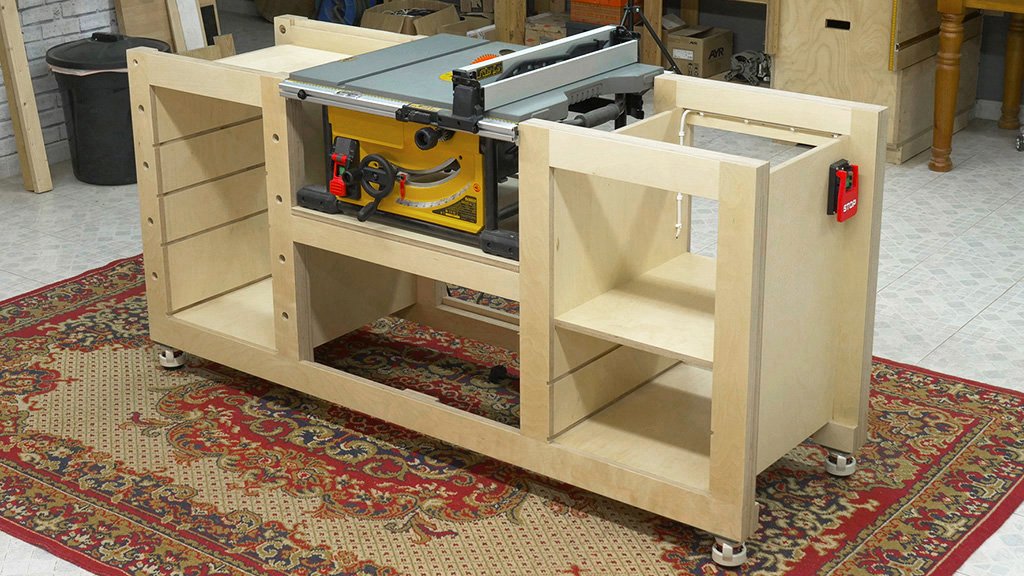
Credit: paoson.com
Accurate saw measurements
Your saw must fit the plan. Check the footprint, fence travel, blade location, and any dust port clearance. Some saws need more rear space than people expect, especially if the fence system extends behind the saw table.
Also check where the miter slot and rip fence will sit relative to the bench frame. If the frame blocks adjustment, the plan needs changes before you build.
Top surface support
The bench top should be flat and strong. A sagging top can cause alignment problems. Plywood is a common choice because it is stable and affordable. In many cases, a laminated plywood top is better than a single thick board because it resists warping.
One non-obvious point: the top does not need to be expensive to be good. What matters most is a flat build, strong joints, and proper support underneath.
Storage that stays easy to reach
Storage should help you work, not slow you down. Put the most-used items close to the front or side of the saw. Good items for storage include:
- Push sticks
- Blade wrenches
- Extra blades
- Measuring tools
- Featherboards
- Safety glasses and ear protection
Drawers are useful, but open shelves can be better for larger items. If you add doors, make sure they do not block dust cleanup or saw access.
Dust control
Dust control is not only about cleanliness. It affects visibility and safety too. A bench with a dust port, rear opening, or enclosed cabinet can help collect more debris. If your saw already has a dust port, your bench should leave room for the hose and not pinch it against the wall.
For useful dust safety guidance, you can also review the OSHA woodworking safety information. It is a practical reminder that sawdust management is part of safe woodworking, not just shop cleaning.
Simple materials that keep the build affordable
One reason people search for free plans is cost. You can build a strong workbench without premium hardwoods. In many cases, ordinary construction lumber and plywood are enough.
These materials are often used in budget-friendly builds:
- 2×4 lumber for the frame
- 3/4-inch plywood for the top and side panels
- 1/2-inch plywood for drawers or cabinet backs
- Wood screws or pocket screws for assembly
- Glue for stronger joints
- Casters if mobility is needed
Do not assume cheaper means weak. A well-braced frame made from basic lumber can be very strong. The real weakness usually comes from poor joinery, bad alignment, or skipping support pieces.
A smart way to save money without lowering quality
Buy the best material where it matters most. For example, use straighter lumber for the frame and flatter plywood for the top. If you are on a tight budget, spend a little more on casters or leveling feet instead of decorative trim. These parts affect how the bench feels every day.
Build features that make daily work easier
A bench becomes valuable when it solves small problems every day. The best free diy table saw workbench plans usually include a few helpful features that do not cost much but improve the experience a lot.
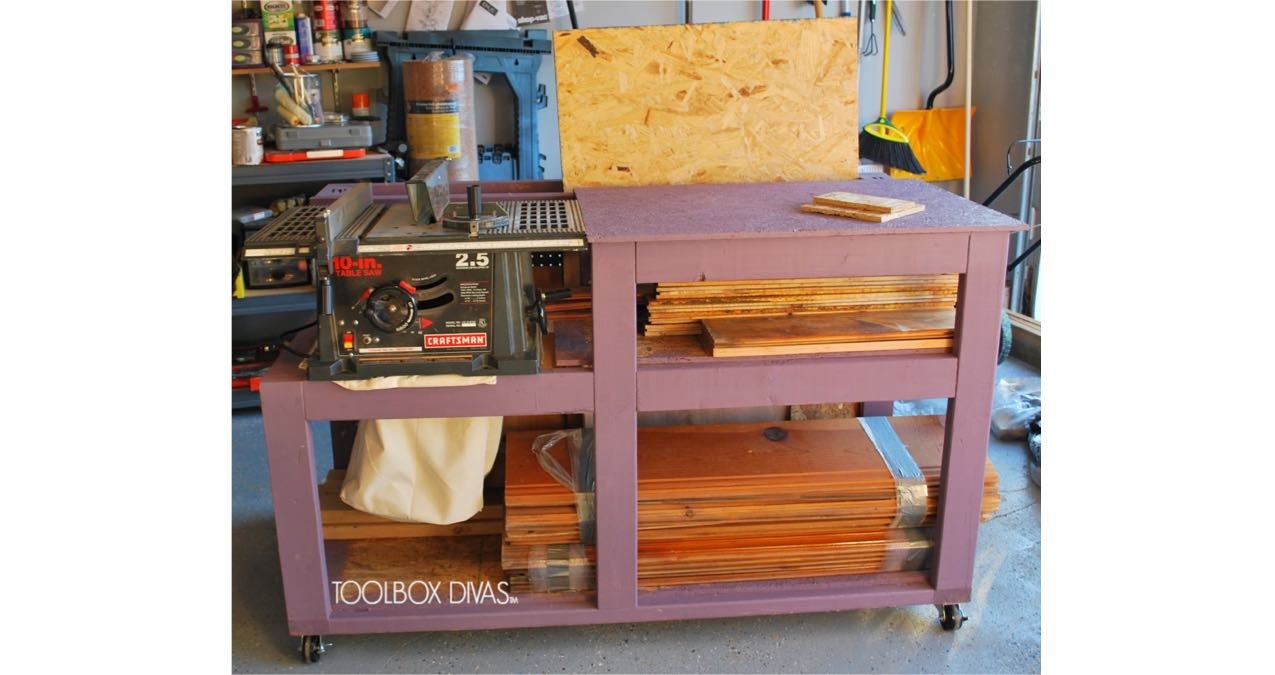
Credit: etsy.com
Outfeed support
Support behind the blade is one of the most useful additions. It keeps long boards from dropping after the cut, which helps accuracy and reduces the chance of binding. You can build a fixed rear platform, add folding wings, or design a low shelf that doubles as support.
If your shop is small, a simple outfeed surface at the same height as the saw can be enough. You do not need a huge extension to get real benefit.
Side extensions for sheet goods
Large plywood sheets are hard to handle on a small saw. Side wings give you extra room and make the whole setup more practical. They also help when crosscutting wide boards. Just make sure the wings are level with the saw top.
Leveling feet or good casters
This is a detail many beginners miss. A bench can look strong and still fail in daily use if it rocks on a bad floor. Leveling feet let you fine-tune the height and remove wobble. If you need mobility, use casters that lock firmly and still allow solid contact when engaged.
Clear fence and control access
Do not block the front of the saw with bulky storage. You need easy access to the fence, power switch, and blade height controls. A common design mistake is to make the front face look neat but then crowd the control area. Function should come first.
A practical build sequence for beginners
If you already have the saw, the cleanest way to build is to start with measurements and move step by step. This reduces waste and makes the fit much better.
- Measure the saw base, table height, and fence travel.
- Decide whether the bench will be fixed or mobile.
- Mark the final footprint on the floor or with tape.
- Cut the frame parts and dry-fit them before fastening.
- Build the base square and check for level.
- Add the top support and make sure the saw sits flat.
- Install storage, shelves, or drawers after the main frame is stable.
- Fit casters or leveling feet only after testing the final height.
This order helps you catch mistakes early. If the base is not square, fix that before adding panels. If the saw height is wrong, adjust before the bench is fully finished. Small corrections are much easier at the beginning.
Common mistakes to avoid
One mistake is building from memory instead of measurement. Even small differences in saw size can cause problems. Another mistake is forgetting blade clearance when the guard or fence is moved.
People also often make the top too fancy. A beautiful bench is nice, but it must be easy to clean, easy to repair, and easy to use. Smooth edges, solid joints, and practical storage matter more than decorative detail.
A second overlooked issue is vibration. If you use thin materials or long unsupported spans, the bench may shake during cutting. That can affect accuracy. Add braces where needed, especially around the saw opening and under the top.
How to make a budget bench feel more professional
You do not need expensive materials to get a clean result. A few small choices can make a low-cost build feel much better.
Use edge banding or simple trim
Raw plywood edges can look unfinished and wear faster. A simple strip of trim or edge banding improves appearance and protects the surface. It is a small job, but it makes the bench look more complete.
Paint or seal the surfaces
A coat of paint or sealant helps resist moisture, dust, and stains. It also makes cleaning easier. If you use glue, finish the bench after assembly so the project does not stick to the surface during work.
Label storage spaces
This sounds minor, but it helps more than many people expect. Label drawers or shelves for blades, hardware, and safety gear. When tools always return to the same place, you waste less time searching.
Think about workflow, not just storage
Store the items you reach for most often in the zone closest to the saw. Put rarely used items lower or farther away. This simple habit makes the bench feel more natural during real work.
When free plans are enough and when to modify them
Free plans are a great starting point, but they are not magic. They work best when the design matches your saw and your space. If your workshop is small, your saw is unusual, or you need special storage, expect to make changes.
Modify the plan if you have one or more of these needs:
- Your saw footprint is larger than the plan allows
- You need mobile storage in the same unit
- Your shop requires folding wings or compact storage
- You use heavy sheet goods often
- Your floor is uneven and needs leveling feet
The goal is not to copy a plan exactly. The goal is to build a bench that works every time you use it. That is where free plans become most useful: they save time while still giving you room to adapt.
Credit: freewoodworkingplan.com
Final thoughts before you start cutting
A good table saw workbench does not need to be expensive, and it does not need to be complicated. It only needs to be solid, level, and built around the way you work. That is why free diy table saw workbench plans are so valuable. They give you a strong starting point without forcing you into a costly setup.
If you plan carefully, use basic materials well, and avoid common layout mistakes, you can build a bench that improves safety, saves space, and makes every cut feel easier. Start with the saw measurements, think about storage and outfeed support, and build for comfort as much as strength. Those details matter more than fancy parts.
FAQs
1. Are free DIY table saw workbench plans strong enough for heavy use?
Yes, if the design uses solid framing, flat top support, and good fastening. Free plans can work very well for daily shop use when you build them carefully and choose proper materials.
2. What is the best material for a budget table saw workbench?
Construction lumber and plywood are usually the best low-cost choice. They are easy to find, simple to cut, and strong enough for most workshop builds when used with proper bracing.
3. Should I build a mobile or fixed table saw bench?
If your shop space changes often, a mobile bench is usually better. If your saw stays in one place and you want maximum stability, a fixed bench is often the better choice.
4. How do I know the right height for my table saw workbench?
Measure your saw table and compare it with your natural standing height. Many woodworkers prefer a saw surface near wrist level, but comfort matters more than a perfect number.
5. Do I need outfeed support in a small workshop?
Yes, even a small support helps a lot. A simple rear platform, folding wing, or roller stand can make long cuts safer and more accurate without taking much space.
