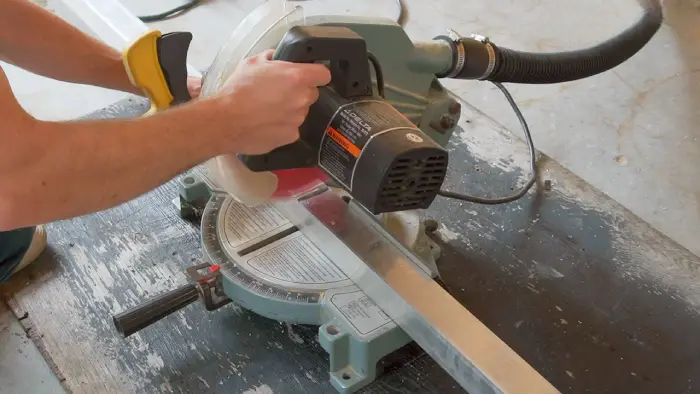
If you work with metal or do home projects, you may ask: can you cut aluminum with a miter saw? The short answer is yes, but only if you use the right blade, the right setup, and careful technique. Aluminum is softer than steel, yet it can still create serious problems if you treat it like wood.
A miter saw can make clean and accurate aluminum cuts for trim, bars, tubing, and light sheet profiles. But the same tool can also throw chips, grab the workpiece, or damage the blade if you use the wrong method. That is why safety and control matter just as much as the cut itself.
In this guide, you will learn when a miter saw is a good choice for aluminum, what blade to use, how to set up the cut, and how to avoid the mistakes that lead to rough edges or dangerous kickback. You will also see when another tool may be the better option.
What makes aluminum different from wood
Aluminum cuts very differently from wood. Wood is fibrous and forgiving. Aluminum is soft, but it is also dense and slippery. That means it can move, bind, or leave sharp edges if the saw is not prepared for metal cutting.
One important thing beginners miss is that aluminum does not just need a sharp blade. It needs a blade with the right tooth shape and spacing. A wood blade can tear the metal, heat up fast, and leave a rough cut. That is why blade choice matters so much.
Another detail many people overlook is chip control. When aluminum is cut, it does not make sawdust. It makes small hot chips. These chips can scatter farther than expected and can damage your eyes or skin if you are not protected.
Why a miter saw can work well for aluminum
A miter saw is useful because it gives you:
- Fast, straight, repeatable cuts
- Good angle control for trim and framing pieces
- Better support for longer stock than a handheld tool
- Cleaner results than many rough-cut methods
For light and medium aluminum work, a miter saw can be very accurate. It is especially helpful for cutting aluminum angle, flat bar, square tube, and certain extrusions used in projects, shelving, railing, and repairs.
Can you cut aluminum with a miter saw safely?
Yes, can you cut aluminum with a miter saw is a fair question, and the answer is yes when the saw is set up correctly. A standard miter saw can cut aluminum, but it should be treated like a metal-cutting task, not a wood-cutting task.
Safety depends on four things: blade type, material support, clamping, and feed speed. If any one of these is wrong, the risk goes up. Most bad cuts happen because the operator pushes too hard or uses a blade that is made for wood, not metal.
If your saw is in good condition, the stock is thin enough, and the aluminum is held firmly, the result can be clean and accurate. If the material is thick, gummy, or hard to secure, another saw may be safer.
The best blade for aluminum
The best choice is usually a carbide-tipped blade designed for non-ferrous metals. Non-ferrous means metals without iron, such as aluminum, brass, and copper. These blades often have more teeth and special tooth angles that reduce grabbing.
Look for these blade traits:
- High tooth count for smoother cuts
- Triple-chip grind or a similar metal-cutting tooth design
- Carbide tips for longer life
- Correct diameter for your saw
A blade made for wood can sometimes cut aluminum in a pinch, but that is not the best practice. It may clog, heat up, or leave a poor finish. A proper non-ferrous blade is the safer and smarter choice.
Why tooth count matters
More teeth usually mean a smoother finish and less grabbing. For aluminum, this is useful because the metal can catch on large gullets between teeth. A blade with too few teeth can pull the workpiece and create a rough edge.
At the same time, do not assume that the highest tooth count is always best. Very fine blades can cut slowly and produce more heat if you force the saw. The best blade is the one made for non-ferrous metal and matched to your saw speed.
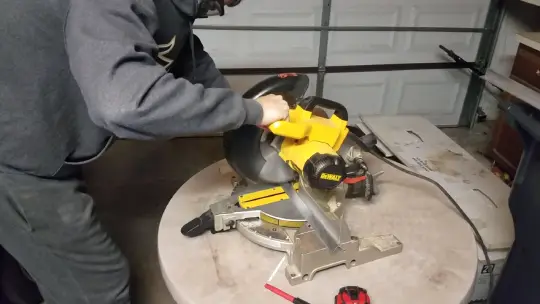
Set up the saw the right way before cutting
Good setup is what turns a risky cut into a clean one. Before you start, make sure the saw is unplugged or the battery is removed. Then check the blade, the fence, the clamp, and the work area.
- Install the correct blade for non-ferrous metals.
- Check blade direction and tighten it properly.
- Clean the table and fence so no debris affects alignment.
- Place the aluminum flat and fully supported.
- Use a clamp if possible to stop movement.
Support is very important. Aluminum pieces can flex more than wood, especially long tubing or thin angle stock. If the stock bends during the cut, the blade can pinch and bind.
For longer pieces, use support stands or rollers so the material stays level with the saw table. This reduces strain and helps the cut stay square.

Credit: woodhandy.com
Use a sacrificial fence when needed
Some aluminum cuts are easier if you add a sacrificial fence. This is a temporary face on the saw fence, often made from wood or medium-density fiberboard, that helps support the work and reduce chip damage to the saw.
This can be useful when cutting softer profiles or when the aluminum shape is narrow. It can also help reduce vibration. Just make sure the added fence does not interfere with blade travel.
How to cut aluminum with a miter saw step by step
Here is a practical way to make a safe and accurate cut.
- Mark the cut clearly with a fine pencil, scribe, or marker.
- Measure twice and confirm the angle if you are cutting a miter.
- Set the saw angle and lock it firmly in place.
- Clamp the aluminum so it cannot twist or lift.
- Lower the blade slowly to check alignment before cutting.
- Start the saw and let it reach full speed before contacting the material.
- Feed the blade steadily without forcing it.
- Complete the cut in one smooth motion if possible.
- Wait for the blade to stop before lifting it.
- Remove chips carefully and check the edge.
The key is steady pressure. Do not push hard to “help” the blade. If the blade is correct and sharp, it should do the work. Forcing the cut can create heat, rough edges, and a higher chance of grabbing.
Another important point: when the blade first touches aluminum, it may sound different than wood. That is normal. What is not normal is chatter, heavy vibration, or sudden pulling. If that happens, stop and check your setup.
Feed speed and cutting pressure
Feed speed should be moderate and controlled. Too fast, and the blade may bind. Too slow, and friction can build heat and make the cut less clean. You want a steady pace that keeps chips moving away from the blade.
If the cut begins to squeal, the blade may be rubbing instead of cutting. That can mean the blade is dull, the feed is too slow, or the wrong blade is installed. A clean cut usually sounds smoother and more even.
Important safety gear you should use
Do not cut aluminum without proper protection. The chips are sharp, and the cut surface can be razor-like. Wear the right gear every time.
- Safety glasses or a face shield
- Hearing protection
- Gloves for handling the cut piece, not for controlling the saw blade
- Long sleeves if chips may fly toward your arms
You should also keep loose clothing away from the saw. Tie back long hair. Remove jewelry. These are simple steps, but they matter.
If your saw produces a lot of chips, consider placing a barrier or using a chip collection method to keep the area cleaner. Chips on the floor can be slippery, and chips on the table can affect the next cut.
Common mistakes that ruin aluminum cuts
Many people cut aluminum once, get a rough result, and think the saw cannot do the job. In most cases, the problem is not the saw itself. It is the setup.
Using a wood blade
This is the most common mistake. Wood blades can grab aluminum and leave a rough, ugly edge. They are not made for the type of chip control that metal cutting needs.
Not clamping the work
Aluminum can lift or shift more easily than expected. If the piece moves during the cut, accuracy drops and safety risk rises.
Cutting too fast
Pushing hard can cause the blade to bind. It also increases heat, which makes chips stick to the blade and can dull it faster.
Ignoring burrs
Even a clean cut often leaves a burr. A burr is a sharp raised edge. If you skip cleanup, the part may not fit well, and it can cut your hands later.
Using damaged or dirty stock
Paint, dirt, oxide buildup, or a bent profile can affect the cut. Clean the contact area when needed so the blade runs smoothly.
How to get a cleaner edge after the cut
A good cut is only part of the job. Aluminum often needs a little finishing afterward. This does not take long, but it improves safety and fit.
After cutting, check the edge with your finger carefully. If it feels sharp or rough, remove the burr with a file, deburring tool, or fine sandpaper. Work slowly and keep the piece secure while smoothing it.
If the cut must look neat for visible trim or furniture work, make a test cut first. This helps you confirm the blade and setup before cutting the final piece.
Credit: woodhandy.com
Small finishing habits that help a lot
- Mark the waste side clearly so you do not cut past the line
- Support the offcut so it does not tear away at the end
- Deburr both the front and back sides of the cut
- Wipe off chips before measuring the next piece
When a miter saw is not the best choice
Even though the answer to can you cut aluminum with a miter saw is yes, it is not always the best tool. Very thick aluminum, large structural pieces, or unusual shapes may cut better on a bandsaw, chop saw made for metal, or with another dedicated metal tool.
If the material is hard to clamp, if the profile is very thin and floppy, or if the cut produces too much heat and chatter, stop and reconsider. A safer tool is better than forcing a saw to do a job it is not suited for.
For long production work, a dedicated non-ferrous metal saw may also be more efficient. It is designed for cleaner chip removal and more consistent metal cutting.
Signs you should switch tools
- The blade keeps grabbing the stock
- The cut leaves deep burrs or heavy chatter marks
- The aluminum is too large for stable support
- You need many repeated cuts and want faster chip control
Best practices for accuracy
Accuracy comes from process, not luck. If you want repeatable results, use the same setup each time.
| Best practice | Why it helps |
|---|---|
| Use a dedicated non-ferrous blade | Improves cut quality and reduces grabbing |
| Clamp the workpiece | Keeps the cut line stable |
| Support long stock | Prevents sagging and blade bind |
| Cut at a steady speed | Reduces heat and rough edges |
| Deburr after cutting | Improves fit and safety |
One non-obvious tip many beginners miss is to plan the cut path before starting. On some aluminum profiles, the blade can hit a hollow section or thin wall at a bad angle. A small shift in support position can make the cut much cleaner.
Another useful habit is to do one test cut on scrap from the same material. Aluminum alloys and wall thickness can vary. A test piece tells you whether the blade and feed speed are right before you cut the final part.
Simple cleanup and maintenance after cutting
Aluminum chips can build up fast. Clean the saw table, fence, blade area, and the floor around the machine after each session. This helps maintain accuracy and keeps chips from scratching the next workpiece.
Check the blade for built-up residue. If chips stick to the blade, the cut quality can drop. Follow the blade maker’s cleaning advice. Also inspect the saw guards and moving parts to make sure chips have not collected in tight spaces.
It is a good idea to store aluminum stock flat and dry. Dirt and scratches can affect future cuts. If the material has a protective film, keep it in place until right before cutting when possible.
For more general saw safety guidance, you can review the OSHA website, which offers trusted workplace safety information.
Credit: woodhandy.com
Final thoughts
So, can you cut aluminum with a miter saw? Yes, you can, and it can be a very practical method for many home and shop tasks. The key is to use a blade made for non-ferrous metal, clamp the work securely, support the stock properly, and feed the saw with patience.
When you respect the material, the miter saw becomes a useful tool for clean aluminum cuts. When you rush the job or use the wrong blade, the result is usually poor accuracy, rough edges, or unsafe movement. Good setup is what makes the difference.
FAQs
1. Can you cut aluminum with a miter saw using a regular wood blade?
You can sometimes do it, but it is not the best or safest choice. A wood blade may grab the aluminum, leave rough edges, and wear out faster. A non-ferrous metal blade is the better option.
2. What kind of blade should I use for aluminum?
Use a carbide-tipped blade made for non-ferrous metals. These blades usually have a higher tooth count and a tooth shape designed to reduce grabbing and improve cut quality.
3. Is it safe to cut aluminum tubing on a miter saw?
Yes, if the tubing is supported well and clamped firmly. Thin tubing can twist or vibrate, so stable support is very important. A test cut on scrap is a smart idea.
4. Why does aluminum leave sharp edges after cutting?
Aluminum often forms burrs when it is cut. This is normal. You should remove the burr with a file, deburring tool, or sandpaper so the edge is safer to handle.
5. When should I use a different tool instead of a miter saw?
Use a different tool if the aluminum is too thick, too large, or too hard to clamp safely. A bandsaw or dedicated metal-cutting saw may be a better choice for those jobs.
