Old drill bits do not always need to go in the trash. In many cases, they only need a proper edge again. A sharp bit cuts faster, makes cleaner holes, and puts less strain on your drill and your hands. It also helps you work more safely because the bit is less likely to slip, grab, or overheat.
If you have ever tried to drill into wood, metal, or plastic with a dull bit, you already know the pain. The drill gets hot. The hole looks rough. You push harder, but the bit still struggles. The good news is that how to sharpen drill bits is not hard once you understand the shape you are trying to restore.
This guide will show you a simple step-by-step process, common mistakes to avoid, and a few useful tips that many beginners miss. You do not need a fancy workshop to get started. You only need patience, good lighting, and the right angle.
What makes a drill bit cut well
A drill bit works because of its point, its cutting lips, and the angle where those lips meet the material. When the edge becomes dull, the bit stops cutting cleanly and starts rubbing. That rubbing creates heat, noise, and poor results.
The most common drill bits for home use are twist bits. These are the bits with a spiral shape. They are usually made of high-speed steel, cobalt, or carbide-tipped material. Each type can be sharpened, but the method and ease can vary. For most people, high-speed steel twist bits are the easiest to sharpen by hand.
Before you sharpen anything, it helps to know what a good drill point looks like. A sharp bit should have:
- Two even cutting lips
- A point centered in the middle
- A proper angle for the material
- A small chisel edge in the center, not a flat, wide one
One detail many beginners miss is that a bit can look “sharp” but still drill badly if the two cutting lips are not equal. If one side is longer, that bit will cut crooked and make an oversized or rough hole.
Tools and supplies you may need
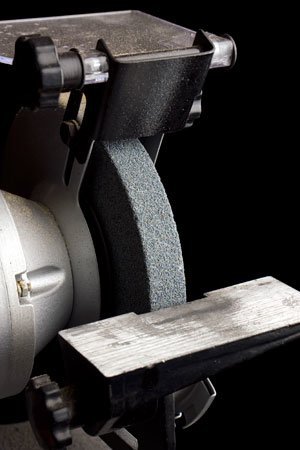
You can sharpen drill bits with a bench grinder, a dedicated drill bit sharpener, or in some cases with a file or sharpening stone. The bench grinder is the most common option for hand sharpening. It gives good control once you learn the motion.
Helpful tools include:
- A bench grinder or drill bit sharpener
- Safety glasses
- A small cup of water for cooling
- A marker to mark the cutting edge
- A good light source
- A magnifier, if the bits are small
If you want to learn the core process of how to sharpen drill bits, a grinder is the best place to start. It is fast, common, and easy to find in many workshops. For extra guidance on grinder safety, you can also review general safety advice from OSHA.
How to sharpen drill bits step by step
The goal is simple: restore the cutting edges while keeping the point balanced. Do not try to grind a lot of metal away. Small, careful touches work better than heavy pressure.
1. Inspect the bit first
Look closely at the tip. Check for dull edges, chips, uneven lips, or a broken point. If the bit is bent, badly cracked, or worn too short, sharpening may not help enough. Some bits are simply too damaged to save.
It helps to compare the bit with a sharp one if you have one. You will notice the sharp bit has a cleaner point and more defined cutting edges.
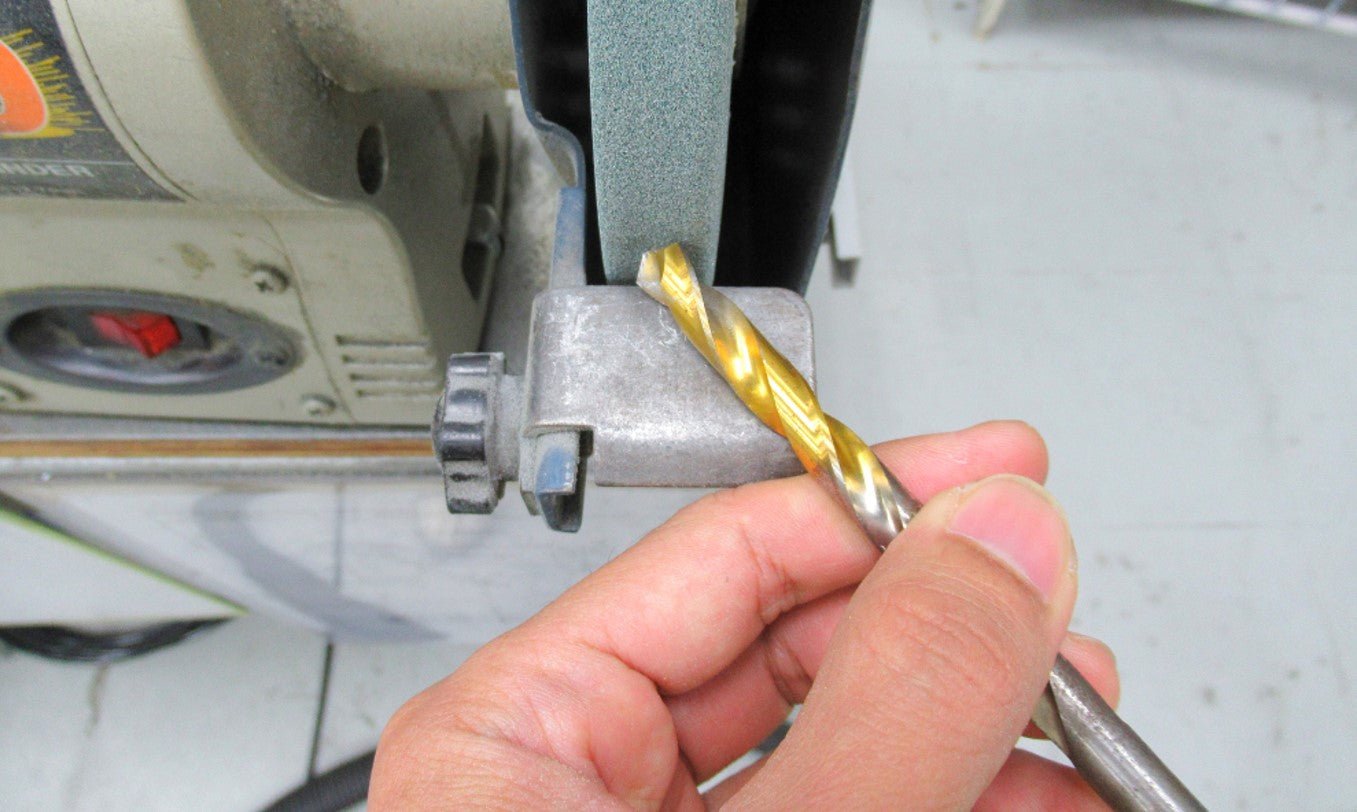
2. Mark the cutting lips
Use a marker to darken the two cutting edges. This makes it easier to see where you are grinding. After a few passes on the grinder, the marker will disappear from the areas you touch. This simple trick helps beginners keep the angle more consistent.
3. Hold the bit at the right angle
For a standard twist bit, the point angle is usually around 118 degrees for general use. Some bits used for harder materials may use a 135-degree angle. If you are not sure, match the original shape as closely as possible.
What matters most is not perfect math. What matters is consistency. Both cutting lips should be shaped the same way.
When you place the bit against the grinder wheel, the cutting lip should touch at the correct angle, and the back of the cutting edge should slope away slightly so the lip can cut instead of rub.
4. Grind one side carefully
Touch the bit lightly to the grinder. Move it in a smooth motion and remove a small amount of metal. Do not press hard. Let the wheel do the work.
Keep the bit steady and aim to create a clean edge. A good habit is to sharpen one side for a second or two, then check your progress before moving on. Overheating can damage the temper of the metal and reduce the bit’s life.
What to watch for
- The edge should stay cool or only mildly warm
- The surface should look smooth, not blue or burned
- The lip should remain straight and even
5. Match the second side to the first
This is the part that really matters. Turn the bit and sharpen the other lip so it matches the first one. Both sides must be the same length and angle. If one side is longer, the bit will wander when you start drilling.
A non-obvious tip: many people focus too much on making both sides “look sharp” and not enough on making them equal. Symmetry is what helps the bit drill a centered hole.
6. Check the center point
After sharpening both lips, look at the tip from the front. The center point should stay centered. The two lips should meet in a balanced way, and the chisel edge should be as small as practical.
If the center looks off to one side, you likely removed more metal from one lip than the other. Fix this by gently touching up the longer side until the point looks balanced again.
7. Test the bit
Try the bit on a piece of scrap wood or soft metal. A sharp bit should start quickly and cut without excessive pressure. It should make a cleaner hole and produce better chips, not dust or heat.
If the bit squeals, burns the material, or walks across the surface, it still needs adjustment.
8. Cool and clean the bit
After sharpening, wipe the bit clean and let it cool. If it feels very hot, dip it briefly in water, but do not overdo it. Repeated overheating and rapid cooling are not ideal for the tool.
Store the bit in a dry place so rust does not form on the fresh edge.
How to tell if the sharpening worked
A good sharpened bit gives you clear signs. It should bite into the material faster, need less pressure, and create a smoother hole. You should also see more controlled chips when drilling wood or metal.
Here are a few simple signs that the sharpening was successful:
- The bit starts drilling without skating across the surface
- The hole stays centered more easily
- The drill motor does not strain as much
- The cutting edges look even and bright
If the bit still feels weak, the problem may be the angle, not the sharpness alone. This is why understanding how to sharpen drill bits is more than just grinding metal. It is about restoring the right shape.

Credit: home-security-systems-answers.com
Common mistakes beginners make
Many first attempts fail for simple reasons. These mistakes are easy to fix once you know them.
Grinding too much metal
People often think a dull bit needs a lot of grinding. In reality, a light touch is usually enough. Removing too much metal shortens the life of the bit and can ruin its shape.
Creating uneven lips
If one cutting edge is longer than the other, the bit will cut on one side first. That makes holes drift off center. Take your time and compare both sides often.
Overheating the bit
Too much heat can damage the steel. If the tip turns blue, that is a warning sign. Work in short bursts and cool the bit as needed.
Ignoring the material you drill
Not every bit uses the same point angle. A wood bit, a metal bit, and a masonry bit are not all sharpened the same way. If you use the wrong angle, the bit may still be “sharp” but not suited to the job.
Forgetting safety
Small metal pieces can fly off during grinding. Always wear eye protection. Keep your fingers away from the wheel and hold the bit securely.
Different drill bits and how sharpening changes them
Not all drill bits are the same, and that affects the sharpening method.
| Bit type | Can it be sharpened? | What to know |
|---|---|---|
| High-speed steel twist bit | Yes | Easiest to sharpen by hand and best for beginners |
| Cobalt bit | Yes | Harder metal, so it may take a little longer to reshape |
| Carbide-tipped bit | Sometimes | More difficult to sharpen correctly; often better with special tools |
| Masonry bit | Limited | Can be touched up, but the tip shape is different from standard twist bits |
For most home users, the best place to begin is with standard twist bits. They are common, inexpensive, and forgiving. Once you get the feel of the motion, other bit types become easier to understand.
Credit: simpleweld.com
Why a drill bit sharpener can help
A dedicated drill bit sharpener is useful if you sharpen bits often or want more repeatable results. It guides the angle for you and reduces guesswork. That can be a big help for beginners.
Still, a machine is not magic. You must still check the lips for symmetry and avoid overheating. The advantage is speed and consistency, not perfect results without attention.
If you only sharpen bits once in a while, a bench grinder is often enough. If you do a lot of drilling work, a sharpener can save time and reduce mistakes.
How often should you sharpen drill bits
Sharpen a bit when you notice slower cutting, more heat, rough holes, or extra pressure needed to drill. Do not wait until the bit is completely ruined. Light maintenance keeps the tool in better shape.
Many professionals sharpen bits before a job instead of after a problem starts. That habit saves time later. It also means your drill works less hard, which can help both the tool and the battery, if you use a cordless drill.
One useful rule: if the bit no longer cuts cleanly after a few seconds on the material, it is time to inspect it. You do not need to be perfect. You just need to catch dullness early.
Practical tips for better results
These small habits can make sharpening easier and improve the life of your bits.
- Use bright light so you can see the cutting edge clearly
- Practice first on an old bit you do not mind losing
- Sharpen only a little at a time
- Keep a reference bit nearby to compare angles
- Store bits so the edges do not rub together
Another beginner mistake is trying to sharpen a bit while rushing. The process works best when you slow down. Even a few extra seconds of careful alignment can make a big difference in drilling quality.
Also, remember that a sharpened bit cannot fix every drilling problem. If your drill speed is wrong, your material is too hard, or you are using the wrong bit type, sharpening alone will not solve everything. Good drilling comes from the right match between tool, bit, and material.
Simple care that keeps bits sharp longer
Sharpening is only part of the job. Good care helps the edge last longer, so you do not need to repeat the process as often.
- Use the correct speed for the material
- Do not force the drill into the workpiece
- Clear chips often when drilling deep holes
- Use cutting oil for metal when needed
- Keep bits dry and organized
Heat is one of the biggest enemies of sharp drill bits. If you drill too fast or push too hard, the edge wears down much faster. A slow, steady cut is usually better than trying to rush through the job.
Credit: bobvila.com
Final thoughts
Learning how to sharpen drill bits is one of those small workshop skills that pays off again and again. It saves money, improves drilling quality, and helps you work with less frustration. The process is not complicated, but it does require patience and balance.
Start with an old twist bit, mark the edges, grind lightly, and keep both sides even. Test the bit on scrap material before you use it on the real job. Once you understand the shape, sharpening becomes much easier.
The more you practice, the better your results will be. And once you can restore a dull bit instead of replacing it, you will handle drilling tasks with more confidence and less waste.
FAQs
1. Can all drill bits be sharpened?
Not all drill bits are good candidates for sharpening by hand. High-speed steel and cobalt bits are usually the easiest. Carbide-tipped and masonry bits may need special tools or may not be worth the effort if they are badly worn.
2. What angle should I use when sharpening a drill bit?
Most general-purpose twist bits use a point angle around 118 degrees. Some bits for harder materials use about 135 degrees. If you are not sure, match the original angle as closely as possible and keep both sides even.
3. How do I know if the bit is too damaged to sharpen?
If the bit is cracked, bent, badly chipped, or worn down too short, sharpening may not restore it enough. A bit that has lost its basic shape is usually better replaced.
4. Do I need a bench grinder to sharpen drill bits?
A bench grinder is the most common tool, but not the only one. You can also use a dedicated drill bit sharpener. For light touch-ups, some people use a file or sharpening stone, but that takes more skill and time.
5. Why does my drill bit still drill badly after sharpening?
The most common reason is uneven lips. If one cutting edge is longer or ground at a different angle, the bit will not cut properly. The drill speed, the material, or the bit type may also be part of the problem.
