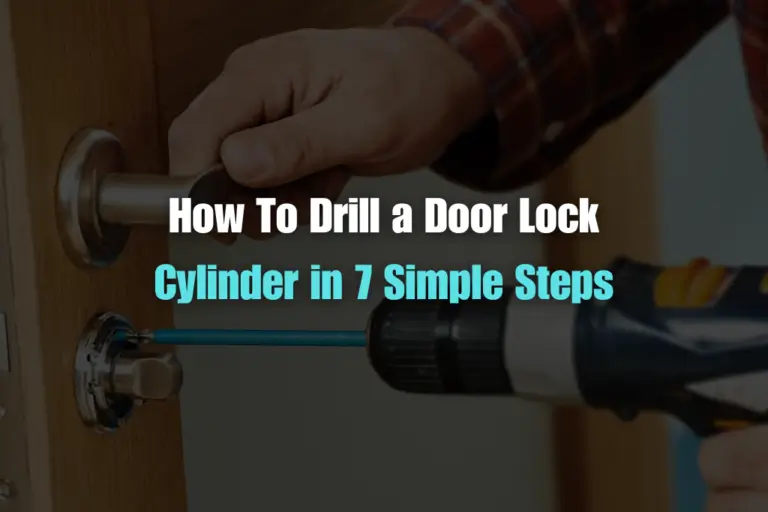
If a lock is jammed, broken, or you have lost the key, drilling can be a fast way to remove it. But this should be the last option, not the first. A drill can damage the lock, the door, and sometimes the hardware around it, so it helps to know the right method before you start.
This guide explains how to drill out a lock in a safe, controlled way. You will learn what tools to use, where to drill, how to stop once the lock gives way, and how to avoid common mistakes that make the job harder. The goal is simple: remove the lock with as little damage as possible.
Before you begin, make sure you are working on a lock you own or are allowed to remove. If the lock protects a home, office, or rental property, check local rules and confirm you have permission. When in doubt, a locksmith may be the better choice, especially for high-security locks or doors you do not want to damage.
When drilling a lock makes sense
Drilling is usually used when the lock cannot be opened in a normal way. Common reasons include a broken key stuck inside, a seized lock cylinder, a damaged deadbolt, or a lock that has failed after wear and rust. In these cases, the goal is not to “save” the lock. It is to destroy the inner pin system so the cylinder can turn or break free.
It is important to understand that not every lock responds the same way. A basic pin tumbler lock is often easier to drill than a high-security model. Some locks have hardened steel pins, anti-drill plates, or extra security features that slow the process. That is why you should first check whether the lock can be opened with simpler methods.
There is also a practical reason to think carefully before drilling. If the door is important, such as an exterior entry door, the lock may be easier and cheaper to replace if the drilling is clean. But if you rush, you can damage the latch, the strike plate, or the door surface itself. A careful approach saves time later.
Try less destructive options first
Before using a drill, consider whether the lock can be opened by lubrication, a spare key, a broken-key extractor, or a locksmith’s picking tools. Many locks fail because they are dirty or dry, not because they are truly dead. A small amount of graphite-based lubricant or a lock-safe spray can sometimes solve the problem.
If the key is broken inside, removing the fragment may be enough. If the cylinder is simply stiff, it may still turn with the right support. Drilling should be your backup plan when these methods fail.
Tools and materials you need
Having the right tools makes the job safer and cleaner. A weak drill bit or poor control can cause extra damage. For the best result, prepare everything before you start.
| Tool | Why it helps |
|---|---|
| Power drill | Provides steady, controlled drilling power |
| High-speed steel or carbide drill bits | Helps cut through the lock’s internal parts |
| Center punch or nail | Marks the exact drilling point so the bit does not slip |
| Hammer | Used with the punch to create a starting dent |
| Safety glasses | Protects your eyes from metal chips |
| Work gloves | Helps protect your hands from sharp edges |
| Screwdriver | Used to remove the lock after the cylinder is destroyed |
| Pliers | Helpful for pulling out broken pieces |
| Lubricant | Can reduce friction and help with cleanup |
| Vacuum or brush | Cleans metal shavings from the area |
For most jobs, a drill bit around 1/8 inch is a good starting size. You may need a second, slightly larger bit if the first hole does not destroy the pins enough. Do not begin with a large bit. Small, controlled holes are safer and more accurate.
If the lock is hardened or high security, standard bits may wear out quickly. In that case, carbide bits can help. However, even strong bits will not always work on advanced locks, so be prepared for a tougher job.
How to drill out a lock step by step
The process is simple in theory, but control matters more than speed. Work slowly and keep the drill straight. The aim is to destroy the pin stack inside the cylinder, not to chew up the whole door.
Credit: maximsystems.net
1. Prepare the area
Clear the space around the door so you can stand comfortably. If possible, open the door if the lock is accessible from the inside. This gives you better control and makes cleanup easier. If the door must stay closed, make sure the drill angle is still comfortable and safe.
Wear safety glasses before doing anything else. Metal shavings can fly in unexpected directions. If the lock is on an exterior door, protect nearby surfaces with a cloth or tape if needed.
2. Find the correct drilling point
Most common cylinder locks are drilled at the keyway, near the center of the plug. The exact point depends on the lock design, but the goal is usually to hit the line of pins inside the cylinder. If you can see the keyway, aim just above the key slot area where the pin stacks sit.
Use a center punch or nail to make a small dent at the spot. This helps keep the drill bit from slipping. One of the most common beginner mistakes is starting without a punch. Without that small starter mark, the bit can skate across the metal and damage the surrounding face of the lock.
3. Start with a small bit
Insert a small drill bit into the drill, usually around 1/8 inch. Hold the drill straight and apply light pressure. Start at a slow speed so the bit bites into the metal cleanly. If you drill too fast, the bit may wander or overheat.
Focus on steady pressure, not force. Let the bit do the cutting. If the bit squeals or slips, stop and adjust the angle. A stable hand is much more useful than extra strength.
4. Drill into the pin area
Once the bit enters the cylinder, continue drilling at a controlled speed. You are trying to destroy the pins and driver pins inside the lock. These parts stop the plug from turning. When they are broken, the cylinder may begin to rotate or collapse.
Do not drill wildly in and out. Short, controlled drilling works better. If you notice resistance changing suddenly, that may mean you are reaching the point where the inner parts are breaking apart.
For a better understanding of lock parts and cylinder behavior, the pin tumbler lock design is a useful reference. It shows why the pins matter so much when drilling a lock.
5. Increase the bit size if needed
If the first hole does not free the lock, move to a slightly larger bit. This can widen the hole enough to destroy more of the internal mechanism. Keep the same careful technique: straight angle, slow speed, and light pressure.
Do not jump to a very large bit right away. A bigger bit may remove material quickly, but it can also create more heat, more slip, and more damage to the surrounding metal. Gradual enlargement is safer.
6. Test the plug
After drilling enough material, try turning the plug with a flat screwdriver or the original key stub, if available. If the lock was a standard cylinder, the plug may now rotate. If it turns, you can usually retract the bolt or release the latch.
If it does not turn, do not force it hard. That usually means more of the pin stack needs to be destroyed. Add a little more drilling and test again.
7. Remove the lock hardware
Once the cylinder is defeated, remove the faceplate screws and pull the lock apart. In many cases, the cylinder or core will come free after the retaining screw is removed. Use a screwdriver, pliers, or both if parts are loose and damaged.
Be careful with broken metal edges. Some lock components become sharp after drilling. If the lock is part of a deadbolt or handle set, take your time removing the rest of the mechanism so you do not bend the door hardware.
8. Clean the opening
Vacuum or brush away all metal shavings. These tiny pieces can scratch the door, jam new hardware, or fall into the locking mechanism if you plan to reuse any part of it. A quick cleanup now saves trouble later.
If you are installing a replacement lock immediately, wipe the area dry and inspect the mounting holes. Make sure nothing inside the door is cracked, loose, or blocked by debris.
What works best on different lock types
Not every lock is drilled the same way. A basic residential knob lock is easier than a heavy deadbolt. A padlock is different again because of its shape and shackle design. Knowing the type helps you choose the right approach and lowers the chance of wasting time.
| Lock type | What to expect | Practical note |
|---|---|---|
| Standard cylinder lock | Usually the easiest to drill | Focus on the pin line near the keyway |
| Deadbolt | May have stronger internal parts | Drill the cylinder, then remove the hardware |
| Padlock | Depends on the brand and shackle design | Some are easier to cut than drill |
| High-security lock | May resist standard drill bits | Often better handled by a locksmith |
Residential locks
Many home door locks use simple pin tumbler systems. These often drill out with standard bits if you stay on target. Still, watch for decorative trim and finished surfaces. The lock may fail easily, but the door surface can still be damaged if the drill slips.
Padlocks
Padlocks vary a lot. Some can be drilled at the keyway, while others are easier to cut off with the right tool. Because the body is small and round, keeping the drill steady can be harder. Clamp the padlock if it is safe to do so, or hold it firmly only if you can control it well.
High-security locks
High-security locks may contain hardened inserts, drill-resistant pins, and other features designed to slow forced entry. These are not good practice locks for beginners. If you encounter one, drilling may take longer and destroy several bits. In many cases, a locksmith is the smarter choice.
Common mistakes that make the job worse
People often think drilling is just about making a hole. In reality, success depends on control and placement. The most common errors are easy to avoid once you know them.
- Drilling in the wrong spot – If you miss the pin line, you may only damage the outer shell and not the mechanism inside.
- Starting with too large a bit – Big bits remove too much material too fast and can damage nearby hardware.
- Using too much speed – High speed can overheat the bit and reduce control.
- Forcing the drill – Heavy pressure makes slipping more likely and can break the bit.
- Skipping safety gear – Metal chips can cause eye injuries very quickly.
- Not cleaning the shavings – Leftover debris can damage the new lock or door finish.
One less obvious mistake is drilling for too long after the lock already failed. At that point, extra drilling does not help. It only increases the chance of harming the door or making replacement harder. Test the plug often so you stop at the right time.
Another detail many beginners miss is heat. If the bit gets hot, it can dull faster and lose cutting power. Taking short pauses helps protect the bit and gives you better control.

Credit: parkavenuelocks.com
How to protect the door while drilling
If you want the lock removed cleanly, protect the surrounding area from the start. A careful setup matters as much as the drilling itself. Put a cloth or thin scrap material near the work area if there is a chance the drill will touch the finish.
Keep the drill aligned with the lock body. The more straight your angle, the less likely it is to scratch the plate or chew up the edge of the hole. If the lock is mounted on a soft door surface, work even more slowly.
Also check the depth. You only need to go far enough to break the pins and internal plug. Going deeper than needed can hit the back of the lock or the door structure. Controlled depth is one of the simplest ways to reduce damage.
After the lock is removed
Once the lock is out, inspect the opening before installing a replacement. Look for bent screws, cracked wood, damaged latch parts, or bits of metal left behind. If the hole is rough, smooth it before fitting the new lock.
If you plan to replace the lock yourself, make sure the new model matches the existing hole size and backset. A mismatch can lead to loose fitting, poor alignment, or weak security. This is a good moment to upgrade if the old lock failed because it was low quality or worn out.
If the door still does not close or latch properly after removal, the issue may not have been the lock alone. The strike plate, latch alignment, or door frame may also need adjustment. A new lock will not fix a warped door by itself.
When to stop and call a locksmith
Sometimes the best answer is not to keep drilling. If the lock has anti-drill protection, if the drill bits keep burning out, or if you are working on a door that must remain undamaged, a locksmith is the safer option. The cost of a professional visit can be lower than repairing a damaged door.
You should also stop if the lock is part of a security system, fire-rated door, or commercial hardware setup. These systems often have special rules and may require proper replacement parts. Forcing the issue can create a bigger safety problem later.
If you are unsure whether the lock can be removed without harming the door, a locksmith can often tell you quickly. That advice alone can save time, money, and frustration.
Credit: pinterest.com
Final thoughts
Learning how to drill out a lock is useful, but it should always be done with care. The key is to use the right tools, mark the drilling point, work slowly, and stop as soon as the cylinder fails. When done correctly, drilling can free a jammed lock without causing more damage than necessary.
Remember the bigger picture: the job is not just about removing metal. It is about protecting the door, keeping the area safe, and preparing for a proper replacement. If the lock is simple, you may do it yourself. If it is complex or valuable, a locksmith may be the smarter path.
FAQs
1. Can I drill out any lock?
Not always. Many standard locks can be drilled, but high-security locks may resist drill bits or have anti-drill features. Some locks are better handled by a locksmith.
2. What drill bit should I use to drill out a lock?
Start with a small high-speed steel bit, usually around 1/8 inch. If needed, move to a slightly larger bit. For harder locks, carbide bits may work better.
3. Will drilling destroy the whole door?
No, if you work carefully. The main damage should be limited to the lock cylinder. The biggest risk comes from slipping, drilling too deep, or using too much force.
4. How do I know when the lock is drilled enough?
Test the plug with a screwdriver after drilling. If it turns, the internal pins are likely destroyed enough to remove the lock. Stop drilling as soon as the mechanism gives way.
5. Is it better to drill or call a locksmith?
If the lock is simple and you own the door, drilling can be a practical option. If the lock is expensive, high-security, or part of a special door system, calling a locksmith is usually safer.
