Brick looks hard, and it is. That is why many people feel nervous before making the first hole. The good news is that how to drill into brick is not difficult when you use the right bit, the right speed, and a steady hand. Most problems come from rushing, using the wrong tool, or drilling in the wrong spot.
If you want to hang a shelf, install a camera, mount a hose reel, or fix a light fitting, brick can give you a strong hold. But it also needs care. A small mistake can crack the surface, dull your bit, or make the hole too loose for the anchor. With the right method, you can drill clean, precise holes without damage.
This guide walks you through the full process in simple steps. You will learn what tools to use, how to mark the spot, how to drill safely, and how to avoid common mistakes. It also includes a few practical tips that many beginners miss, such as how mortar differs from brick and why hole depth matters more than people think.
What you need before you start
Good drilling starts before the drill touches the wall. The right setup makes the job faster, safer, and neater. If you skip this part, even a strong drill can give poor results.
Tools and materials
- Hammer drill or a strong standard drill with a hammer setting
- Masonry drill bits in the correct size
- Wall anchors or plugs that match the screw size
- Masking tape for marking and reducing bit slip
- Pencil or marker
- Measuring tape
- Vacuum or brush to clean dust from the hole
- Safety glasses
- Dust mask if you are drilling several holes
If you are unsure about drill speed or safety basics, this general drilling safety guide from Hilti is a useful reference for tool users.
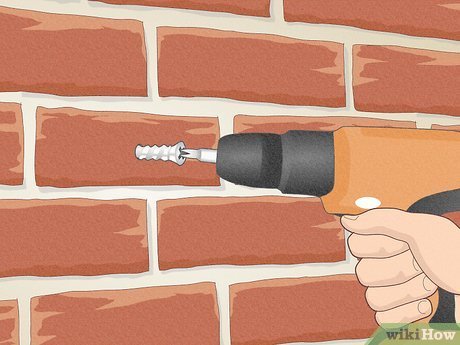
Choose the right drill bit
Brick needs a masonry bit, not a wood or metal bit. Masonry bits have a harder tip, often made for concrete, brick, and block. For most home jobs, a carbide-tipped masonry bit works well.
Pick the bit size based on the anchor or plug you plan to use. A common beginner mistake is to choose the screw first and guess the hole size later. That often leads to loose fittings. The better way is to match the hole size to the anchor instructions, then choose the screw to fit the anchor.
Understand the wall surface
Not all brick areas are the same. You may be drilling into:
- Solid brick, which is hard and stable
- Mortar joints, which are softer and easier to drill
- Brick veneer, which is thinner and may not hold heavy loads well
This matters because drilling into mortar is easier, but it is not always the best choice. Mortar can crumble more easily over time, especially if the load is heavy. For light items, mortar may be fine. For stronger support, brick itself is usually better.
How to drill into brick the right way
Once you have the tools ready, the drilling process itself is simple. Work slowly and let the bit do the job. Brick is strong, but a clean hole depends more on patience than force.
1. Mark the exact spot
Use a tape measure and pencil to mark where the hole should go. Check the position twice before drilling. If you are mounting something that must be level, use a spirit level or a laser level.
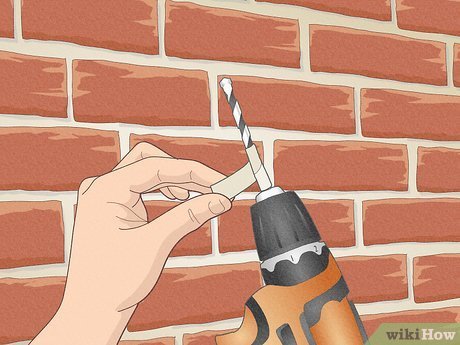
For a cleaner start, place a small piece of masking tape over the mark. This helps the bit grip the surface and can reduce slipping, especially on smooth or dusty brick.
2. Check what is behind the brick
Before drilling, make sure there are no hidden wires or pipes behind the wall. This is very important for exterior walls, old homes, and areas near power points or plumbing.
If you are not sure, use a stud and wire detector made for masonry walls, or check the building layout first. A few extra minutes here can prevent serious damage.
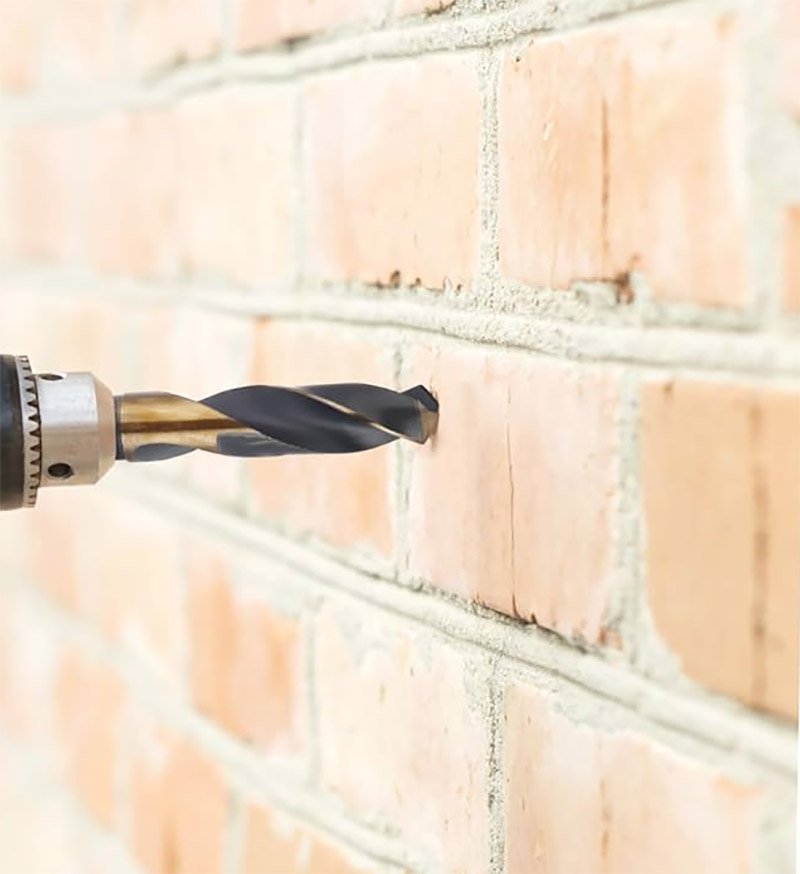
3. Start with a slow speed
Place the bit on your mark and start the drill at a low speed. Keep both hands steady. Apply light pressure only. At the beginning, the goal is to make a small guide point, not to force the hole deep.
Many beginners press too hard. That can make the bit wander, overheat the tool, or chip the brick surface. Let the bit bite slowly. Once it has a small grip, you can increase the speed a little.
4. Use the hammer setting only when needed
If you have a hammer drill, the hammer action helps break up the brick while the bit turns. This is very useful for brick, but it should be used carefully. On very soft brick or weak mortar, too much hammer action can create extra crumbling.
If your drill has only one mode, the job can still be done, but it may take longer. The key is to use a proper masonry bit and steady pressure.
5. Drill straight and steady
Keep the drill as straight as possible. An angled hole can make the anchor sit poorly and reduce holding strength. If you are drilling overhead or in a tight place, take a moment to position yourself well before starting.
Drill in short pauses if needed. Pull the bit out slightly now and then to clear dust. This prevents the hole from packing with powder, which can slow the drill and make the hole less accurate.
6. Stop at the right depth
Do not drill deeper than needed. Measure the anchor length and mark the bit with tape if necessary. The hole should be slightly deeper than the anchor so dust has room at the bottom.
This is one of the small details beginners often miss. If the hole is too shallow, the anchor may not sit fully in the wall. That can make the screw fail to tighten properly. If the hole is too deep, the anchor may slide in too far and lose support.
7. Clean the hole before inserting the anchor
Brick dust can stop an anchor from seating correctly. Use a vacuum, blower, or small brush to clean the hole. A clean hole gives a better grip and a longer-lasting hold.
For larger holes, cleaning becomes even more important. Dust can hide at the bottom and make the screw feel tight at first, even though the anchor is not fully set.
Choosing the best place to drill
Where you drill matters almost as much as how you drill. A strong drill hole in the wrong place can still fail.
Credit: wikihow.com
Brick is usually better than mortar for heavier items
Mortar is softer, so it is easier to drill. But for shelves, brackets, and anything that carries weight, the brick itself usually gives a stronger hold. Mortar can crack or wear out faster, especially outdoors where weather changes weaken it over time.
Use mortar only for light fixtures or very small items when a less permanent hold is acceptable. If the item is heavy, go into the brick whenever possible.
Avoid the edges
Drilling too close to the edge of a brick increases the chance of cracking. Try to keep a safe distance from corners, edges, and already damaged sections. If the brick looks loose or broken, choose another spot.
In older walls, the surface may look solid but hide weak areas inside. A light tap with the drill bit or a small hammer can help you notice hollow or loose sections before you commit to the hole.
Watch for hidden weak points
Some brick walls have repairs, old holes, or soft patches that do not hold anchors well. These spots may crumble when drilled. If the brick starts flaking badly, move to a different location instead of forcing it.
| Drilling spot | Ease of drilling | Holding strength | Best use |
|---|---|---|---|
| Solid brick | Moderate | Strong | Hooks, shelves, brackets, heavy fittings |
| Mortar joint | Easy | Medium to low | Light fixtures, small accessories |
| Damaged brick | Unreliable | Poor | Avoid if possible |
| Near edge or corner | Risky | Weak | Only if no other option |
How to avoid common drilling problems
Even with the right tools, brick drilling can go wrong. Most problems are easy to prevent once you know what causes them.
Bit slipping at the start
This usually happens when the surface is dusty, smooth, or marked too lightly. To fix it, use masking tape over the mark or create a tiny starting dent with a nail punch. Start slowly and keep the drill steady.
Brick cracking or chipping
Cracks often come from too much pressure, drilling too close to an edge, or using the wrong bit. A dull bit can also tear the surface instead of cutting it. If the brick starts chipping, stop and reassess before continuing.
Hole too wide for the anchor
If the hole is larger than planned, the anchor may spin or slip. This often happens when the wrong bit size is used or the drill is wobbled while drilling. If the hole is only slightly too big, a larger anchor may solve the problem. If it is much too big, move the hole or use a repair method suited to the job.
Dust blocking the hole
Brick dust can make the anchor sit high or stop the screw from tightening fully. Clear the dust before inserting anything. This is a small step that improves the final result a lot.
Bit overheating
Heat builds up when the drill is pushed too hard or the bit is dull. If the bit gets very hot, stop and let it cool. A hot bit can wear out faster and may drill less cleanly. For repeated holes, having a spare masonry bit is a smart move.
How to choose anchors and screws for brick
The hole is only one part of the job. The anchor or plug is what turns that hole into a useful fixing point. Choosing the wrong one can make even a perfect hole fail.
Credit: wikihow.com
Match the anchor to the load
Light items such as small hooks need simple plastic wall plugs. Heavier items such as shelves, handrails, and exterior fixtures may need stronger wall anchors or specialist fixings made for masonry.
Always check the weight the fitting must hold. A hook for a picture frame is very different from a bracket supporting a shelf full of books. Do not guess. The wall fixing should suit the actual load, not just the screw size.
Match the screw to the anchor
The screw should fit the anchor firmly. If it is too small, the anchor may not expand enough. If it is too large, it can split the plug or make it impossible to drive in.
A useful habit is to buy the screws and anchors as a matched set when possible. That removes a lot of guesswork.
Use outdoor-rated fixings outside
If the hole is for outdoor use, choose screws and anchors that resist rust and weather damage. Outdoor brick walls face rain, sun, and temperature changes. Cheap fixings may weaken faster than expected.
Safety tips that really matter
Safety is not just about eye protection, though that is important. The bigger risk is making a bad decision before you drill. A careful setup gives you better results and fewer accidents.
- Wear eye protection to stop dust and small chips from entering your eyes.
- Use a dust mask if you are drilling many holes or working indoors.
- Hold the drill with both hands for better control.
- Keep loose clothing, hair, and jewelry away from the moving bit.
- Never force the drill if it starts to bind or shake badly.
- Check the wall for hidden wires, pipes, or fragile sections before drilling.
One often missed point is dust management. Brick dust is fine and spreads quickly. If you are drilling indoors, cover nearby furniture and vacuum as you go. This keeps the work area safer and saves cleanup time later.
Best practices for clean, precise results
If you want a neat finish, focus on control rather than speed. Professional-looking results usually come from small habits.
Use tape for cleaner edges
Masking tape helps reduce chipping at the surface. It also makes your mark easier to see. This is a simple trick, but it improves accuracy for many home jobs.
Drill in short bursts
Instead of pushing hard in one long move, work in short bursts. Remove the bit occasionally to clear dust. This keeps the hole cleaner and reduces heat.
Test the fit before installing the full item
After inserting the anchor, test the screw fit before mounting the object. If the screw feels wrong, fix it now. It is much easier to correct a problem before the shelf or bracket is attached.
Keep spare bits and anchors nearby
Brick work sometimes reveals surprises. A bit may dull faster than expected, or a hole may need to be redone. Having spare masonry bits and a few extra anchors saves time and frustration.
When to call a professional
Most basic brick drilling jobs are manageable for a homeowner. Still, some situations are better left to a pro.
Call a professional if the wall seems damaged, if you suspect hidden pipes or cables, if the item is very heavy, or if the brick is part of an important structural area. You should also get help if the wall is crumbling, old, or made from mixed materials you do not understand.
In those cases, the cost of expert help is often lower than the cost of a cracked wall or a failed mount.
Credit: homeskillset.com
Final thoughts
Learning how to drill into brick is mostly about good preparation and calm technique. Use a masonry bit, start slowly, keep the drill straight, and clean the hole before adding the anchor. Choose the drilling spot with care, and do not rush the job.
Once you understand the difference between brick and mortar, and once you match the bit, anchor, and screw properly, the process becomes much easier. With the right steps, you can make clean holes that hold well and look professional.
FAQs
1. Can I drill into brick without a hammer drill?
Yes, you can drill into brick without a hammer drill, but it will take more time and effort. A regular drill with a good masonry bit can work for small holes in softer brick. For harder brick or multiple holes, a hammer drill is much better.
2. Should I drill into brick or mortar?
For heavier items, brick is usually the better choice because it holds anchors more securely. Mortar is easier to drill, but it is softer and may not support weight as well. For light items, mortar can be acceptable if needed.
3. What size drill bit should I use for brick?
Use the size recommended by the anchor or wall plug manufacturer. The bit must match the anchor size closely so the anchor fits snugly. If the hole is too large, the anchor may not hold properly.
4. Why does my drill bit keep slipping on brick?
Bit slip usually happens because the surface is dusty, smooth, or too hard to start on. Masking tape, a slow start, and a small starting dent can help. Keeping the drill straight also improves control at the beginning.
5. How deep should I drill into brick?
Drill slightly deeper than the anchor length so there is room for dust at the bottom. A common mistake is stopping too soon, which prevents the anchor from seating fully. Mark the depth on the bit with tape if needed.
