If you want to change the look of a room, hanging pictures is one of the fastest ways to do it. But many people stop before they start because they do not want holes in the wall. That is a real concern, especially in rentals, dorm rooms, offices, or newly painted spaces.
The good news is that how to hang pictures without nails is not a hard problem. Today, there are several damage-free methods that work on many wall types. Some are best for light frames. Others can support larger pieces and even help you create a clean gallery wall.
The key is not just choosing a sticky hook and hoping for the best. The right method depends on your wall surface, picture weight, frame style, and how long you want it to stay up. If you match those things correctly, you can avoid dents, peeling paint, and falling frames.
Start with the wall, not the frame
Before you pick a hanging method, look closely at the wall. This step saves time and prevents damage. A method that works well on painted drywall may fail on brick, tile, or textured walls.
Here are the main wall types you may face:
- Painted drywall: Usually the easiest surface for adhesive hooks, strips, and picture rails.
- Plaster: Can be older and more fragile. Strong adhesives may pull off paint if removed too fast.
- Brick or concrete: Needs stronger products made for rough surfaces.
- Tile or glass: Smooth surfaces can work well with adhesive methods, but clean prep is very important.
- Wood paneling: Some adhesives work, but they may leave marks on finished wood.
Also check the wall finish. Glossy paint, matte paint, wallpaper, and textured walls all behave differently. This is one of the details beginners miss. A hook may be rated for the right weight, but still fail if the wall has dust, moisture, or texture.
If you are not sure about the wall, test a small hidden spot first. That small step can save a lot of trouble later.
Choose the right no-nail method for the job
There is no single best answer for every room. The best damage-free method depends on what you are hanging and how permanent you want it to be. Below are the most useful options.
1. Adhesive picture hooks
Adhesive hooks are one of the easiest ways to hang lightweight framed pictures. They stick to the wall with a removable backing and often hold wire, sawtooth hangers, or frame loops.
They are a good choice if you want:
- Fast installation
- No tools
- Easy removal later
- Light to medium-weight frames
These hooks are simple, but they work best when used carefully. Clean the wall first with a dry cloth or a little rubbing alcohol. Let it dry fully. Press the hook firmly and wait the amount of time listed on the package before hanging anything.
Common mistake: many people hang the frame immediately after sticking the hook. That weakens the bond. The adhesive needs time to settle.
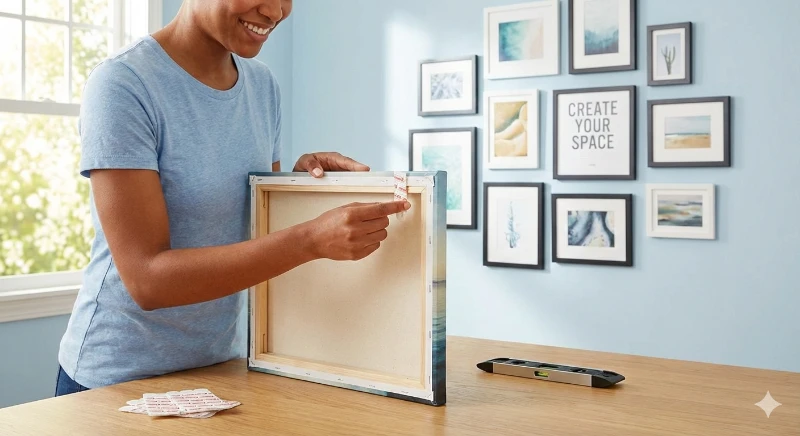
2. Damage-free adhesive strips
Adhesive strips are very popular for people learning how to hang pictures without nails. They usually come in pairs that lock together. One side sticks to the wall, and the other side sticks to the frame.
They are useful for:
- Flat-backed frames
- Gallery walls
- Light signs and art prints
- Temporary decorating
One strong advantage is clean removal. Many quality strips can be removed by pulling the tab slowly, without leaving holes. But there is a catch: they need the right surface and the right weight.
Non-obvious tip: do not use strips on fresh paint. New paint may look dry, but it often needs several weeks to fully cure. If you install strips too early, the paint can peel off when you remove them.
3. Velcro-style mounting strips
These are similar to adhesive strips, but the grip often feels stronger. They are helpful when you want a frame to sit flush against the wall and stay steady.
They work well for:
- Small to medium frames
- Rooms where vibration is low
- Pictures that may be adjusted later
They are not always the best choice for very humid rooms unless the package clearly says they are moisture resistant. Bathrooms can be tricky because steam weakens some adhesives.
If the frame keeps slipping, the problem is often dust, not the strip itself. Clean both the wall and the frame back before applying.
4. Picture ledges
Picture ledges do not always need nails if you use adhesive mounting hardware or if they can sit on a shelf, mantel, or furniture top. They let you lean several frames together without making lots of wall marks.
This method is ideal when:
- You want to change art often
- You like a layered, relaxed look
- You do not want to measure every frame precisely
One useful benefit is flexibility. You can mix picture sizes, place small items in front of larger ones, and change the arrangement whenever you want. That makes this a smart choice for renters.
Non-obvious tip: use museum putty or a small piece of removable poster adhesive on the back bottom edge of a frame leaning on a ledge. This reduces slipping and keeps the display neat.
5. Tension rods and hanging bars
If you want to display pictures without touching the wall much at all, tension rods can help in some spaces. They are especially useful in window areas, closets, or narrow alcoves.
You can hang lightweight frames from:
- Clip rings
- String
- Small hooks attached to the rod
This is not the most common method for a living room wall, but it can be clever in the right place. It works best when the room layout already has two solid surfaces close together.
6. Leaning frames on furniture
Sometimes the easiest answer is not to hang at all. You can lean pictures on a console table, bookshelf, desk, dresser, or fireplace mantel.
This method gives a calm, layered look and avoids wall damage completely. It is especially good for:
- Large frames
- Heavy art
- People who change decor often
- Spaces where you do not want holes at all
To make it feel intentional, vary the sizes and place objects in front of the frames. A lamp, vase, or plant can help the display look finished.
7. Clip systems and wire displays
These systems let you hang art from a rod, cable, or mounted strip without using traditional nails in the wall. Some versions attach with adhesive, while others use pressure or existing fixtures.
They are helpful when:
- You want to switch artwork often
- You have posters, prints, or light frames
- You prefer a modern look
This method is often overlooked, but it can be one of the best ways to make a gallery wall feel adjustable. If you like changing art by season or mood, this is a smart option.
How to match weight, frame style, and wall type
Not every no-nail method is equal. The weight of the frame matters more than most people think. A product may say it holds a certain amount, but that number usually assumes a smooth, clean, ideal wall.
Use this simple guide:
| Picture type | Best method | Notes |
|---|---|---|
| Paper print in a light frame | Adhesive strips or hooks | Works well on clean, smooth walls |
| Small framed photo | Adhesive hook or strip | Check frame backing shape before choosing |
| Medium framed artwork | Heavy-duty strips or picture ledge | Use two supports if needed |
| Large frame | Picture ledge, leaning display, or high-capacity adhesive system | Test carefully; large pieces put more force on the wall |
| Poster or unframed print | Removable poster strips, clips, or display rail | Avoid curling by keeping edges flat |
A beginner mistake is to focus only on weight and ignore shape. A narrow, tall frame can twist more than a square frame of the same weight. That twisting puts extra stress on adhesive products. If a frame is tall or awkwardly shaped, use two hanging points instead of one whenever possible.
Another detail people miss is the back of the frame. Some frames have recessed backs, thin wires, or deep sawtooth hangers. Make sure your chosen method fits the frame hardware. If it does not, the frame may tilt or slide.

Credit: canvasdiscount.com
Step-by-step: hang a picture with adhesive strips
This is one of the most common damage-free methods, so it helps to do it properly. If you follow the steps below, your frame is much more likely to stay put.
- Clean the wall and frame back. Use a dry cloth or rubbing alcohol. Remove dust, oil, and moisture.
- Check the weight rating. Make sure the strips can support more than your frame weighs.
- Attach the strips to the frame. Press them firmly for the amount of time listed on the package.
- Mark the wall lightly. Use a pencil if needed, or hold the frame in place first.
- Stick the wall side in position. Press hard and evenly.
- Wait before hanging. Some products need one hour, others need longer.
- Join the strips and press firmly. Check that the frame sits straight.
If the frame is crooked after hanging, do not pull it off quickly. That can weaken the adhesive. Instead, remove it slowly if needed and start again with fresh strips. Reusing adhesive strips is usually a bad idea unless the brand specifically says you can.
How to hang pictures on tricky surfaces
Some walls need extra care. Here is how to handle the most common difficult surfaces.
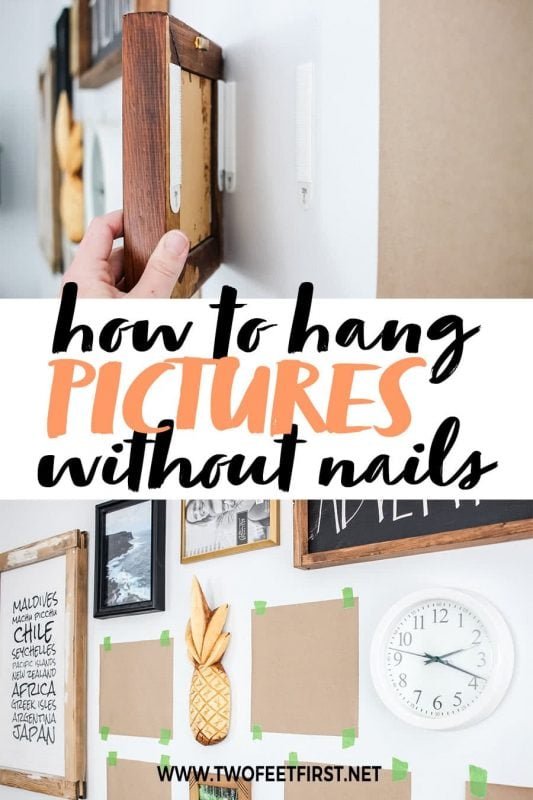
Credit: twofeetfirst.net
Painted drywall
This is the easiest wall for most adhesive products. Still, clean the area first and avoid placing hooks over dust, texture bumps, or damp spots. If the paint is old and brittle, test gently before using a strong strip.
Plaster walls
Plaster can chip or flake, especially in older homes. Use lighter products and remove them slowly. If the wall sounds hollow or crumbly, skip heavy adhesive options.
Tile and glass
Smooth surfaces can give excellent adhesion if they are perfectly clean. Use alcohol to remove soap film or grease. This is where a lot of people fail without noticing why. The surface may look clean but still have invisible residue.
Brick and concrete
Rough walls need products designed for texture. Standard strips often do not grip enough. If the wall is very uneven, picture ledges or freestanding displays may be better than trying to force an adhesive solution.
Wallpaper
This is one of the most delicate surfaces. Even “damage-free” adhesives can lift wallpaper on removal. Use the lightest method possible and test a small hidden spot first. If the wallpaper is expensive or old, avoid strong adhesive strips altogether.
If you want more background on safe wall hanging habits, a helpful general reference is the The Spruce, which offers practical home decorating advice.
Simple ways to make no-nail hanging look polished
Damage-free does not have to mean temporary-looking. A careful setup can look just as good as a nailed frame. The difference is usually in planning, spacing, and balance.
Use these ideas to improve the final look:
- Keep spacing consistent: In a gallery wall, even gaps make the display feel clean.
- Mix sizes with purpose: Place one larger piece as the anchor, then build around it.
- Align to furniture: Pictures above a sofa or console should connect visually with the item below.
- Use level tools: A slightly crooked frame is easy to notice and hard to ignore.
- Repeat frame colors or mat colors: This creates unity, even if the art is different.
One advanced tip: in a set of pictures, leave a little more space between frames than you think you need. Tight spacing often looks messy once people start walking around the room and noticing small alignment errors. Slightly larger gaps can make the whole wall feel calmer and more professional.
Common mistakes to avoid
Most problems with no-nail picture hanging come from rushing. These are the mistakes that cause the most damage or disappointment.
- Not cleaning the wall: Dust and oil weaken the bond.
- Using the wrong weight rating: A product that is too weak will fail over time.
- Hanging on fresh paint: This can peel the finish when removed.
- Ignoring humidity: Bathrooms and kitchens can weaken adhesives.
- Removing too fast: Pulling suddenly can damage paint or wallpaper.
- Using one hook for a large frame: Two support points are often safer.
Another mistake is assuming all removable products behave the same. Some peel off cleanly. Others are much stronger and may still leave residue if used on a delicate wall. Read the label carefully. The word “removable” does not always mean “safe for every surface.”
How to remove damage-free hangers safely
Taking things down the right way matters as much as putting them up. If you rush removal, you can still damage the wall.
For most adhesive strips, follow the pull tab slowly and pull straight down, not out. Keep the strip close to the wall as you remove it. This reduces pressure on the paint layer.
If the product leaves residue, use gentle methods first. Warm water, mild soap, or a small amount of rubbing alcohol may help, depending on the wall finish. Avoid scraping with sharp tools.
If a strip resists, do not yank it. Warm the area slightly with your hand or a hair dryer on low heat, then try again. Patience protects the wall.
When a no-nail method is not the best choice
Sometimes the safest option is to use another display idea instead of forcing an adhesive solution. If your picture is heavy, your wall is fragile, or the room has heat and moisture, a different setup may work better.
Consider another method if:
- The frame is large and heavy
- The wall is old, cracked, or peeling
- The wall surface is rough or uneven
- The room is very humid
- You need the picture to stay up for many years
In those cases, leaning frames, using furniture displays, or installing a picture rail may be smarter than relying on adhesive alone. The goal is not just to avoid nails. The goal is to keep your wall safe and your art secure.
Credit: thediyhomedecor.com
A simple plan for choosing the best method
If you still feel unsure, use this quick decision process:
- Check the wall type.
- Weigh the frame.
- Look at the frame’s hanging hardware.
- Think about how long it needs to stay up.
- Choose the lightest method that can safely handle the job.
This approach works because it stops you from overbuying or overloading the wall. Many people choose the strongest product they can find, but that is not always smart. The strongest adhesive is not always the safest for a delicate surface.
If you are hanging several pictures, start with the hardest one first. Once you know what works on your wall, the rest becomes much easier.
Final thoughts
Learning how to hang pictures without nails is really about matching the method to the wall and the frame. Once you understand that, the process becomes simple. Adhesive hooks, strips, ledges, and leaning displays can all give you a clean result without making holes.
The best damage-free setup is the one that fits your space, holds securely, and comes off cleanly later. Take your time, clean the surface, and check the weight before you begin. That small amount of care makes a big difference.
FAQs
1. What is the safest way to hang pictures without nails?
For most light frames on smooth walls, adhesive picture strips are one of the safest and easiest options. They are simple to use and can be removed cleanly when used correctly. Always check the weight limit and wall type first.
2. Can I hang heavy pictures without nails?
Yes, but you need a stronger method. Heavy-duty adhesive systems, picture ledges, or leaning displays are usually better than standard strips. Very large or valuable frames may still be safer with a more secure mounting solution.
3. Will adhesive strips damage paint?
Quality strips often remove cleanly from properly prepared walls, but damage can still happen on weak, old, or fresh paint. If the paint is not fully cured or the wall surface is fragile, the risk goes up.
4. How do I keep a picture from falling off the wall?
Clean the wall first, follow the weight rating, press the adhesive firmly, and wait the recommended time before hanging. Also make sure the room is not too humid and that the frame is not heavier than the product can hold.
5. What should I do if the hanger leaves residue?
Try gentle cleaning first with mild soap, warm water, or a little rubbing alcohol if the wall finish allows it. Avoid sharp tools. If the residue is stubborn, soften it slowly rather than scraping it off.
