If you want clean cuts, faster work, and less waste in the workshop, learning how to use a table saw is a big step forward. It is one of the most useful tools in woodworking, but it is also one of the most dangerous if you rush or skip basic safety steps.
The good news is that a table saw is not hard to use once you understand the main parts, the right setup, and the habits that keep your hands away from the blade. Accuracy also improves very quickly when you use the fence, miter gauge, and blade height in the right way.
This guide will walk you through safe setup, proper cutting methods, common mistakes, and simple habits that help beginners work with more confidence. If you are new to the tool, read this slowly and practice each step before making important cuts.
Start with the machine, not the cut
Many beginners want to start cutting right away. That is where mistakes begin. Before you switch on the saw, you should know the main parts and what each one does. This makes the tool easier to control and safer to use.
Main parts you should know
- Blade: The spinning cutting disc. Different blades are used for ripping, crosscutting, or fine cuts.
- Table: The flat surface that supports the wood.
- Fence: A straight guide used for ripping wood lengthwise.
- Miter gauge: A guide used for crosscuts and angled cuts.
- Blade guard: A safety cover above the blade that helps reduce contact and kickback risk.
- Riving knife: A metal piece behind the blade that helps keep the wood from pinching the blade.
- Push stick: A hand tool that keeps your fingers away from the blade during narrow cuts.
One small point many beginners miss: the fence and the miter gauge should not usually be used together unless the saw manual says it is safe. Using both the wrong way can trap the wood and lead to kickback.
Check the saw before every use
A short inspection takes only a minute, but it can prevent a serious problem. Look for loose parts, a damaged blade, or sawdust build-up around the blade and fence.
- Make sure the blade is sharp and clean.
- Check that the blade is tight and installed in the correct direction.
- Confirm the fence locks firmly and stays square.
- Make sure the blade guard and riving knife are in place if your cut allows them.
- Remove nails, screws, staples, and other metal from the wood.
If a board has hidden damage, twist, or internal tension, it can move during the cut. That is one reason even straight-looking wood should be checked before use.
Set up for safety before the first cut
Safe table saw use starts with a clean area and the right personal habits. A crowded floor, loose clothing, or poor lighting can turn a simple job into a risky one.
Wear the right safety gear
- Eye protection: Use safety glasses or a face shield.
- Hearing protection: Table saws are loud enough to damage hearing over time.
- No loose clothing: Keep sleeves fitted and remove jewelry.
- Closed-toe shoes: Protect your feet from dropped wood or tools.
Do not wear gloves while cutting on a table saw. Gloves can catch on the blade or moving wood. Also tie back long hair so it cannot fall near the tool.
Arrange the workspace correctly
You need enough room for the board to enter and leave the saw without turning or forcing it. A long board that falls to the floor can pull your hands off line and make the cut unsafe.
Before you start, clear the area around the saw. Make sure the floor is dry and free of scrap pieces. Good light matters more than many beginners think, especially when you are reading a pencil line or watching the board against the fence.
Pick the right blade for the job
Blade choice affects both safety and cut quality. A blade that is wrong for the job can burn the wood, grab too hard, or leave rough edges.
| Cut type | Best blade style | Why it helps |
|---|---|---|
| Ripping | Rip blade | Fast cutting along the grain with less drag |
| Crosscutting | Crosscut blade | Cleaner cut across the grain |
| General use | Combination blade | Good for mixed tasks and beginner work |
| Fine finish work | Fine-tooth blade | Smoother edge with less tear-out |
For a beginner, a quality combination blade is often the easiest starting point. It is not perfect for every task, but it handles many common cuts well.
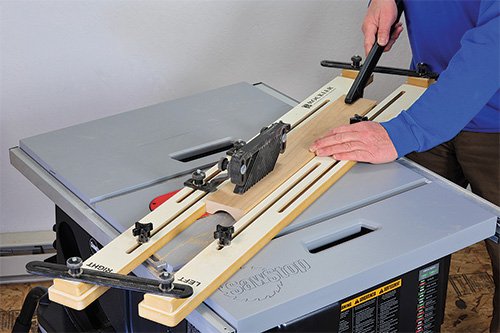
Understand the two main cuts
Most table saw work comes down to two basic cuts: rip cuts and crosscuts. If you understand the difference, you will use the machine more accurately and with less fear.

Credit: woodworkersjournal.com
Ripping wood lengthwise
A rip cut means cutting along the grain, usually to make a board narrower. For this cut, you use the fence to guide the wood in a straight line.
Set the fence to the width you want, lock it firmly, and keep the board flat against the table. Feed the wood at a steady pace. Do not push too fast. If you force the piece, the blade may overheat or the wood may twist.
One useful habit many new users skip: keep your eyes on the fence contact point and the blade path at the same time. This helps you notice drift early and correct it before the board wanders.
Crosscutting wood to length
A crosscut is made across the grain, often to shorten a board. For this cut, the miter gauge is usually safer and more accurate than the fence, especially when the board is short.
Never hold a cutoff piece with your hand near the blade. If the piece becomes small, use a stop block only when your saw setup and manual allow it, and make sure the offcut cannot get trapped between the blade and fence.
How to use a table saw for a straight rip cut
This is the cut most beginners want to learn first. A straight rip cut is simple when you follow the same steps each time.
- Measure the width you need and mark the board if helpful.
- Set the fence to the correct distance from the blade.
- Lock the fence and double-check the measurement.
- Set the blade height so the top of the teeth sits just above the wood surface.
- Stand slightly to the side of the blade path, not directly behind the board.
- Start the saw and let it reach full speed before feeding the wood.
- Push the board forward with even pressure while keeping it tight to the fence.
- Use a push stick or push block when your hands get close to the blade.
- Keep feeding until the wood is past the blade and fully clear.
Do not pull the wood backward while the blade is spinning. If you need to stop, shut off the saw and wait for the blade to stop completely before adjusting anything.
How to keep the rip cut accurate
Accuracy on a table saw depends on more than just your measuring tape. The fence must stay parallel to the blade, the board must stay flat, and your feed rate must stay steady.
If the wood drifts away from the fence, the cut will lose its exact size. If you press the board too hard against the fence from the back side, it can bind. The goal is gentle, steady contact, not force.
Another beginner mistake is measuring from the wrong side of the blade kerf. The blade removes wood width, so always measure from the correct edge of the blade or use the saw’s fence scale only after confirming its accuracy with a test cut.
How to make a clean crosscut
Crosscuts are where many beginners feel less sure, because the board is usually not supported by the fence in the same way. The key is control and support.
- Mark the cut line clearly on the wood.
- Set the miter gauge to 90 degrees for a square cut.
- Place the board firmly against the miter gauge fence.
- Hold the board and gauge together, then start the saw.
- Push both forward at a smooth pace until the cut is complete.
- Pull the wood back only after the blade has stopped or the piece is fully clear and safe to move, depending on the saw and setup.
For long boards, support the far end with a stand or helper. When the board drops after the cut, it can shift your hand position and affect accuracy.
Use the miter gauge, not the fence, for short crosscuts
A common beginner error is using the fence as a stop for short crosscuts. This can trap the board between the fence and blade and cause kickback. If you need repeat cuts to the same length, use a proper stop block method that keeps the offcut free, or follow your saw manual and shop setup rules carefully.
Blade height, feed speed, and body position matter more than you think
People often focus on the fence and forget the small settings that shape the cut. These three details make a large difference in both safety and result.
Set the blade height correctly
A good rule is to set the blade so the teeth rise just above the top surface of the wood. This helps reduce exposed blade area while still cutting well. It also often gives a cleaner cut and less tear-out than a blade set too high.
A blade set far above the wood is not safer. In fact, it exposes more teeth to your hand and can make the cut more aggressive.
Feed at a steady pace
Too slow can cause burning. Too fast can cause the blade to bind or leave a rough edge. The correct pace feels controlled and smooth. Let the saw do the work.
If the motor slows down hard, you are pushing too quickly or the blade is not right for the material. If you hear a strong burning sound, reduce feed speed and check blade sharpness.
Stand in the right place
Do not stand directly behind the blade line. Stand a little to the side so if kickback happens, the board is less likely to hit you. Keep your balance with both feet planted.
This is one of the easiest safety habits to build, yet many beginners ignore it because they are only thinking about the cut line.
What kickback is and how to avoid it
Kickback happens when the wood closes in on the blade and gets thrown back toward the operator. It is fast, loud, and dangerous. Most kickback events happen because the board pinched the blade, lost fence alignment, or was fed with poor control.
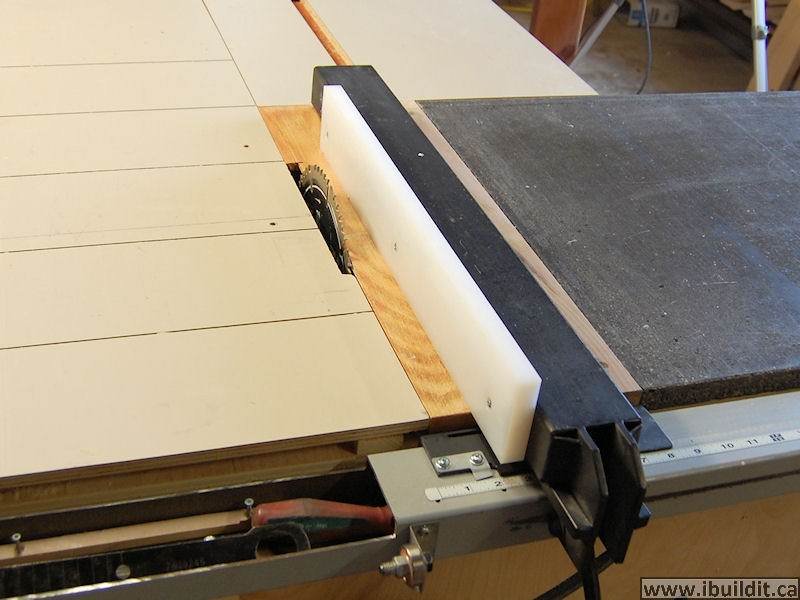
Credit: ibuildit.ca
Simple ways to reduce kickback risk
- Keep the fence parallel to the blade.
- Use the riving knife when possible.
- Do not freehand cuts.
- Use sharp, clean blades.
- Support long boards so they do not twist.
- Do not cut warped wood without planning the direction of the bow.
- Stay out of the blade’s direct line.
One detail beginners often miss is that internal tension in wood can change during the cut. A board may look straight, but if it is under stress, the kerf can close behind the blade and squeeze it. That is why proper support and a riving knife matter so much.
Use accessories that improve safety and precision
A table saw is not just the blade and fence. Small accessories can make the work much safer and more accurate.
Push sticks and push blocks
Use these whenever your hands would come too close to the blade. A push stick is good for narrow ripping. A push block gives more control on wider pieces and can help hold the wood flat.
Do not wait until your fingers are already near the blade. Plan the cut so the tool is in your hand before you start.
Featherboards
A featherboard presses the wood against the fence or table and helps keep the feed consistent. It can improve accuracy and reduce wandering. Use it only when the setup allows it and when it will not interfere with the cut path.
Outfeed support
Long boards need support after they pass the blade. Without support, the weight of the board can pull it down and tilt the cut. A simple roller stand or outfeed table can solve this problem.
Common beginner mistakes to avoid
Most early table saw problems are caused by habits, not bad luck. If you avoid these mistakes, you will save wood and reduce risk.
- Starting without checking the fence: Even a small misalignment affects accuracy and safety.
- Using a dull blade: Dull teeth burn wood and require more force.
- Standing in line with the blade: This increases risk if kickback happens.
- Pushing with too much force: A table saw should cut smoothly, not fight you.
- Using the fence for short crosscuts: This can trap the wood and cause kickback.
- Ignoring support for long boards: Drooping wood can ruin a straight cut.
- Removing safety parts without understanding the risk: The guard and riving knife are there for a reason.
Another thing beginners often overlook is cleanup. Sawdust near the fence, throat plate, or tabletop can affect the cut line and make the wood slide unevenly. A quick brush-off before each session helps more than many people expect.
Practical tips for better results
If you want smoother cuts and more confidence, these small habits help a lot.
- Make test cuts on scrap wood before cutting the final piece.
- Use a sharp pencil or marking knife for clearer layout lines.
- Measure twice, but also check the saw setup once more.
- Let the blade stop fully before reaching near it.
- Keep your hands clear even when the cut looks almost finished.
- Clean and wax the tabletop if your saw manufacturer allows it, so wood slides more easily.
If you want to improve faster, keep a small notebook of blade type, fence setting, and cut results. This simple habit helps you repeat good cuts and understand what worked best.
When to stop and rethink the cut
Sometimes the safest move is not to force the cut. If a board is badly warped, too short for safe control, or likely to pinch the blade, stop and choose another method.
Use a different tool when needed. A table saw is excellent for many jobs, but it is not always the best choice for tiny parts, very irregular stock, or cuts that cannot be guided safely.
If something feels wrong, trust that feeling. A moment of caution is much better than a damaged board or an injury.
Credit: woodworkersjournal.com
A simple learning path for beginners
If you are just starting, do not try advanced cuts on day one. Build skill in a safe order.
- Learn the saw parts and safety rules.
- Practice setting the fence and blade height.
- Make straight rip cuts on scrap wood.
- Practice square crosscuts with a miter gauge.
- Try repeat cuts only after your setup is accurate.
- Move to cleaner finish cuts when your control improves.
This slow path may feel simple, but it builds the muscle memory that keeps you safe. Good table saw work comes from repetition, not speed.
For official safety guidance, it is worth reviewing the OSHA safety resources, especially if you are working in a shared shop or workshop environment.
Final thoughts
Learning how to use a table saw safely is really about building good habits. Know the parts, choose the right blade, support the wood, and keep your body out of the danger line. Once those habits become normal, the saw feels much easier to control.
Accuracy also improves when you stop rushing. Set up carefully, make test cuts, and let the machine work at its own pace. That is how beginners move from nervous first cuts to clean, repeatable results.
FAQs
1. What is the first thing a beginner should do before using a table saw?
Start by learning the main parts of the saw and checking that the blade, fence, guard, and riving knife are in good condition. Then clear the area, wear eye and ear protection, and make sure you understand the cut before turning the saw on.
2. Can I use a table saw without a blade guard?
Only if your saw manual and the specific cut allow it, and only if you understand the risk. In most beginner situations, the guard and riving knife should stay in place because they add important protection against contact and kickback.
3. Why does my table saw burn the wood?
Burn marks usually come from a dull blade, a dirty blade, or feeding the wood too slowly. A blade that is not right for the material can also cause burning. Check the blade first before changing your cutting technique.
4. What is the safest way to cut small pieces on a table saw?
Use a push stick or push block, keep your hands far from the blade, and make sure the piece is supported well. If the piece is too small to control safely, use another tool or a different method instead of forcing the cut.
5. How do I know if my table saw fence is accurate?
Set the fence, lock it, and check that it stays parallel to the blade. Make a test cut on scrap wood and measure the result. If the cut is not accurate, adjust the fence before cutting your final piece.
