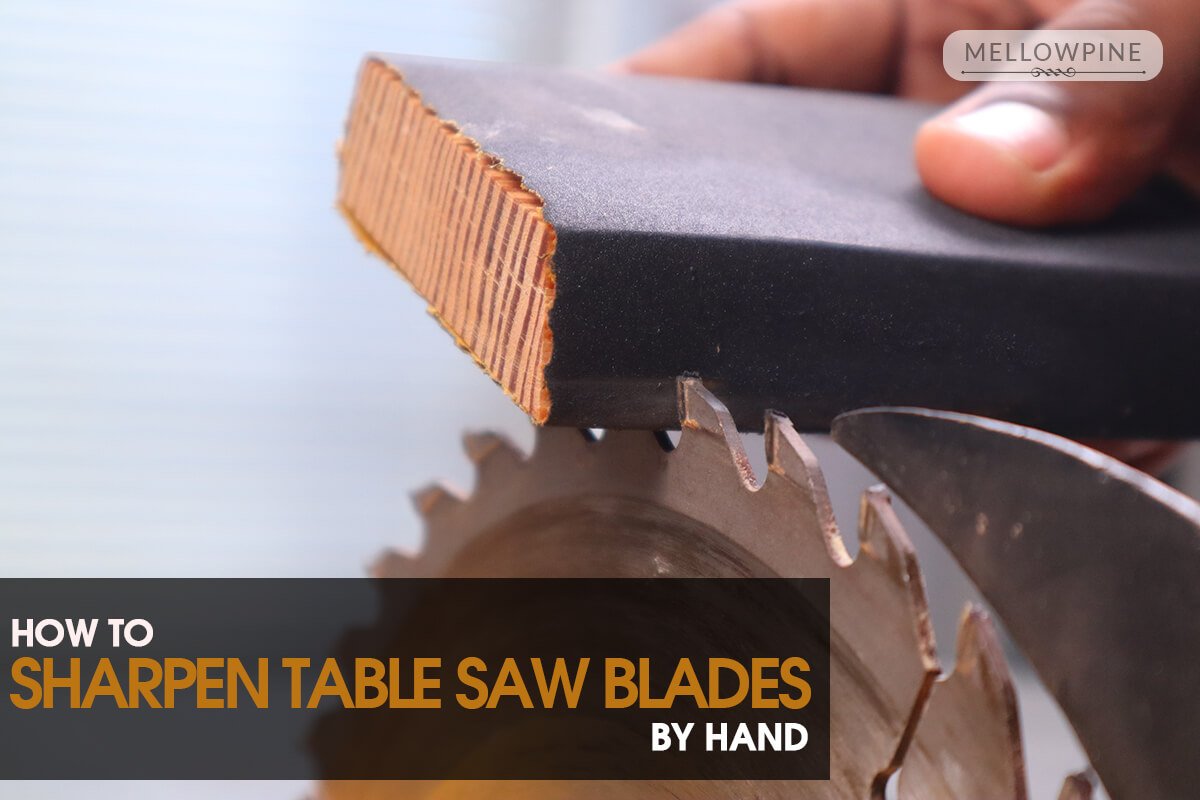
A table saw can make very clean cuts. But that only happens when the blade is sharp, clean, and set up the right way. A dull blade does more than slow you down. It can burn the wood, leave rough edges, and even make the saw harder to control.
If you have been wondering how to sharpen a table saw blade, the good news is that the process is not as mysterious as it sounds. You do need care, patience, and the right method. Some blades can be sharpened at home. Others are better sent to a professional. The key is knowing the difference before you waste time or damage the blade.
This guide will show you how to inspect the blade, decide if sharpening makes sense, clean it first, and then sharpen it step by step for smoother, cleaner cuts. You will also learn common mistakes, signs of a worn-out blade, and a few details that many beginners miss.
Before You Start, Check Whether the Blade Really Needs Sharpening
Not every cutting problem means the blade is dull. Sometimes the problem is pitch build-up, a wrong feed rate, or a misaligned fence. That is why the first step is to inspect the blade carefully before doing any sharpening work.
Signs your table saw blade is dull
- The cut feels slow or hard.
- The wood shows burn marks.
- The saw makes more noise than usual.
- You need to push the wood harder through the blade.
- The cut edge looks fuzzy, chipped, or torn.
- The blade leaves a rough finish even on good lumber.
Here is one detail many beginners miss: a dull blade and a dirty blade can look very similar in use. Resin on the teeth can create drag and heat, which feels like dullness. So before you sharpen, always clean the blade first.
When sharpening may not be the best choice
If the teeth are missing, bent badly, cracked, or worn down too far, sharpening may not help. The carbide tips on many modern blades are small. If they have been sharpened several times already, there may not be enough material left for another full sharpening.
In that case, replacing the blade is the safer choice. A damaged blade can cut poorly and may also be unsafe.
Know Your Blade Type Before You Touch It
Table saw blades are not all the same. The blade design affects how it should be sharpened. This is another point many people overlook. A blade for rough ripping is different from a blade used for fine crosscuts or plywood.
Most table saw blades fall into one of these broad groups:
| Blade type | Common use | Sharpening note |
|---|---|---|
| Flat-top grind | Fast ripping | Usually easier to sharpen |
| Alternate top bevel | General purpose cutting | Each tooth angle must stay consistent |
| Triple-chip grind | Hard materials, laminate, plywood | More complex; often better for a pro shop |
If you are not sure what kind of blade you have, look for the label on the blade body or packaging. You can also check the manufacturer’s site. Knowing the grind helps you understand whether home sharpening is practical.
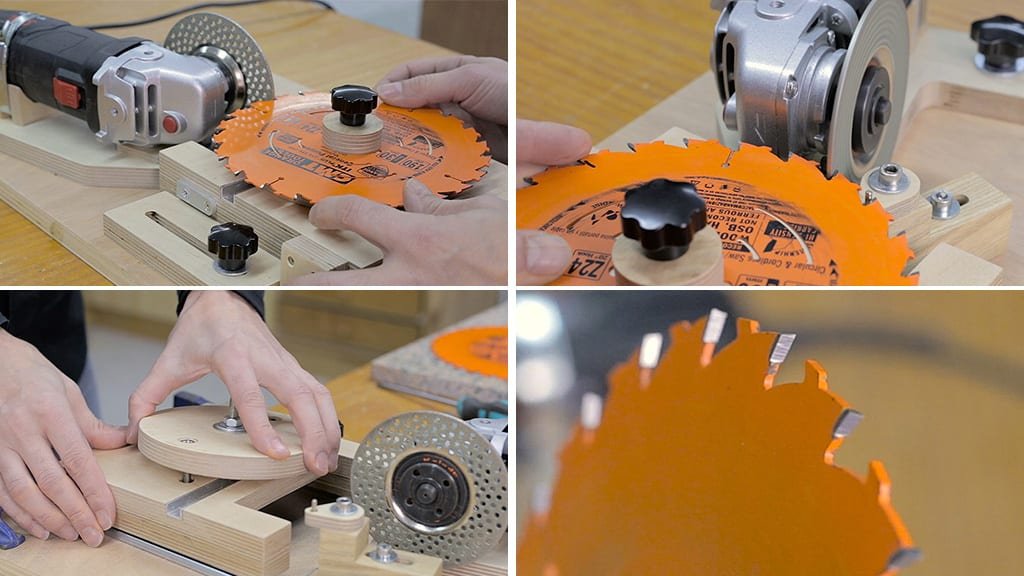
Gather the Right Tools and Safety Gear
Sharpening a table saw blade is not a job to rush. You need the right tools before you begin. Working with the wrong tools can damage the teeth or make the blade uneven.
Basic tools you may need
- Safety glasses
- Work gloves
- Blade removal wrench
- Marker or paint pen
- Blade cleaning solution
- Soft brush or old toothbrush
- Fine diamond file or sharpening stone
- Blade sharpening jig or vice
- Rag or microfiber cloth
- Digital caliper or magnifier, if available
For many woodworkers, a sharpening jig is the most useful item. It holds the blade steady and helps keep the angle even from tooth to tooth. Without control, one tooth can end up sharper than the next, and that leads to poor cutting performance.
If your blade has carbide tips, a normal steel file usually will not work well. Carbide is very hard. A diamond tool is usually a better choice. For many blades, professional sharpening is still the best path. If you want to learn more about blade care and safe cutting practices, a trusted source like the Woodworkers Guild of America can also be helpful.
Remove the Blade Safely
Safety comes first. Never try to sharpen the blade while it is still on the saw. The blade must be removed so you can clean it, inspect it, and work on it properly.
- Unplug the table saw.
- Raise the blade fully.
- Lock the arbor if your saw has that feature.
- Use the correct wrench to loosen the arbor nut.
- Remove the outer washer and blade carefully.
- Place the blade on a clean, stable surface.
Do not grip the teeth directly with bare hands. They can still be sharp enough to cut you. Handle the blade by the center hole or by the body, not by the tooth edge.
Credit: mellowpine.com
Inspect the blade before cleaning
Take a close look at each tooth. You are checking for missing tips, chips, heavy wear, wobble, or uneven damage. Mark the first tooth with a marker so you can keep track of your progress as you work around the blade.
This is a small but useful habit. It helps you avoid skipping a tooth or sharpening one tooth twice by mistake.
Clean the Blade First for Better Results
Cleaning is not optional. A dirty blade cuts worse and can make sharpening less effective. Resin, pitch, and sawdust can hide the real condition of the teeth.
How to clean it properly
- Soak the blade in a blade cleaner or a mild degreasing solution if needed.
- Scrub the teeth with a soft brush.
- Wipe the blade body with a rag.
- Pay close attention to the gullets, which are the spaces between the teeth.
- Dry the blade completely before sharpening.
Do not use rough sandpaper or a metal tool to scrape the teeth. That can damage the cutting edge. A clean blade is easier to inspect and easier to sharpen evenly.
One non-obvious tip: if you clean a blade and it suddenly looks much sharper at the edges, it may have been only dirty, not truly dull. In that case, you may not need a full sharpening yet.
Set Up a Stable Sharpening Station
A stable setup matters more than speed. If the blade moves while you sharpen, the angles will vary. That leads to uneven teeth and poor cuts.
Good setup habits
- Work on a bright, flat surface.
- Secure the blade in a vise or sharpening jig.
- Keep the tooth edge at eye level if possible.
- Use strong light so you can see the bevel clearly.
- Keep the file or stone at the correct angle for the tooth type.
Angle control is critical. If you change the angle from one tooth to the next, the blade may still feel “sharp” but it will not cut smoothly. In some cases, uneven sharpening can cause vibration or more tear-out.
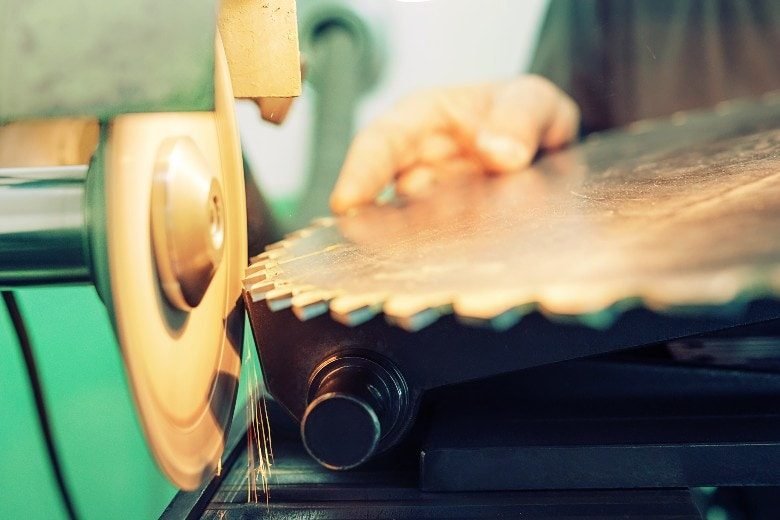
Sharpen the Teeth One by One
This is the main part of the job. Go slowly. The goal is not to remove a lot of metal. The goal is to restore a crisp cutting edge.
Step 1: Match the original tooth shape
Before sharpening, look carefully at the original bevel. Try to match that shape. If the blade has alternate bevel teeth, each tooth must keep the correct left-right pattern. If it is a flat-top blade, keep the top flat and level.
Step 2: Make light passes
Use gentle pressure. Heavy pressure can remove too much material and shorten the life of the blade. A few controlled strokes are better than one hard stroke.
- Place the file or diamond tool against the cutting edge.
- Follow the original angle.
- Make the same number of passes on each tooth.
- Move to the next tooth only after finishing the current one.
Consistency is more important than force. If one tooth gets extra attention, it may cut differently from the others. That difference can show up as marks on the wood.
Step 3: Keep track of your progress
Use the marker you placed earlier to know where you started. Work around the blade in a full circle. Once you return to the marked tooth, check your work before stopping.
Another useful detail: if a tooth feels much harder to sharpen than the others, do not force it. That tooth may be damaged or may already be near the end of its service life.
For carbide-tipped blades
Carbide-tipped blades need extra care. A diamond sharpening tool is usually required. Keep the stroke light and avoid changing the tip shape. If the carbide is chipped, cracked, or very uneven, a professional sharpening service is often the smarter choice.
Check the Evenness of the Teeth
After sharpening, inspect the blade again. Every tooth should look similar in shape and finish. The cutting edges should appear even, not taller or shorter than the rest.
Credit: paoson.com
Simple checks you can do
- Look across the tooth tips in good light.
- Compare the shine on each edge.
- Check for chips or missed teeth.
- Spin the blade slowly and confirm all teeth look uniform.
If one tooth is clearly different, it can cause a rough cut. The blade may also make a tapping sound when running through wood. Fix the problem now instead of discovering it during a project.
Balance and Reinstall the Blade Correctly
A sharp blade still needs to be installed correctly. A poorly mounted blade can wobble, even if the teeth are perfect.
- Clean the arbor and washers before reinstalling.
- Place the blade on the arbor in the correct direction.
- Make sure the blade sits flat against the flange.
- Tighten the arbor nut firmly, but do not over-tighten.
- Lower the blade and rotate it by hand to confirm smooth movement.
Always check the arrow on the blade body. The blade must rotate in the correct direction. Installing it backward is a common mistake and can make the saw cut poorly or dangerously.
After installation, test the saw with a scrap piece of wood. You want a clean cut, low resistance, and little to no burning.
How Often Should You Sharpen a Table Saw Blade?
There is no fixed number for every shop. The answer depends on the wood you cut, the amount of use, and the type of blade. A blade used on clean softwood will stay sharp longer than one used on dirty lumber, MDF, or abrasive plywood.
As a general guide, sharpen the blade when you notice cutting quality dropping. Do not wait until the blade is badly worn. Small dulling is easier to correct than deep wear.
Here is a practical rule: if you notice burning, drag, or rough cuts on a blade that was previously working well, inspect it soon. Early attention protects both the blade and the saw.
Common Mistakes to Avoid
Even careful woodworkers make simple errors when learning how to sharpen a table saw blade. Avoiding these mistakes will save time and improve your results.
- Skipping cleaning first. Dirt can hide real wear and make sharpening less effective.
- Using too much pressure. Heavy force removes too much metal.
- Changing the angle. Even a small angle change can affect cut quality.
- Sharpening only some teeth. All teeth must be treated evenly.
- Ignoring damage. A cracked or chipped tooth may mean the blade should be replaced.
- Reinstalling the blade backward. This is easier to do than many people think.
A useful insight here is that the best sharpening job is often the one that removes the least metal. The blade should cut better, not look dramatically reshaped.
When to Use a Professional Sharpening Service
Home sharpening works for some blades and some skill levels. But professional sharpening is often better when the blade is expensive, highly specialized, or badly worn.
Choose a pro if:
- The blade has carbide tips and you do not have diamond tools.
- The teeth are uneven or damaged.
- You want the exact original grind restored.
- The blade is costly enough that you do not want to risk a mistake.
A professional can also check tooth height, balance, and grind consistency more accurately. In many cases, that is worth the small cost. For premium blades, a professional sharpening service can extend the blade life and improve cut quality more than a quick home touch-up.
How to Keep the Blade Sharp for Longer
Good care can delay the next sharpening. Many blades get dull faster than they should because of poor habits, not just hard use.
Credit: woodsmithspirit.com
Use these habits to extend blade life
- Clean the blade after heavy use.
- Cut clean lumber when possible.
- Avoid nails, staples, dirt, and embedded grit.
- Use the right blade for the material.
- Feed wood at a steady pace.
- Store the blade in a dry place.
One thing people often miss is that blade life is strongly affected by material choice. MDF, particleboard, and dirty reclaimed wood wear teeth much faster than clean pine or hardwood. If you use the wrong blade for those materials, sharpening needs will come sooner.
Final Thoughts on Getting Cleaner Cuts
Learning how to sharpen a table saw blade is really about care, accuracy, and patience. Start by checking whether the blade is truly dull. Clean it well. Use the right tools. Keep the original tooth shape. Sharpen evenly. Then reinstall it with care and test the cut.
When done well, sharpening gives you smoother cuts, less burning, less effort, and better control at the saw. It also helps your blade last longer and keeps your woodworking safer and more enjoyable. If a blade is too damaged or too specialized for home sharpening, do not force it. A replacement or professional service is sometimes the best answer.
Cleaner cuts usually begin long before the wood hits the blade. They start with a sharp, clean, well-maintained tool.
FAQs
1. How do I know if my table saw blade needs sharpening?
Common signs include slower cutting, more noise, burn marks, rough edges, and extra pushing force. If the blade is dirty, clean it first because pitch build-up can look like dullness.
2. Can I sharpen a carbide table saw blade at home?
Yes, but only if you have the right diamond sharpening tools and enough skill to keep the angles even. Many woodworkers prefer professional sharpening for carbide blades because the tips are small and easy to damage.
3. How many times can a table saw blade be sharpened?
It depends on the blade design, tooth size, and how much material is removed each time. Blades with larger carbide tips can usually be sharpened more than thin or heavily worn blades.
4. What is the biggest mistake people make when sharpening a table saw blade?
The biggest mistake is changing the tooth angle or sharpening unevenly. Even if the blade feels sharp, uneven teeth can cause rough cuts, vibration, and burn marks.
5. Is it better to sharpen or replace a table saw blade?
Sharpen it if the teeth are still in good shape and the blade is worth saving. Replace it if the teeth are chipped, cracked, badly worn, or too small after many sharpenings.
