If you want clean edges from plexiglass, the table saw can do a very good job. But only if you use the right blade, the right speed, and the right support. Plexiglass is strong, yet it can crack or chip fast when the cut is rough or the sheet vibrates.
The good news is that how to cut plexiglass on a table saw is not hard once you know the rules. The main goal is simple: keep the plastic steady, reduce heat, and avoid forcing the blade through the sheet. When those three things are under control, the cut looks much better and the risk of damage drops a lot.
In this guide, you will learn the setup, the cutting process, common mistakes, and a few small tricks that make a big difference. You will also see when a table saw is the right tool, and when another method may be safer.
What makes plexiglass tricky to cut
Plexiglass, also called acrylic sheet, behaves differently from wood. Wood fibers can tear a little and still look fine. Plexiglass does not forgive that kind of rough treatment. If the blade is wrong or the sheet moves, the edge can chip, melt, or split.
Heat is one of the biggest problems. A fast, dull, or dirty blade creates friction. That heat can soften the plastic near the cut. Then the edge starts to smear or fuse back together in a rough line. In bad cases, the material cracks from stress.
Another problem is flex. A thin sheet can bend while it is being cut. If the sheet closes on the blade, the saw can grab it. That is dangerous, and it also raises the chance of cracking.
Many beginners also miss one simple point: plexiglass has internal stress from the factory and from storage. If the sheet was bent, clamped badly, or left in a hot car, it may crack more easily even before cutting begins.
What you need before you start
You do not need a huge workshop, but you do need the right tools. The wrong blade or a weak fence setup can ruin the cut very quickly.
Best blade choice
Use a sharp carbide-tipped blade with a high tooth count. A fine crosscut blade works well for most plexiglass jobs. More teeth usually means a smoother edge and less chipping. For many cuts, a 60-to-80 tooth blade on a 10-inch saw is a smart choice.
Some woodworkers use blades made for plastics or non-ferrous materials. Those can work too. What matters most is a sharp edge, clean cutting action, and low vibration.
Other tools and materials
- Table saw with a stable fence
- Fine-tooth blade designed for clean cuts
- Plexiglass sheet with the protective film still on, if possible
- Measuring tape and marker
- Straightedge or guide for accurate marking
- Clamps or outfeed support
- Push stick or push block
- Safety glasses and hearing protection
- Dust mask if you expect fine particles
If you want a trusted source on safe saw use and guarding basics, the Wood Magazine table saw safety guide is a useful reference. It is not plexiglass-specific, but the safety habits still matter.
Blade and saw setup matters more than force
One non-obvious point many people miss is that a table saw does not cut plexiglass by power. It cuts it by control. A powerful saw with a poor blade can give worse results than a smaller saw with a sharp, fine blade.
Check that the blade is aligned, the fence is straight, and the saw does not shake. Even small wobble can leave tiny chips along the edge. If the sheet is large, add support on both the infeed and outfeed sides so it stays flat through the cut.
How to prepare the plexiglass sheet
Preparation is where many clean cuts are won or lost. If you skip this part, even the best saw setup may not save the edge.
Keep the protective film on
If your sheet still has its factory film or paper cover, leave it in place during cutting. This layer helps reduce surface scratches. It can also make marking easier because you can draw on it without scarring the acrylic itself.
Measure and mark clearly
Mark your cut line with a fine marker or pencil. Use a straightedge for accuracy. For long cuts, check the measurement at both ends before you start. A small mistake in marking can lead to a bad fit, and once plexiglass is cut, you cannot easily hide the error.
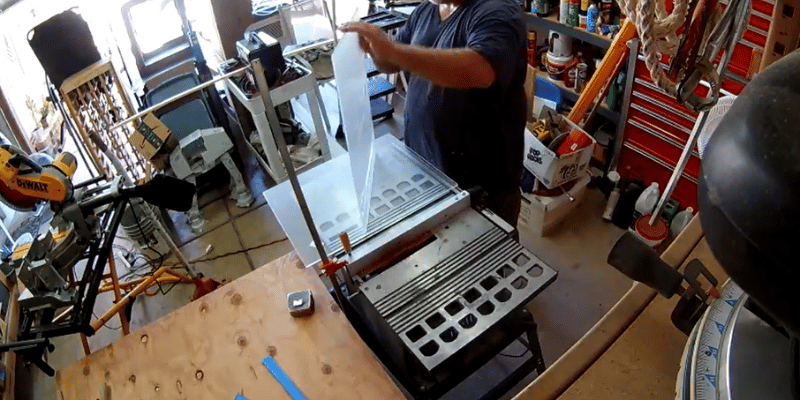
Support the full sheet
Plexiglass sheets often come in large sizes. If the sheet hangs off the saw table, its weight can pull the material down and twist the cut line. Use rollers, stands, or a helper if needed. The goal is to keep the sheet level from start to finish.
Another useful detail: if the sheet is very cold, let it sit in the room for a while before cutting. Cold acrylic can be more brittle. Room-temperature material is usually less likely to crack at the edge.
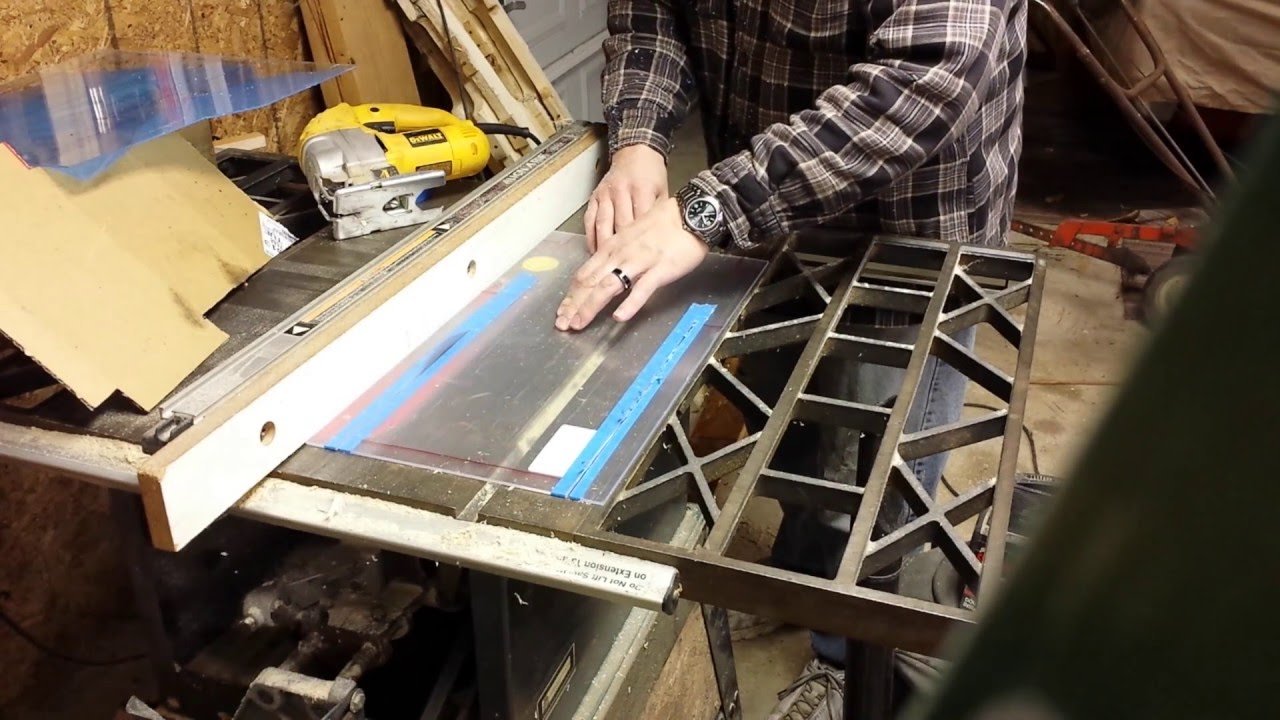
The right way to cut plexiglass on a table saw
Now for the main process. The steps below are the safest path for most straight cuts.
- Set the blade height. Raise the blade so it sits just above the thickness of the sheet. A blade that is too high can be more aggressive and may increase chipping.
- Install a fine-tooth blade. Make sure it is sharp, clean, and secure.
- Set the fence. Measure from the blade to the fence carefully. Double-check the width before making the cut.
- Support the sheet. Place the plexiglass flat on the table and keep the cutting line aligned with the blade path.
- Start the saw and let it reach full speed. Do not feed the sheet into a blade that is still slowing down or starting up.
- Feed slowly and evenly. Use gentle pressure. Let the blade cut at its own pace.
- Keep steady forward motion. Do not stop halfway unless you must. A stop can leave a burn mark or stress spot.
- Use a push stick if your hands get close to the blade. Keep your body slightly to the side, not directly behind the cut.
- Finish the cut smoothly. Let the offcut clear the blade before moving the sheet away.
The best feeding speed is slower than wood, but not so slow that the blade heats the plastic too much. If you hear squealing or see melted edges, your feed rate is probably too slow, or the blade is too dull.
If you see chipping on the top edge, the blade may be lifting the material too aggressively. If you see roughness on the bottom edge, the sheet may not be supported well enough, or the blade may be the wrong type.
Credit: shuntool.com
Cut with the good side facing up
For many table saw cuts, the side facing up gets the cleanest edge. That means if one side matters more for the final project, place that side up. The bottom side may show more small marks because the teeth exit there first.
This is a simple detail, but it matters when the cut will be visible in a finished panel, sign, or cover.
How to avoid cracking and chipping
Getting a cut is easy. Getting a clean cut is the real skill. These small habits make the biggest difference.
Use sharp blades only
A dull blade is one of the fastest ways to damage plexiglass. It creates more heat, more noise, and more force on the sheet. If the blade has cut a lot of wood, check it carefully before using it on acrylic. Resin buildup and dull teeth both reduce cut quality.
Do not rush the feed
People often think faster is safer because the plastic spends less time near the blade. That is only partly true. If you push too fast, the sheet can chip or the saw can bind. If you push too slowly, friction can melt the edge. The right speed is steady and controlled.
Keep the sheet fully supported
Unsupported acrylic can bounce, and bounce causes cracking. This is especially important for thin sheets. Add a sacrificial board or side support if the material is large. The sheet should feel stable before the blade touches it.
Avoid cutting with stress in the material
If the sheet has been stored under tension or curled in one direction, it may crack at the cut line. Let it relax flat before cutting. If you notice existing cracks, do not expect a perfect result. Small flaws often spread during the first pass.
Make one clean pass instead of multiple rough passes
Some people try to score or nibble their way through the material with the saw. That usually leads to edge damage. A single clean pass is usually better than several partial passes. The blade should enter, cut, and leave without hesitation.
| Problem | Likely cause | Better fix |
|---|---|---|
| Small chips on the top edge | Blade too aggressive or feed too fast | Use a finer blade and slow down slightly |
| Melting or smeared edge | Too much heat from slow feed or dull teeth | Replace or clean the blade and keep a steady feed |
| Crack starting at the corner | Sheet stress or poor support | Support the full sheet and let it rest flat before cutting |
| Rough edge after cut | Vibration or blade wobble | Check blade alignment and use a stable fence |
Safety habits that matter every time
Plexiglass can break in sharp pieces, so safety is not optional. The saw can also throw offcuts if the sheet binds or twists. A few habits reduce risk right away.
- Wear eye protection at all times.
- Keep hands away from the blade path.
- Stand slightly to the side of the cut line.
- Use a push stick when needed.
- Do not remove blade guards or safety devices unless your saw design specifically allows and requires a change for the cut.
- Never cut a sheet that feels unstable or too large to control safely.
One practical mistake beginners make is trying to hold the sheet with one hand and guide the fence with the other while standing too close. That body position leaves no room to react if the material shifts. Make your stance comfortable before you start, then keep both hands working from a safe position.
Credit: sawtheory.com
What to do after the cut
Once the cut is done, inspect the edge before moving on. A good edge should be smooth enough for the project without major chips or white stress marks.
Check the edge carefully
If the edge is only slightly rough, you may be able to smooth it with fine sandpaper, a sanding block, or light polishing later. Do not force a bad edge into place during assembly. If the crack has already started, trimming a little more material may be better than trying to hide the damage.
Remove protective film only after cutting
Take off the film after the cut if you still need a clean surface. This helps keep dust and scratch marks away while you handle the piece.
Store the cut piece flat
Do not lean a fresh cut sheet against a wall where it can twist. Store it flat or on a broad, stable support. That prevents edge stress, especially for larger panels.
When a table saw is not the best choice
A table saw works well for straight cuts on medium to thick plexiglass sheets. But it is not always the best tool.
If the sheet is very thin, very small, already cracked, or has a curved cut line, another method may be safer. A scoring tool, jigsaw with the right blade, or router may be better for special shapes. If the cut must be almost perfect and the panel is expensive, some people prefer to have it cut by a plastic supplier.
Here is the simple rule: use the table saw when you need a straight cut and can support the sheet well. Use a different tool when the shape, size, or stress in the material makes control difficult.
Small pro tips that improve the result
These are the details beginners often learn too late.
Clean the blade before cutting
Pitch and dust on the blade can increase friction. A clean blade cuts cooler and smoother. This is a small task, but it can make the edge look much better.
Make a test cut on scrap
If the project is important, test your setup on a scrap piece first. This lets you see if the blade is too rough or too hot without risking the real sheet.
Use a zero-clearance insert if possible
A zero-clearance insert supports the material around the blade opening. That extra support can reduce chip-out at the cut line. It is not mandatory, but it helps when you want cleaner results.
Do not over-clamp the sheet
Clamps are useful, but too much pressure can create stress marks. Tight enough to stop movement is enough. More pressure is not better with acrylic.
Another useful insight: the first inch of the cut and the last inch of the cut are often the most fragile. Start smoothly, and support the offcut side as the blade reaches the end. Many chips happen right at the finish because the sheet drops or twists at the last second.
Final thoughts
Learning how to cut plexiglass on a table saw is really about control. Use a sharp fine-tooth blade, support the sheet well, keep the feed steady, and avoid heat. Those simple steps do most of the work.
If you prepare the sheet carefully and respect the material, the table saw can give you a clean, straight edge with little trouble. The biggest mistakes are almost always avoidable: dull blades, poor support, and rushed cuts. Fix those, and your results improve fast.
Credit: woodworkingadvisor.com
FAQs
Can I cut plexiglass with a regular table saw blade?
You can, but it is not the best choice. A regular rough wood blade may chip the edge and create too much heat. A fine-tooth carbide blade gives cleaner results and lowers the chance of cracking or melting.
Should the protective film stay on while cutting?
Yes, if the film is still in place, leave it on during the cut. It helps protect the surface from scratches and makes handling easier. Remove it after the cut is finished.
Why does my plexiglass melt instead of cut cleanly?
Melting usually means too much heat. The blade may be dull, dirty, or moving too slowly through the sheet. Try a sharper blade, clean the teeth, and feed the material at a steady pace.
What thickness of plexiglass can a table saw handle?
Most table saws can handle common sheet thicknesses if the blade is right and the sheet is supported well. Thicker sheets are easier to control than thin ones, but the key is always a clean blade and stable feed. Very thick or large sheets may need extra support or a different method.
How do I smooth the edge after cutting?
If the edge is only slightly rough, use fine sandpaper or a sanding block with light pressure. Work slowly and check the edge often. For a more polished look, you can move to finer grit or use a plastic-safe polishing method after sanding.
