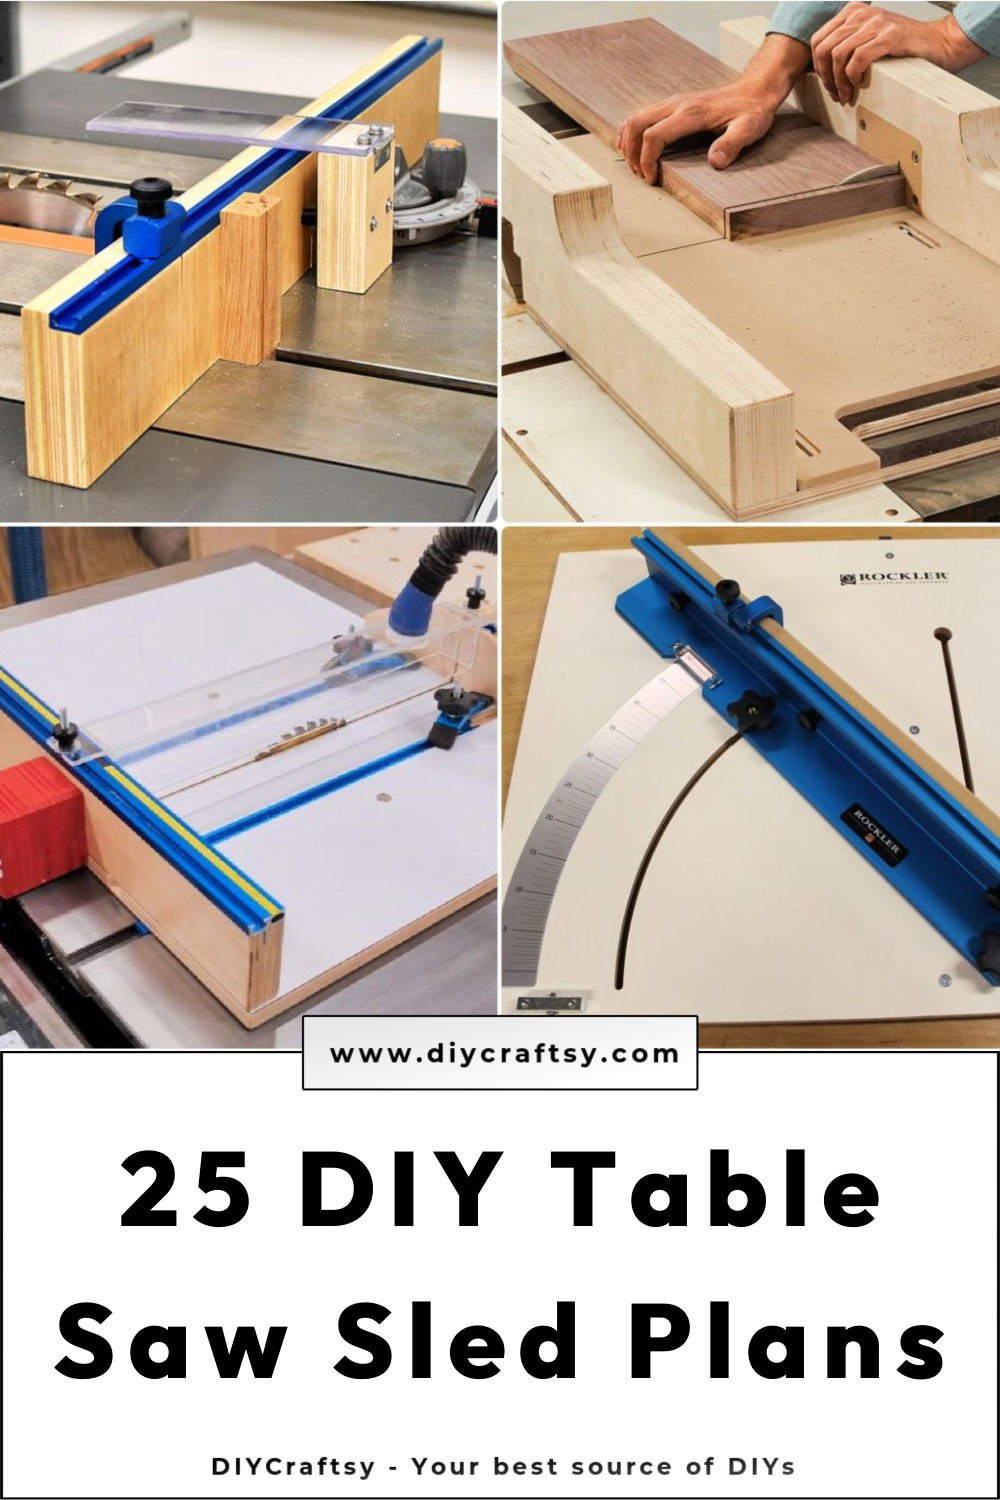
If you want cleaner cuts, safer work, and better repeatability, a table saw sled is one of the best shop upgrades you can build yourself. Many woodworkers buy sleds, but a well-made DIY version often fits your saw better and gives you more control.
Good diy table saw sled plans do more than show where to screw the parts together. They help you build a sled that stays square, glides smoothly, and works for the cuts you actually make. That matters whether you are cutting small parts, square panels, or miters that must match exactly.
This guide walks you through a simple, accurate build process, plus the small details that make a big difference. You will learn what to buy, how to assemble the sled, how to tune it, and how to avoid the mistakes that ruin accuracy.
What a table saw sled really does for your cuts
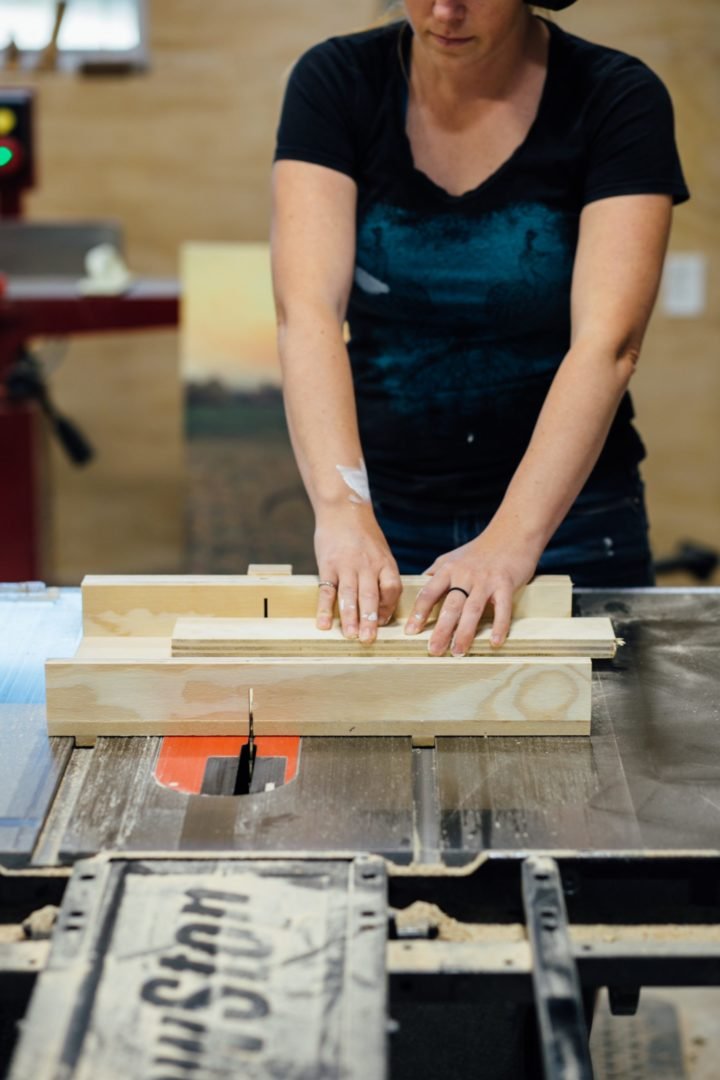
A table saw sled carries your wood through the blade on a stable platform. Instead of pushing a board against the table saw fence alone, the sled moves in the miter slots and holds the workpiece square to the blade. That gives you better control and safer handling, especially with short or narrow pieces.
The biggest advantage is accuracy. A fence alone can drift slightly, and a board can twist if the grain is rough or the piece is small. A sled reduces that movement. It also makes crosscuts more repeatable, which is useful when you need several pieces to match exactly.
One thing beginners often miss is that a sled is not just for 90-degree cuts. With the right setup, you can use it for miters, stop cuts, and even small batch production work. A simple sled can save time in almost every project.
Why build one instead of buying one
Store-bought sleds can be good, but they do not always fit every saw well. Your miter slots may be slightly different. The fence may not align perfectly with your workflow. A DIY sled lets you solve those problems from the start.
It is also cheaper in many cases. If you already have plywood, hardwood scraps, screws, and glue, you can build a very solid sled for much less than a premium model. More important, you can make it the exact size you want.
Materials and tools you need before you start
You do not need fancy parts to build a strong sled. Simple, flat materials are better than expensive ones that move or warp. The main goal is stability.
Here is a practical material setup for most woodworkers:
- Base: 1/2-inch or 3/4-inch plywood, preferably flat cabinet-grade plywood
- Fence: Straight hardwood or quality plywood strip, about 3 to 4 inches tall
- Runner material: Hardwood, UHMW plastic, or aluminum miter bar
- Fasteners: Wood screws, glue, and possibly threaded inserts
- Optional reinforcement: Small brackets or another plywood strip for fence stiffness
For tools, you will need a table saw, drill, measuring tape, square, clamps, screwdriver, and possibly a hand plane or sanding block for fitting the runners. A dial indicator can help, but it is not required.
One non-obvious point: the flatter your base material is, the less tuning you will need later. A bowed sled base can still work, but it will fight you every time you use it. Spend extra time choosing flat stock.
Choosing the right sled size
A full-size sled is useful for cutting panels, but a smaller sled is easier to build and handle. If you mostly cut small parts, a compact sled may be better. If you build furniture, a larger sled gives more support and safety.
For most shops, a medium sled works well. It should extend far enough past the blade to support common workpieces, but it should not feel heavy or awkward. Think about the kind of projects you actually make.
A simple build that gives accurate results
The best diy table saw sled plans are not the most complicated ones. They are the ones that are easy to align, easy to tune, and strong enough to stay square over time. The design below is simple but reliable.
1. Cut the base
Start with a flat plywood base. Cut it so it covers the area in front of the blade and extends enough to support your typical workpieces. If you are unsure, make it slightly larger rather than too small.
Before moving on, check that the base sits flat on your saw table. Any bump, twist, or debris under the base can affect accuracy. This is one of those small details that beginners often overlook.
2. Fit the runners
The runners must slide smoothly in the miter slots without side-to-side play. They should move easily, but not wiggle. A loose runner will ruin the precision of the sled.
If you are using hardwood runners, plane or sand them until they fit. Test them several times in the slot. If they bind, the sled will feel rough. If they are too loose, the sled will shift during cuts.
For many builders, UHMW plastic runners are a smart choice because they resist swelling and slide well. Hardwood can work too, but it must be well seasoned and carefully fitted.
3. Attach the runners to the base
Place the runners in the miter slots and rest the base on top of them. Use small spacers or double-sided tape to hold the base slightly above the table surface while you position it. This keeps the sled aligned with the slots.
Then fasten the runners from above or below, depending on your design. Use glue and screws if possible. Make sure the runners stay straight while the glue sets.
A helpful trick is to check the sled movement before the glue fully cures. Slide it back and forth. If it binds, correct the problem now. Once the glue hardens, small mistakes become harder to fix.
4. Install the front fence
The front fence is the heart of the sled. It must be straight, rigid, and square to the blade. Use a hardwood strip or a laminated plywood fence that will not flex under pressure.
Position the fence so it is far enough from the blade to support the sled body, but not so far away that it adds unnecessary weight. Clamp it in place first. Do not rush this step. If the fence is off even slightly, every cut will reflect that error.
After clamping, attach the fence with glue and screws. Many woodworkers also add a back support rib or another layer for stiffness. That can help keep the fence true over time.
5. Make the first calibration cut
This is where the sled starts becoming accurate. Raise the blade slowly and cut a slot through the sled base. Keep your hands clear and stand to one side of the blade path.
After the slot is cut, test the sled with a small board and check the result with a square. If the cut is not perfectly square, adjust the fence slightly before final tightening. Tiny changes matter here.
Many woodworkers use the “five-cut method” to tune the fence more precisely. It takes a little time, but it can bring your sled very close to perfect. If you want a deep explanation of that method, this guide from Woodgears is a useful reference.
How to make the sled more accurate
Accuracy does not come from the shape alone. It comes from the way the sled is built and tuned. A simple sled with careful setup will often beat a fancy sled that was assembled loosely.
Credit: diycraftsy.com
Check the fence with real test cuts
Do not trust a tape measure alone. Always test the sled with scrap wood. Cut one piece, flip it, and check whether the edges close perfectly. If they do not, the fence needs adjustment.
Using scrap is smarter than using a finished board. It lets you make changes without wasting good material. This is one of the easiest ways to improve your results fast.
Use a zero-clearance insert area
A tight blade opening around the cut helps reduce tear-out. It also supports smaller pieces better. If your sled design allows it, keep the blade slot narrow and clean.
This is especially helpful for plywood and veneered boards. A wide opening can chip the edge more than you expect. Beginners often blame the blade when the real issue is support around the cut.
Strength matters as much as square
A sled that starts square but flexes during use will still give poor results. If the fence bows when you push a board into it, reinforce it. If the base sags, use thicker plywood or add stiffeners.
One useful upgrade is a second fence layer laminated to the first. Another is a support rib along the front edge. These changes do not need to be complex, but they can make the sled last much longer.
Common mistakes that ruin a DIY sled
Most sled problems come from a few simple errors. If you know them early, you can avoid a lot of frustration.
- Using warped plywood: A twisted base will never track well.
- Making the runners too loose: Even a little side play hurts accuracy.
- Rushing fence alignment: A slightly crooked fence means every cut is off.
- Skipping test cuts: Measuring is not enough. Test with real wood.
- Ignoring blade setup: A dull or dirty blade makes tuning harder and cuts rougher.
Another mistake many beginners miss is overbuilding the sled before proving the design. It is better to build a simple version first, test it, and improve it later. That way, you learn what matters most on your own saw.
Credit: google.com
Why the saw itself must be checked too
Even a perfect sled cannot fix a badly tuned table saw. If the blade is out of parallel with the miter slots, or the table surface has debris, the sled will not perform well.
Before blaming the sled, check the saw alignment, blade condition, and slot cleanliness. These small checks can solve problems that look like sled mistakes.
Useful upgrades once the basic sled works
After your first sled proves itself, you can add features that fit your projects better. These upgrades are not required, but they can make the sled far more useful.
Stop block system
A stop block lets you repeat the same cut length many times. This is useful for drawer parts, frame pieces, and batch work. It saves time and keeps parts matching closely.
Hold-down clamp
For small pieces, a clamp can improve safety and control. It keeps the board stable as the blade passes through. This is especially helpful when cutting thin or narrow stock.
Tall auxiliary fence
A taller fence helps support vertical cuts on small parts or stacked work. It also gives you more surface for attaching jigs and stops.
Replaceable sled face
Some woodworkers like to add a replaceable insert near the blade line. When it gets worn, you swap it out instead of rebuilding the whole sled. This is a smart long-term move for busy shops.
How to use the sled safely
A sled improves safety, but only if you use it with good habits. Keep your hands away from the blade path and never reach over the cut line.
Always wait until the blade stops before removing offcuts. Small pieces can be trapped near the blade and kick back if you hurry. A calm pace is safer and usually more accurate too.
Wear eye protection, and avoid loose sleeves or gloves that can catch. If the cut feels forced, stop and check the setup. Do not push through a bad fit.
Safe habits that help every time
- Use a sharp blade matched to the material.
- Keep the sled runners clean and free of sawdust buildup.
- Support long workpieces so they do not tip.
- Use push pressure that is steady, not sudden.
- Check for hidden nails, staples, or screws before cutting reclaimed wood.
When a simple sled is better than a complex one
Many woodworkers think more features always mean better performance. That is not true. In many shops, a simple sled is the best sled.
If your main goal is accurate crosscuts, a clean single-purpose sled is often easier to use than a heavy multi-jig system. It is lighter, faster to align, and easier to store. That matters more than people think, especially in smaller shops.
The smartest approach is to build a reliable base first. Then add only the features you truly need. That keeps the sled useful instead of cluttered.
Simple maintenance that keeps the sled accurate
A well-made sled can stay accurate for years, but only if you care for it a little. Store it flat so the base does not warp. Keep glue squeeze-out and dust off the runners.
Check the fence every so often with a square or a test cut. Wood moves with humidity, and shop use can loosen screws over time. A quick check before a project can save a lot of wasted material.
If the sled starts to drift or feel rough, do not ignore it. Small tune-ups are much easier than rebuilding the sled later.
Credit: mintdesignblog.com
Why these plans work well for beginners
The best diy table saw sled plans are not the most advanced ones. They are the ones that help you build with confidence and get usable results fast. A beginner needs clear steps, simple materials, and room to correct small mistakes.
This style of sled works because it keeps the important parts visible: flat base, fitted runners, rigid fence, and careful calibration. Those are the real accuracy drivers. Fancy extras matter less than people think.
If you build one sled well, you will also understand your saw better. That knowledge helps with future jigs, cabinet work, and repeat cuts. In that way, a sled is not just a tool. It is a skill builder.
A practical final thought before you start cutting
Take your time with the setup, not with the design. A simple sled built with care is often better than a complicated sled built in a hurry. Focus on flatness, fit, and fence alignment first.
If you do that, your sled will feel smooth, square, and dependable. And once you use it for a few projects, you will likely wonder how you ever worked without one.
FAQs
1. What is the best material for diy table saw sled plans?
Flat plywood is usually the best choice for the base. Cabinet-grade plywood is strong and stable. For the runners, hardwood or UHMW plastic both work well if they fit the miter slots closely.
2. How do I know if my sled fence is square?
Cut a piece of scrap wood, flip one side, and check whether the two edges match perfectly. A square alone helps, but a real test cut shows the true result more clearly.
3. Can I make a table saw sled without special tools?
Yes. You can build a useful sled with basic tools like a saw, drill, square, clamps, and measuring tape. Careful fitting matters more than having expensive tools.
4. Why does my sled bind in the miter slot?
The runner may be too wide, slightly twisted, or catching sawdust. Clean the slot, check the fit, and lightly plane or sand the runner until it moves smoothly without side play.
5. How big should a DIY table saw sled be?
The right size depends on your work. A medium sled works well for many shops because it handles common crosscuts without becoming too heavy. If you cut large panels often, a bigger sled may be better.
