If you want a fence that looks neat and stays strong, the posts matter more than almost anything else. A fence can only be as straight and stable as the posts that hold it up. That is why learning how to hammer fence posts the right way can save you time, money, and a lot of repair work later.
This job looks simple from far away. But in real life, one small mistake can make the whole fence lean, twist, or fail in strong wind. The good news is that you do not need to be a master builder to do it well. You just need the right tools, a solid method, and a little care with each post.
In this guide, you will learn how to drive fence posts straight, check depth, avoid common mistakes, and build a fence line that stays firm for years. Whether you are fixing a small yard fence or starting a larger project, these steps will help you work faster and get better results.
Start with the right post and the right ground
Before you swing a hammer, think about the post itself and the ground where it will go. This step is often rushed, but it makes a big difference. Not every fence post is made for hammering into the soil. Some are too thin, some are too weak, and some are better set in concrete instead.
For hammering or driving, metal T-posts, star posts, and some treated wooden posts work well. The soil should also be firm enough to hold the post. Sandy soil, wet soil, and rocky ground can all create problems. If the soil is very hard, you may need to pre-start the hole with a digging bar or auger. If the soil is very soft, the post may need extra support later.
Think about the fence job too. A light garden fence is different from a livestock fence. A tall privacy fence needs more strength than a small wire fence. Choosing the right post type at the start helps you avoid failure later.
Non-obvious tip: Many beginners choose a post that is too short. A fence post needs enough length below ground to resist movement. As a general rule, about one-third of the total post length should stay underground, though soil type and fence height can change this.
Tools and materials you will need
Having the right tools makes the job safer and cleaner. Here is what you should prepare before you begin:
- Fence posts
- Sledgehammer or post driver
- Post level or regular level
- Tape measure
- String line
- Work gloves
- Safety glasses
- Shovel or digging bar
- Wooden block or post cap for hammering wood posts
- Marker or chalk
If you are working with wooden posts, use a protective cap or a block of scrap wood on top while hammering. This helps stop the post top from splitting. For metal posts, a post driver is often better than a sledgehammer because it keeps the force straight and reduces bending.
Mark the fence line before you drive anything
A straight fence starts with a straight line. Do not guess the placement by eye. Even a small shift in the first few posts can make the rest of the fence look crooked. Use a tape measure and string line to mark the full run before you begin hammering.
Start by placing stakes at the end points. Pull a tight string between them. This gives you a clear visual guide. If your fence will turn corners, mark those points carefully too. Check distances between posts before you begin. This helps you keep spacing even from start to finish.
Non-obvious tip: Do not rely on the grass edge, driveway edge, or garden bed as your fence line. Those edges are often uneven. A string line is much more reliable and will help you keep the fence visually straight, even if the ground slopes a little.
Measure post spacing the smart way
Spacing depends on the kind of fence you are building. For many wooden fences, posts are often set 6 to 8 feet apart. For wire or livestock fences, spacing can vary more. Always check the needs of the fence material you plan to attach.
A common mistake is placing posts too far apart to save time or money. That may seem fine at first, but it can weaken the fence and cause sagging. If posts are too close together, you waste material and create extra work. Aim for the spacing that matches the fence design, not the spacing that feels easiest.
| Fence type | Common post spacing | Notes |
|---|---|---|
| Light wire fence | 8 to 12 feet | Depends on wire tension and soil strength |
| Wood picket fence | 6 to 8 feet | Needs good support for rails and panels |
| Privacy fence | 6 to 8 feet | Wind load is high, so strong posts matter |
| Livestock fence | 8 to 12 feet | May need bracing at corners and ends |
Prepare each post before hammering
Before you set a post, inspect it. Straightness matters. A bent metal post or twisted wooden post will make your fence harder to align. Lay each post on a flat surface and look along its length. If it is already bent, do not use it for a visible fence line unless the damage is very small.
Mark the depth on the post before driving it. This gives you a clear stopping point. For most projects, the post should go deep enough to resist movement and frost, if that is a concern in your area. If the soil freezes where you live, post depth becomes even more important.
If you are hammering wooden posts, check the top end for cracks or knots. These weak spots can split under heavy hits. A scrap block on top helps spread the force and protect the wood.
Credit: powertoolstoday.com
Know when hammering is the right choice
Some people try to hammer every type of fence post. That is not always the best idea. Hammering works well when the ground is workable and the post type supports driving. It is not ideal for very large wooden posts, very rocky ground, or fences that need concrete footings for strength.
If you must use brute force on a post that should not be hammered, you can damage the post and still end up with poor alignment. If the soil is too difficult, it is often better to dig a proper hole than to fight the ground.
For more technical guidance on soil conditions and fence stability, a helpful reference is the Purdue Extension, which offers practical land and building advice for property projects.
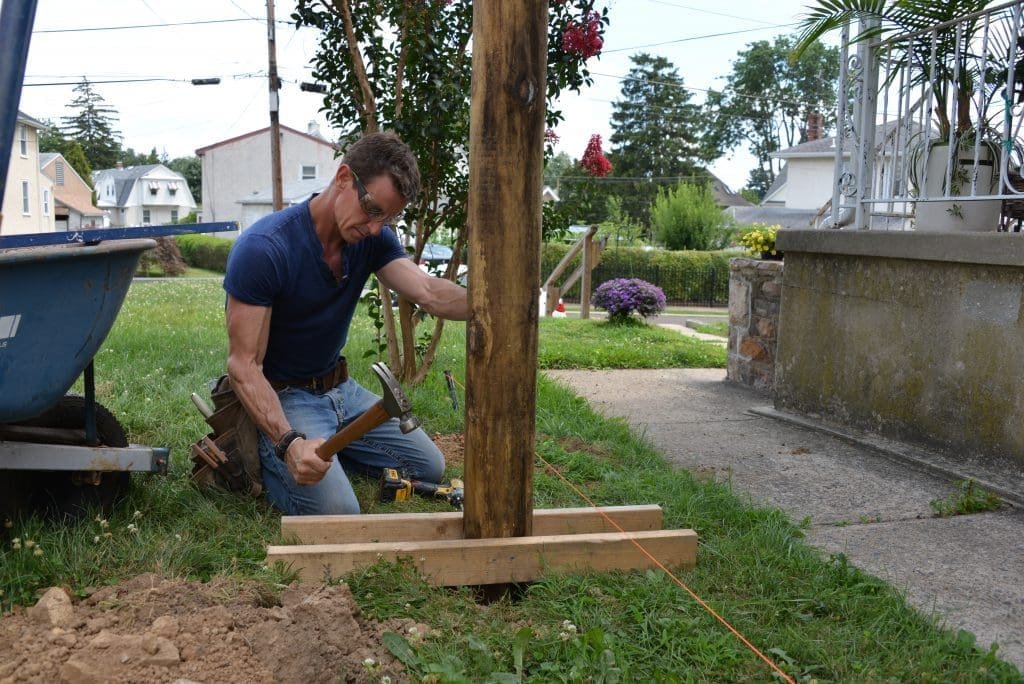
Set the first post with extra care
The first post decides the rest of the line. If it is off by even a little, every other post may follow the same error. Place the first post exactly where it belongs on the string line. Check the height and direction before each strike.
Hold the post steady, or have someone help you keep it upright. Start with light hits to seat the bottom. Then increase force gradually. This is safer than going hard from the start, because it gives you time to correct the angle before the post goes too deep.
After a few strikes, stop and check the level. Look from the front, side, and top if possible. The post should be straight in both directions. Small adjustments are much easier early on.
How to stay straight while hammering
The key is to work in small steps. Strike the post, then check alignment. Strike again, then check again. This may feel slow, but it saves time overall because you avoid pulling and resetting posts later.
Use a level often. A post may look straight from one angle and lean from another. Also watch the string line as you go. The post should sit on the line, not wander away from it.
Non-obvious tip: Do not stare only at the top of the post. The top can be straight while the base is drifting. Always watch the post from farther back too. A few steps away, you can often spot a lean faster than when standing right beside it.
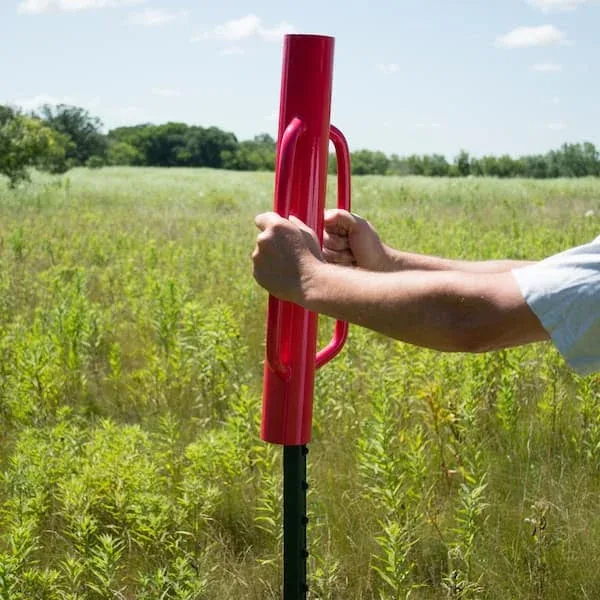
Use the right hammering method for the post type
The best method depends on whether you are using metal or wood. Each one reacts differently to force. Using the wrong approach can bend metal or split wood.
For metal posts
A post driver is usually the best tool. It fits over the top of the post and lets you drive it straight down. This reduces bending and keeps your hands safer than swinging a sledgehammer near the top of a narrow post.
If you use a sledgehammer, hit the post squarely. A side blow can bend the post or drive it off line. Keep your feet stable and use controlled swings. Too much force too fast can make the post lean.
For wooden posts
Use a heavy sledgehammer, but protect the top with a wooden block or a purpose-made cap. Hammering wood directly can split the end and ruin the post. Start with lighter hits to help the post bite into the soil. Once it is standing firm, increase force carefully.
Wood posts often need more checking because they can twist as they go in. If the ground is tough, the post may drift. Adjust early before the post gets too deep.
For rocky or compact ground
If the soil contains rocks or is packed very hard, do not force the post blindly. You may bend metal, crack wood, or create an uneven hole. In this case, use a digging bar to open space first. Sometimes a narrow pilot hole is enough to guide the post straight down.
Do not assume every hard spot is normal. If one location resists badly, move the post a little if the fence layout allows it. A few inches can make the difference between a good install and a damaged post.
Drive each post to the correct depth
Depth matters as much as straightness. A post that sits too shallow will move in wind, rain, or pressure from the fence itself. A post that goes too deep can weaken the visible height and make the fence harder to finish evenly.
Use your mark as a guide, but also think about the fence height and the soil. In softer ground, deeper placement may be needed. In very hard ground, the correct depth may still need a pilot opening first. The goal is a firm post that does not wobble when pushed by hand.
After the post reaches depth, test it. Push it from several sides. A good post should feel solid. A little movement at the top is normal for very tall posts, but the base should not shift.
Common depth mistakes to avoid
One mistake is stopping too early because the post “looks deep enough.” Another is driving too far and making later fence attachment difficult. A third mistake is ignoring local frost depth, which can lift posts over time in colder areas.
These are small errors on day one, but they become big problems later. A fence with weak post depth may lean after heavy rain, strong wind, or seasonal ground movement.
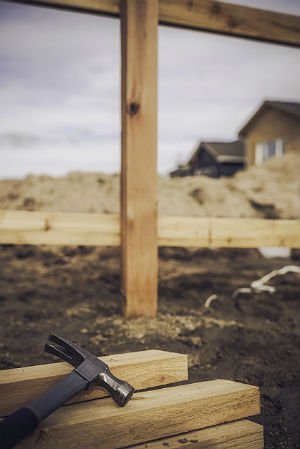
Keep the fence line aligned as you work
Once the first post is set, the rest should follow the same line. Move one post at a time and keep checking the string. This is where patience pays off. A fence line that looks clean from the start will continue to look clean at the end.
Set the next post, check its distance from the first, and then check its angle. If you are working alone, place a temporary brace or use a helper to hold the post while you test it. Avoid rushing through the middle posts. These are the ones that often drift a little without anyone noticing.
On sloped ground, you may need to decide whether the fence will follow the slope or step down in sections. Pick one style and stay consistent. Mixed styles often look messy and cause spacing errors.
Credit: myfixituplife.com
How to correct a post that is off line
If the post is only slightly off and not too deep, pull it out a little and reset it. If it is already deep, you may be able to nudge it with firm pressure before going further. Do not accept a bad angle just because correcting it is annoying. A small correction now is easier than a crooked fence forever.
If a post has bent or split during hammering, replace it. Trying to save a damaged post usually leads to more trouble later.
Finish the job with checks that most beginners skip
Many people stop once all the posts are in. That is not enough. A strong fence build needs a final inspection. Walk the line and check each post for height, angle, and firmness. Sight down the fence to see if the tops are even and if any post leans out of place.
Also check spacing one more time. If you plan to attach panels, rails, or wire, even spacing will make that work much easier. A small adjustment now can prevent problems during the next stage of the build.
Look for signs that the soil around a post is loose. If a post wiggles, tamp the soil firmly around it if needed. In some soils, extra packed dirt around the base can help. In others, you may need a different anchoring method.
When you should not rely on hammering alone
Hammering is useful, but it is not always the full answer. Large gate posts, corner posts, and end posts often need braces or concrete because they carry more force than normal line posts. These posts hold tension, weight, and movement from opening and closing gates.
If you skip bracing on these stress points, the fence may start to pull apart even if the line posts are perfect. This is one of the most common mistakes in fence building.
Safety matters every time you swing
Driving fence posts involves force, balance, and repeated motion. It is easy to forget safety when you are focused on getting the job done. But one bad swing can hurt your hands, feet, or eyes.
Wear gloves to protect your hands from blisters and rough metal edges. Safety glasses help guard against flying dirt or small rock chips. Keep your feet clear of the post base. If you are using a sledgehammer, make sure no one stands too close.
Work in stable shoes with good grip. Wet grass, loose soil, and uneven ground can cause slips. Also be aware of overhead wires, buried lines, and nearby hard objects. Never assume the ground is clear just because it looks open.
Non-obvious tip: Take breaks before your swing becomes sloppy. Fatigue changes your aim. Many fence injuries happen late in the job, when the worker is tired and starts swinging harder to finish faster.
Problems you may face and how to handle them
Even with good planning, a few issues can show up during the job. Knowing how to handle them makes the work less stressful.
Credit: bobvila.com
The post keeps leaning
This usually means the soil is too soft, the driver is hitting unevenly, or the post started off line. Stop early, reset the angle, and check the ground. In soft soil, a wider base or different post type may be needed.
The post will not go down
Rocky ground or compact clay is often the cause. Use a digging bar, pilot hole, or small amount of excavation to make a path. Do not keep pounding blindly. That can bend the post or damage your tool.
The top of the post is damaged
Wood may split, and metal may mushroom or bend. If the damage is small and the post still performs well, you may be able to trim or cap it. If the damage is severe, replace the post before moving on.
Spacing slowly drifts
This happens when measurements are guessed instead of checked. Re-measure each gap before driving the next post. Use a tape measure, not your eye alone.
Why straight posts make the whole fence better
Strong, straight posts do more than hold the fence up. They also make the fence look professional. They help gates close properly, keep wire tension even, and reduce stress on fasteners and rails. A good fence line does not just stand there. It works better over time.
This is why learning how to hammer fence posts is such a useful skill. It improves both the function and the look of the fence. When posts are set well, the rest of the project becomes easier and the finished fence lasts longer.
If you take the time to mark carefully, check each post as you go, and avoid the usual mistakes, your fence will be much more stable. Good post work is quiet work. People usually notice it only when it is done badly. When it is done well, the fence simply does its job for years.
Frequently asked questions
1. How deep should I hammer fence posts into the ground?
Most fence posts should go deep enough that about one-third of the total length is underground. Taller fences, soft soil, and windy areas may need deeper placement. Always think about stability first, not just appearance.
2. Can I hammer wooden fence posts without splitting them?
Yes, but you should use a wooden block or post cap on top while hammering. Start with light strikes and check the post often. If the wood already has cracks or large knots at the top, replace it before driving.
3. Is a post driver better than a sledgehammer?
For metal posts, a post driver is often better because it keeps force straight and reduces bending. For wood posts, a sledgehammer can work well if you protect the top. The best tool depends on the post type.
4. What is the biggest mistake when hammering fence posts?
The biggest mistake is starting without a clear line or checking alignment often. A post that is slightly off at the beginning can throw the entire fence out of shape. Always use a string line and level.
5. When should I stop hammering and dig a hole instead?
If the soil is full of rocks, too hard, or too soft to hold the post well, digging a hole may be the better choice. You should also switch methods for large corner posts, gate posts, or any post that needs extra strength and bracing.
