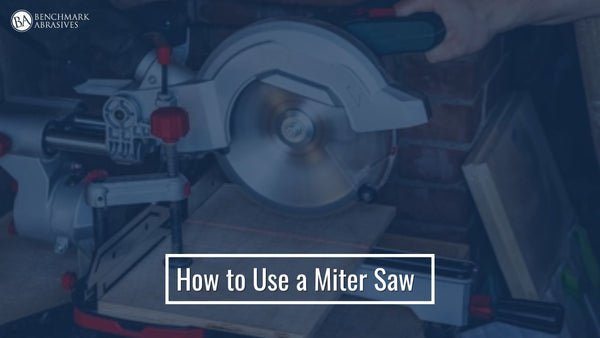
If you are new to woodworking or home projects, learning how to use a miter saw can save you time and give you cleaner cuts. This tool looks simple, but it can do a lot. It can make fast crosscuts, angle cuts, bevel cuts, and repeat cuts with good accuracy.
The first time many beginners use a miter saw, they focus only on the blade. That is a mistake. Safe setup, good measuring, and proper body position matter just as much. When you learn the right habits early, the saw becomes much easier to use and much safer too.
In this guide, you will learn the basic parts of the saw, how to set it up, how to make common cuts, and how to avoid beginner mistakes. By the end, you will have a clear process you can follow with confidence.
Know the saw before you make a cut
A miter saw is made for cutting wood quickly and accurately. Most beginners use it for trim, framing lumber, shelving, and simple project parts. The blade moves down in a controlled way, which makes it easier to get square and angled cuts than using a hand saw.
Before you start cutting, it helps to understand the main parts of the tool. This makes the controls feel less confusing and helps you work more safely.
Main parts you should recognize
- Blade: The round cutting disc that does the work.
- Blade guard: A cover that moves away as you lower the blade.
- Handle: The part you hold while cutting.
- Fence: The back guide that holds your wood straight.
- Base or table: The flat part where the wood sits.
- Miter scale: Shows the angle for left and right cuts.
- Bevel scale: Shows the tilt angle of the blade.
- Clamp: Holds wood in place on some models.
There are also different types of miter saws. A basic saw makes straight crosscuts and miter cuts. A compound saw can tilt for bevel cuts too. A sliding miter saw can move forward and back, which helps cut wider boards. For beginners, any of these can work well if you understand the basics.
Set up the saw the right way
Good setup is not a small detail. It affects cut quality, safety, and comfort. A saw that moves while cutting can give bad results or create danger. Take a few minutes to prepare the area before you switch it on.
Place the saw on a steady surface
Put the saw on a workbench, miter saw stand, or other solid surface. It should not wobble. If the saw is not stable, the blade may pull the wood or cause rough cuts. If you work with long boards, support both sides of the saw with stands or rollers.
Check the blade
Make sure the blade is sharp, clean, and made for the material you are cutting. A dull blade burns the wood and makes the saw harder to control. For most wood projects, a fine-tooth blade gives smoother cuts than a rough-framing blade.
Use the right safety gear
- Safety glasses: Protect your eyes from dust and chips.
- Hearing protection: Miter saws are loud.
- Dust mask or respirator: Helpful when cutting a lot of wood.
- Closed-toe shoes: Better protection around tools and boards.
Also keep loose sleeves, jewelry, and long hair away from the blade. This sounds basic, but it is one of the most important habits you can build.
Clear the cutting area
Remove loose tools, scrap pieces, and anything that could block the board. Good lighting matters too. You need to see the cut line clearly before the blade comes down. A cluttered area often leads to poor positioning and mistakes.
Measure and mark with care
Many beginners think the saw does the hard part. In truth, most cutting problems start before the blade moves. If your measurement is wrong, the cut will be wrong no matter how well you use the saw.
Measure twice, cut once
Use a tape measure and a pencil or fine marker. Mark the exact place where you want the cut. For trim or molding, mark the cut on the visible side so you do not confuse the waste side and the finished side.
Pay attention to the blade side
One beginner mistake is forgetting that the blade removes material. The cut line should match the edge of the blade, not the center. On most saws, this difference is small, but on detailed work it matters. It is smart to make a small test cut on scrap wood if you are unsure.
Support the board before marking
If the board is bent, twisted, or moving around, the measurement can change after you cut. Lay the material on a flat surface and keep it steady while marking. This is especially important for trim and finishing work.
Learn the basic cuts
Once your saw is set up and your wood is marked, you are ready to make cuts. Start with simple cuts first. That gives you control and helps you build confidence before trying angles or bevels.
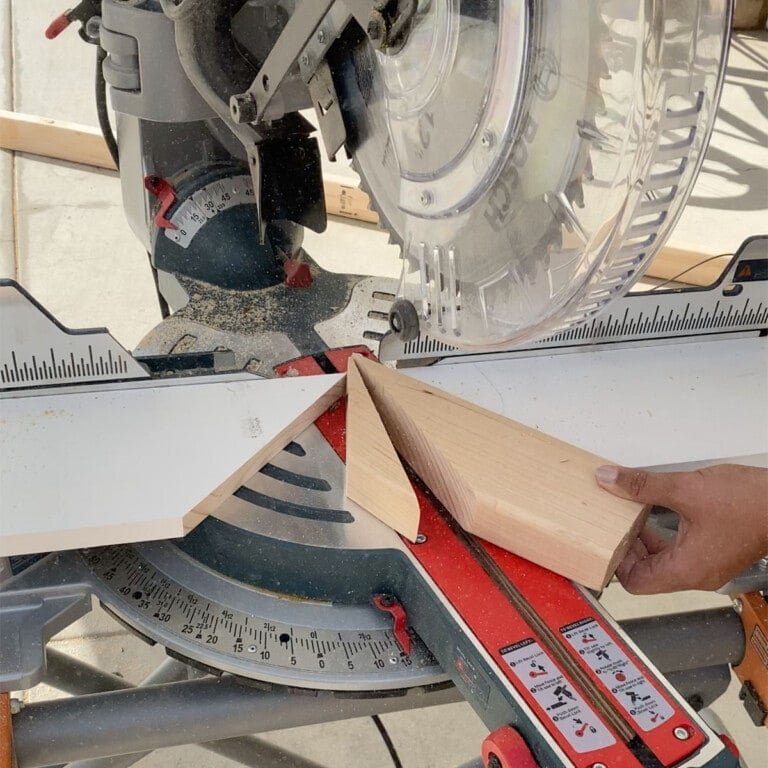
Credit: benchmarkabrasives.com
Make a straight crosscut
A crosscut is the simplest cut. It cuts straight across the width of the board.
- Unplug the saw if you are adjusting it.
- Set the board flat on the base and tight against the fence.
- Line up the blade with your mark.
- Hold the board firmly or clamp it.
- Start the saw and let the blade reach full speed.
- Lower the blade smoothly through the wood.
- Keep the blade down until it stops moving.
- Raise the blade and remove the board after the blade fully stops.
Do not force the blade through the wood. Let the saw do the work. Pushing too hard can cause rough edges and may throw the blade off line.
Make a miter cut
A miter cut is an angled cut across the face of the board. It is common for picture frames, trim corners, and decorative work.
- Set the saw head angle using the miter scale.
- Lock the angle in place if your saw has a lock.
- Place the board flat against the fence and base.
- Align the blade with the marked line.
- Cut slowly and keep the board steady.
A small but important detail: always confirm whether the angle is left or right. Many mistakes happen because the saw is set correctly, but in the wrong direction.
Make a bevel cut
A bevel cut tilts the blade while the board stays flat. This is common for angled edges and some compound cuts.
- Adjust the bevel angle on the saw.
- Keep the board flat on the base.
- Check that the board will not move during the cut.
- Lower the blade smoothly and finish the cut without forcing it.
Bevel cuts can feel harder at first because the blade angle changes the way the wood is removed. Work slowly until you feel comfortable.
Make a compound cut
A compound cut combines a miter angle and a bevel angle. This is common in crown molding and other finish carpentry work. It can look confusing at first, so begin with simple scrap pieces before cutting your final material.
When you use a compound cut, make sure you know which side of the board faces up, which side touches the fence, and where the finished face should be. A small mistake in position can create a cut that looks wrong even if the angles are correct.
Use the saw safely every time
If you want to learn how to use a miter saw well, safety habits matter as much as cutting skill. Most accidents happen when people rush, reach too close, or lose focus for one second.
Keep your hands away from the blade path
Always place your hands far from the cutting line. Hold the board against the fence, but never near the blade. If a piece is too short to hold safely, use a clamp or cut a longer piece first and trim it later.
Wait for the blade to stop
Do not lift the saw head or remove the board while the blade is still spinning. Wait until it stops completely. This is a simple habit, but it prevents many injuries.
Never cut without support
Long boards can shift, sag, or twist. If the board moves while cutting, the blade can bind or the cut can become uneven. Support both ends of long stock so the wood stays level.
Be careful with small pieces
Small cutoffs can move around easily. They can get trapped by the blade or become dangerous if your hand is too close. After a cut, clear away small offcuts before starting the next one.
For official safety guidance on power tools, you can also review this helpful resource from the Occupational Safety and Health Administration.
Get cleaner cuts with a few simple habits
Good results do not come only from the saw itself. They come from small habits that improve accuracy. These are the details beginners often miss.
Let the blade reach full speed before cutting
If you lower the blade too soon, the cut can start rough. Waiting for full speed gives a cleaner entry into the wood.
Use a smooth motion
Move the blade down in one steady motion. Jerky movement can leave rough marks, especially on soft wood and finish trim.
Keep the board tight against the fence
This is one of the most important points. If the board is not fully against the fence, the angle can shift during the cut. Even a small gap can affect accuracy.
Cut on the waste side of the line
When the cut line matters, always cut slightly outside the finished piece. You can trim more later, but you cannot add wood back. This is a simple way to avoid short cuts.
Test important cuts on scrap
Before cutting expensive trim or project pieces, test the angle on scrap wood. This saves time and material. It is especially useful for compound angles and repeated trim work.
Non-obvious tip: If your cuts are slightly off even though your marking is correct, the problem may be the fence or saw alignment, not your measuring. A saw can drift out of square over time, so checking calibration from time to time is smart.
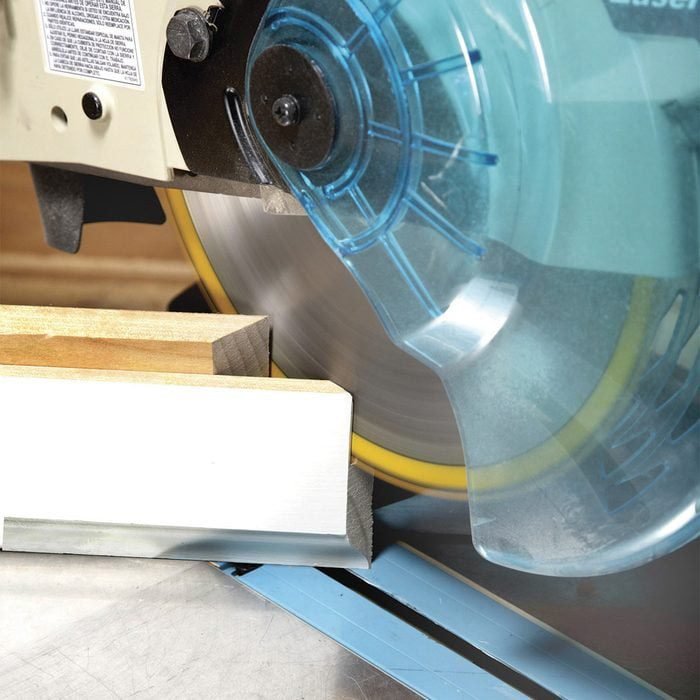
Common beginner mistakes to avoid
Most first-time users make a few predictable errors. The good news is that they are easy to fix once you know what to watch for.
Credit: anikasdiylife.com
Using a dull blade
A dull blade causes burning, rough edges, and extra effort. If the saw seems to struggle, do not keep pushing. Check the blade condition first.
Forgetting to lock the angle
If the miter or bevel angle is not locked, the setting can shift during the cut. That leads to a bad result and can also be unsafe.
Holding the board too close to the blade
Some beginners try to hold the wood right next to the cut line. That is dangerous. Keep your hands well away and use clamps when needed.
Cutting with the wrong side facing up
This mistake is common in finish work. Always think about the visible side and which edge should stay clean. A reversed board can waste a good piece of material.
Rushing the cut
Fast is good, but rushed is not. A miter saw is designed for efficiency, yet accuracy still depends on calm, controlled movement.
Second non-obvious tip: When cutting trim or molding, label the back side of the board before you start. It sounds small, but it helps you keep track of the orientation when several pieces look similar.
How to handle different materials
Miter saws are usually used for wood, but some models and blades can handle other materials too. Always check the saw and blade rating before cutting anything new.
Softwood and pine
These are easy to cut, but they can splinter if the blade is dull or the board moves. Use a sharp blade and a steady feed.
Hardwood
Hardwood is denser and may need a slower, smoother cut. A blade with more teeth often gives a better finish.
Molding and trim
These pieces can be small and awkward. Keep the finished face in the correct position and use scrap pieces for practice if you are not sure about the angle.
Composites and engineered boards
These materials may cut cleanly, but some create more dust. Wear a mask and keep the saw area clean.
Keep the saw in good condition
A clean, well-maintained saw cuts better and lasts longer. This does not need to be complicated.
- Unplug the saw before cleaning or adjusting it.
- Remove sawdust from the base and fence.
- Check that the blade guard moves freely.
- Inspect cords and plugs for damage.
- Replace worn blades when cuts start to feel rough.
Dust buildup can make the saw harder to read and use. It can also block the wood from sitting flat. A quick cleanup after each project helps a lot.
Practice with simple cuts first
The best way to build skill is to start with simple practice pieces. Use scrap wood and try a few straight cuts, then angle cuts. Watch how the blade enters the wood and how the board reacts.
As you practice, ask yourself three questions: Did the board stay against the fence? Did the blade cut smoothly? Was the measurement correct? These small checks help you improve faster than guessing.
If a cut does not look right, do not assume the saw is broken. First check the board position, the angle setting, the blade condition, and your measurement. Most problems come from setup, not the machine itself.
Credit: familyhandyman.com
A simple workflow you can follow
If you want an easy routine, use this order every time:
- Set up the saw on a stable surface.
- Check the blade and safety gear.
- Measure and mark the wood clearly.
- Set the angle if needed.
- Place the board flat and tight against the fence.
- Hold or clamp the wood securely.
- Start the saw and wait for full speed.
- Lower the blade smoothly through the cut.
- Wait for the blade to stop before lifting it.
- Check the cut before moving to the next piece.
This routine may seem simple, but it helps you avoid rushing. It also makes each cut more repeatable, which is the real value of a miter saw.
Final thoughts for new users
Learning how to use a miter saw is not about memorizing fancy terms. It is about building a few solid habits: measure carefully, keep the wood stable, use the right angle, and cut with control. Once these steps feel natural, the saw becomes one of the most useful tools in your workshop.
Start small. Practice on scrap. Focus on safety and clean setup. With a little patience, you will make better cuts and feel much more confident on your next project.
FAQs
1. What is the first thing I should do before using a miter saw?
First, check that the saw is stable, the blade is in good condition, and your work area is clear. Then put on safety glasses and hearing protection before making any cut.
2. Can a beginner use a miter saw safely?
Yes. A beginner can use a miter saw safely by following basic rules: keep hands away from the blade, hold the wood firmly, wait for the blade to stop, and never rush the cut.
3. What kind of blade should I use?
For most wood projects, a sharp fine-tooth blade gives cleaner cuts. The best blade depends on the material you are cutting, so check the blade type and tooth count before starting.
4. Why are my miter saw cuts not square?
The most common reasons are poor board positioning, a dull blade, or a saw that is not calibrated correctly. Make sure the wood is tight against the fence and check the saw setup if cuts keep coming out off.
5. Do I need a sliding miter saw as a beginner?
No, not always. A standard miter saw is enough for many home projects. A sliding saw is helpful for wider boards, but it is not required to learn the basics.
