If you want to start simple craft projects, home fixes, or small DIY repairs, learning how to use a hot glue gun is a smart first step. It is one of the easiest tools for beginners, but it still needs careful use. Hot glue can burn skin, damage surfaces, and create messy results if you rush.
The good news is that a hot glue gun is not hard to master. With the right setup, the right glue sticks, and a few safe habits, you can make clean, strong bonds on many materials. You can use it for crafts, decorations, fabric projects, school work, and quick repairs around the house.
This guide will show you how to use a hot glue gun safely and effectively, what mistakes to avoid, and how to get better results from the very first project.
What a hot glue gun does and why beginners like it
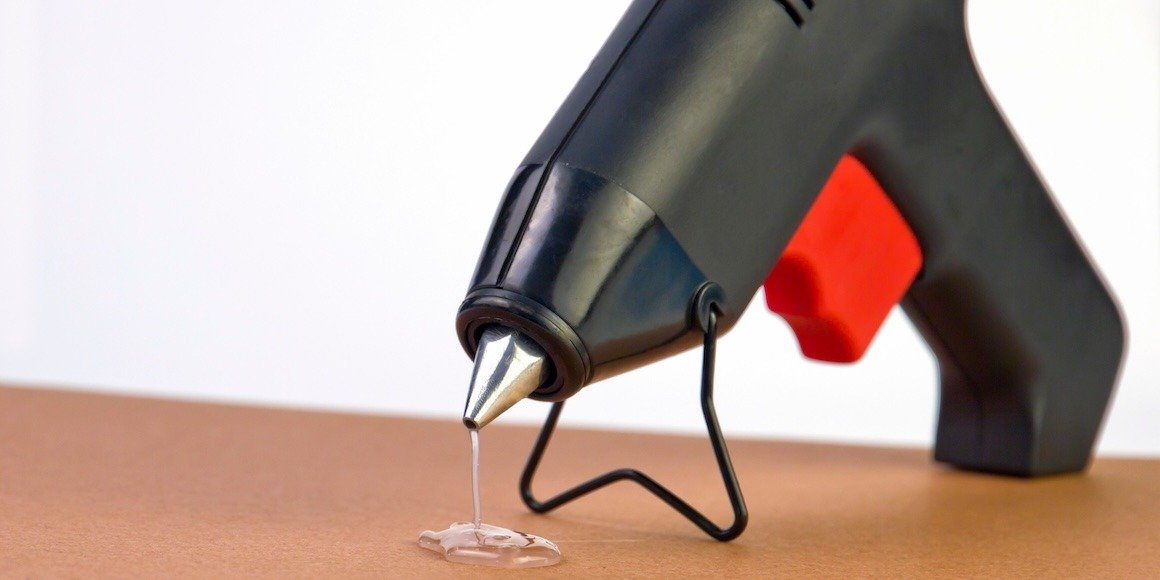
A hot glue gun heats a solid glue stick until it turns into liquid glue. When you press the trigger, the melted glue comes out through the nozzle. After that, it cools and hardens very fast. This fast drying time is the main reason many people love it.
It is useful for small jobs where speed matters more than perfect strength. For example, it works well for crafting, light repairs, gift wrapping, floral work, costume work, and school projects. It is also popular because it is easy to learn. You do not need special skills to start.
Still, there is one thing beginners often miss: hot glue is not the best choice for every surface. It is strong on many porous materials like cardboard, wood, fabric, and foam, but it may not hold well on very smooth or oily surfaces like glass, metal, or some plastics. Knowing this before you start saves time and frustration.
Common types of hot glue guns
Before you learn the steps, it helps to know that glue guns are not all the same. Most beginner models are either low-temperature or high-temperature.
- Low-temperature glue guns melt glue at a lower heat. They are safer for children’s crafts and delicate materials like ribbon, foam, and thin fabric.
- High-temperature glue guns create a stronger bond and work well for wood, thicker materials, and many home projects. They can burn more easily, so extra care is needed.
- Dual-temperature glue guns let you switch between both settings. These are a great choice if you want one tool for different project types.
If you are just starting out, a low-temp or dual-temp model is often the easiest and safest choice.
What you need before you begin
Set up everything first. This makes the process smoother and safer. A hot glue gun heats quickly, so you should not search for supplies after it is already hot.
- A hot glue gun
- Glue sticks that fit your gun
- A heat-safe work surface, like a silicone mat or old cardboard
- Scissors or a craft knife for trimming materials
- Safety glasses if tiny glue strings may fly around
- A small scrap piece for testing the glue flow
One beginner mistake is using the wrong size glue stick. Glue sticks come in different diameters, and they must match the gun. If the size is wrong, the gun may jam or feed poorly. Check the package before buying.
Another smart step is to keep a dry cloth or paper towel nearby for cleanup. But do not use your hand to remove hot glue. Wait until it cools first.
How to use a hot glue gun step by step
Once your workspace is ready, using the gun becomes easy. The key is to work in a calm, steady way.
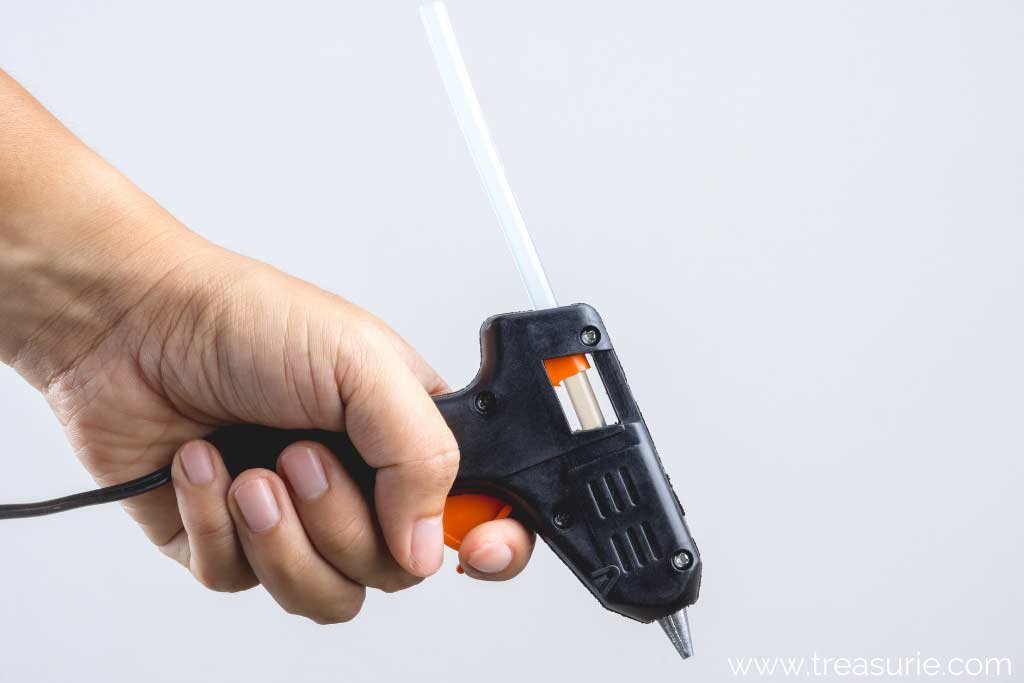
- Insert the glue stick. Push one glue stick into the back of the gun until it stops. Do not force it. If it does not slide in easily, the size may be wrong.
- Place the gun on its stand. Many glue guns come with a small wire stand or base. Use it so the hot nozzle does not touch your table.
- Plug it in and let it heat. Wait about 3 to 5 minutes for most small glue guns. Some larger models need more time. The glue should look shiny and start to soften.
- Test the flow on scrap material. Press the trigger gently until a small bead of glue comes out. This helps you see if the glue is ready.
- Apply glue to one surface. For most projects, a thin line or a few small dots work better than one large blob.
- Press the pieces together quickly. Hot glue sets fast, often within seconds. Align the pieces before you press them down.
- Hold for a short time. Keep the pieces still until the glue grips. A few seconds is often enough.
- Unplug when done. Let the gun cool fully before storing it.
Here is the most important beginner tip: hot glue is fast, so planning matters more than speed. If you are unsure where the pieces should go, dry-fit them first without glue. This avoids wasted glue and crooked results.
How much glue should you use?
Less is often better. Too much glue can squeeze out from the sides, create a rough look, and slow down drying. A small amount gives a cleaner finish and is usually strong enough for light projects.
For wide surfaces, use several thin lines or dots instead of one thick line. This helps the glue spread better and makes the bond more even.
Simple rule for beginners
If the glued pieces are thin and light, start with a small amount. If the material is heavier or rougher, use slightly more. But avoid overloading the joint. A neat glue line is usually stronger than a messy lump.
Safety rules you should never skip
Hot glue can cause real burns. Even a small drop can hurt if it lands on skin. That is why safety is not optional.
- Never touch the nozzle. It is the hottest part of the gun.
- Keep fingers away from the glue bead. Fresh glue looks soft, but it is very hot.
- Use the stand when possible. A gun lying on its side can burn surfaces or cause accidents.
- Work in a clear area. Remove papers, cords, cloth, and clutter from the immediate space.
- Do not leave it plugged in alone. Unplug it when you step away, even for a short time.
- Keep away from children unless supervised. Low-temp models are safer, but still not toy-safe.
If glue gets on your skin, do not pull it off while hot. Run cool water over the area and let the glue harden, then remove it gently if needed. Pulling hot glue away can tear skin.
Also, hot glue can drip. This is normal. To reduce drips, keep the gun upright when not in use and avoid squeezing the trigger too hard. Many beginners press too much and then wonder why glue keeps leaking.
For more general product safety guidance, the U.S. Consumer Product Safety Commission offers helpful information on safe home product use.
Credit: blog.baysupply.com
How to get stronger, cleaner results
Learning how to use a hot glue gun well is not only about safety. It is also about getting neat, lasting results. The difference often comes from small details.
Prep the surface first
Hot glue sticks best to clean, dry surfaces. Dust, oil, or moisture can weaken the bond. Wipe the area before gluing. If you are working with wood or cardboard, make sure it is dry and flat.
Warm the material if needed
Cold materials can make hot glue harden too fast before it bonds properly. This is a small detail beginners often miss. If your room is very cold, or you are working outside, the glue may cool too quickly. In that case, work a little faster and use thinner glue lines.
Match the glue to the material
Not all glue sticks are the same. Some are made for general craft work, while others are designed for stronger adhesion, clear finish, or flexible bonding. If your project needs more hold, choose the right type instead of blaming the gun.
Common material pairings
- Cardboard and paper: Use a small amount. Too much can soak through.
- Fabric and ribbon: Low-temp glue is often better because it reduces damage.
- Wood: High-temp glue usually gives a stronger bond.
- Foam: Low-temp glue helps prevent melting.
- Plastic: Test first. Some plastics bond poorly.
One useful habit is to hold the two surfaces together firmly for a moment after pressing. This improves the bond more than adding extra glue.
Common mistakes beginners make
Most problems with hot glue are easy to avoid once you know what to watch for.
| Mistake | Why it causes problems | Better approach |
|---|---|---|
| Using too much glue | It creates mess, weak edges, and longer cleanup | Use a thin line or small dots |
| Waiting too long before joining parts | The glue starts to harden before it bonds | Press pieces together right away |
| Using the wrong glue stick size | It can jam the gun or feed badly | Check the size before buying |
| Skipping surface prep | Dust and oil weaken the hold | Clean and dry the surfaces first |
| Trying to force a weak material bond | Some surfaces simply do not hold well | Test first or use another adhesive |
Another less obvious mistake is using hot glue for load-bearing jobs. It is excellent for crafts, decoration, and light repairs, but it is not a replacement for wood glue, epoxy, screws, or heavy-duty construction adhesives.

Credit: istockphoto.com
How to clean up hot glue safely
Cleanup is easier if you stay patient. Never try to wipe hot glue immediately with your fingers. That is the fastest way to get burned.
Let small drips cool first. Once hard, many pieces can be peeled off from smooth surfaces. If needed, use a plastic scraper or your fingernail to lift the edge gently. On fabric, let the glue fully harden, then flex the fabric to crack the glue off carefully.
If glue lands on the nozzle, allow the gun to cool before cleaning. Some residue around the tip is normal, but heavy buildup can block the flow. A dry cloth or gentle scraping after cooling usually helps.
For your work surface, using a silicone mat, baking sheet, or scrap cardboard can save a lot of cleanup time. This small habit makes projects much less stressful.
How to store a hot glue gun the right way
Safe storage helps your tool last longer. It also prevents accidents the next time you use it.
- Unplug the gun and let it cool fully.
- Leave the glue stick inside if the model allows it.
- Wipe off any loose glue after cooling.
- Store it in a dry place away from children.
- Keep glue sticks in a sealed bag or box so they stay clean.
If the gun has a loose cord or removable stand, keep those parts together. Missing parts make the tool less safe and less convenient to use later.
Easy project ideas for first-time users
Once you understand the basics, start with small projects. Easy projects help you practice glue control without much pressure.
- Making card decorations
- Attaching ribbon to gift boxes
- Fixing loose craft pieces
- Building simple school models
- Adding fabric trims to handmade items
- Creating small floral arrangements
Start with light, low-risk materials. This lets you learn how fast the glue sets and how much pressure you need. After a few tries, your hands will naturally become steadier.
Credit: blog.treasurie.com
Final tips that make a big difference
If you remember only a few things, remember these. First, prepare before heating the gun. Second, use less glue than you think you need. Third, press the pieces together quickly and hold them steady. Fourth, respect the heat.
Beginners often think skill comes from using more glue. In reality, better results usually come from better timing, cleaner surfaces, and calmer movement. That is what makes a project look neat instead of rushed.
Hot glue is simple, but it rewards careful habits. Once you know how to use a hot glue gun properly, you can move from basic crafts to more useful DIY work with confidence.
FAQs
1. How long does it take for hot glue to dry?
Hot glue usually sets within seconds and becomes firm very quickly. Full strength may take a few minutes, especially on larger or thicker glue lines.
2. Can I use a hot glue gun on fabric?
Yes, hot glue works on many fabrics, especially for crafts and temporary fixes. Low-temperature glue is usually safer for delicate fabric because it reduces the chance of damage.
3. Why is my hot glue gun leaking glue?
Some dripping is normal because the glue is melted. If it leaks a lot, the gun may be too hot, overfilled, or squeezed too hard. Keeping it upright helps reduce drips.
4. What should I do if I burn my finger with hot glue?
Run cool water over the area right away. Do not pull the glue off while it is still hot. Let it harden first, then remove it gently if needed.
5. Is a hot glue gun safe for kids?
Only with close adult supervision. Low-temperature models are safer than high-temperature ones, but the nozzle and glue can still burn skin.
