If you have ever wished for a cleaner, safer, and faster way to cut long boards, a miter saw table can change your workshop life. It gives your saw a fixed home, supports long stock, and helps you make repeat cuts with much better accuracy. That means less lifting, less wobble, and fewer mistakes.
The good news is that you do not need a fancy shop to make one. With simple plywood, basic tools, and careful measuring, you can build a strong workstation that fits your space and your saw. This guide will show you how to build a miter saw table step by step, even if you are not an advanced woodworker.
Along the way, you will learn a few details many beginners miss, like how important fence height is, why the saw deck must match your cutting line, and how to keep long supports flat without making the whole table bulky.
What a good miter saw table should do
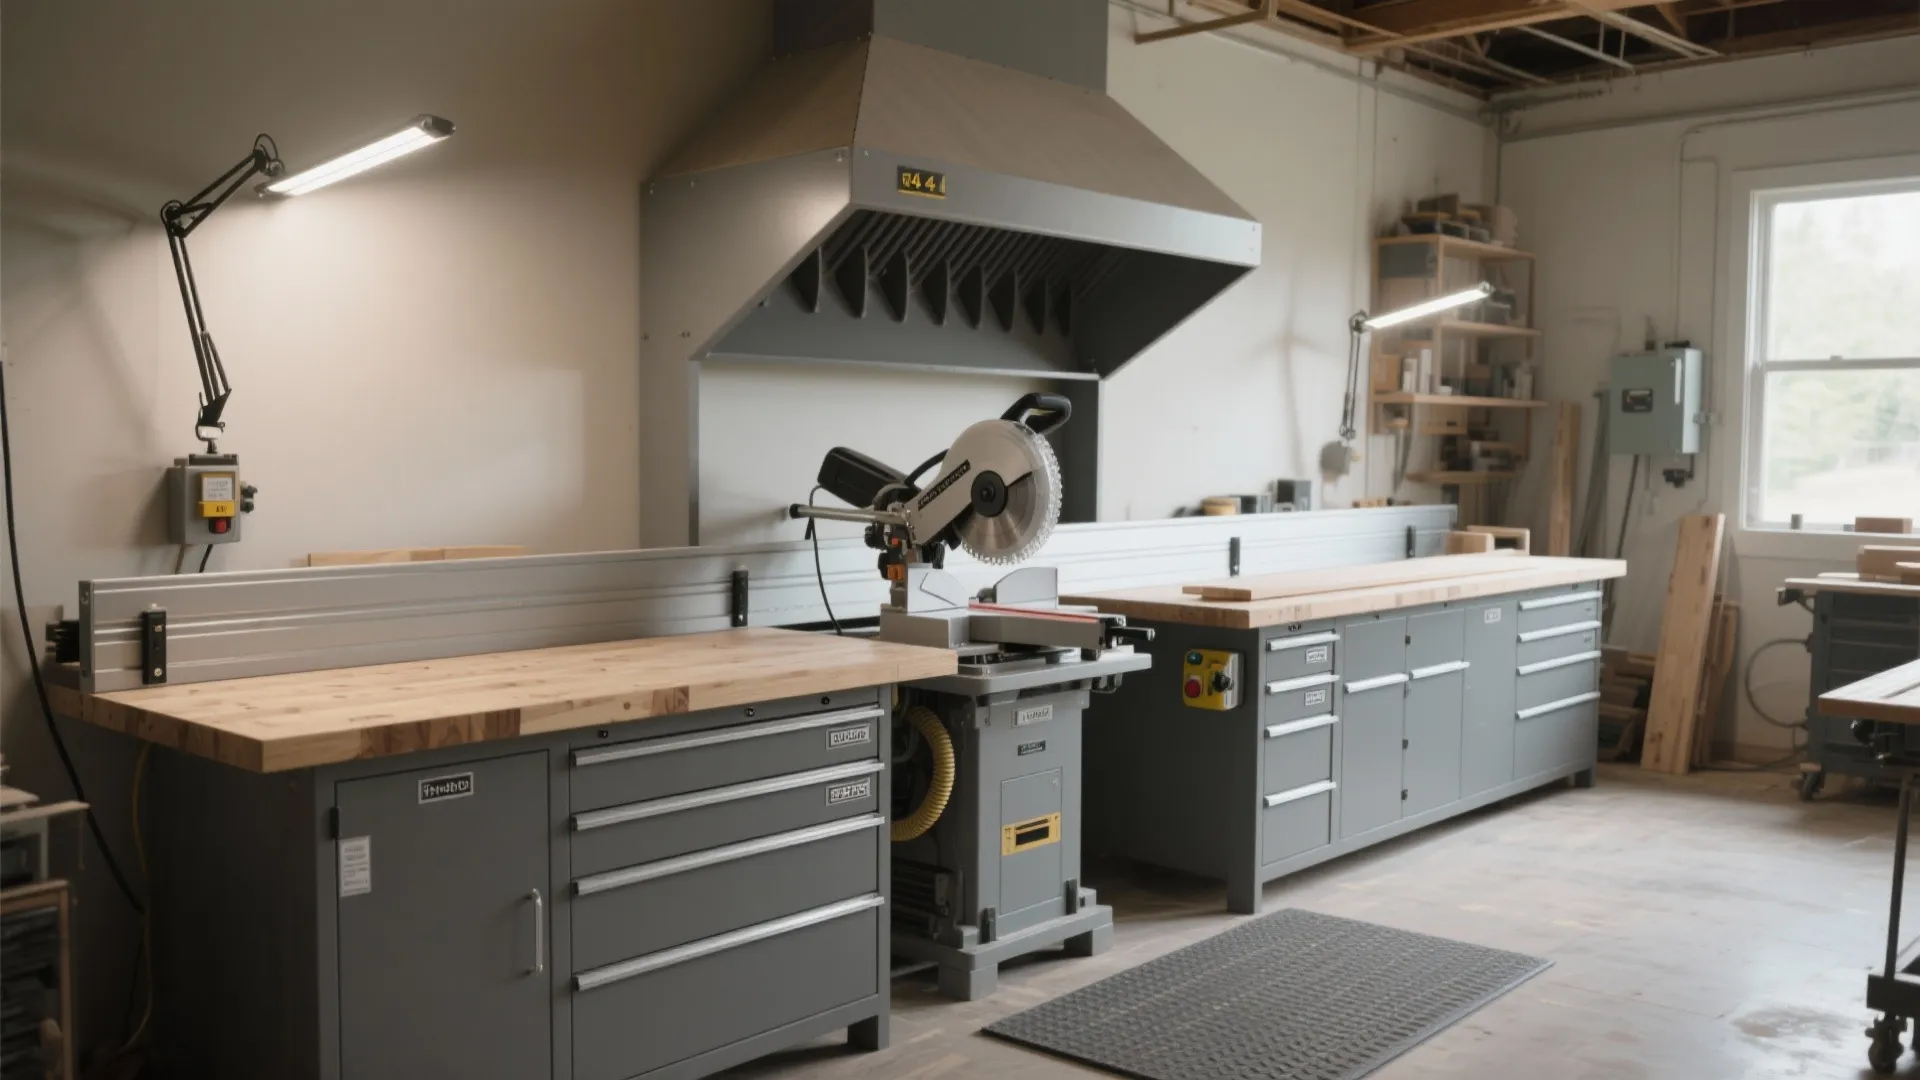
A miter saw table is more than a flat surface with a saw mounted on it. It should help you work better, not just hold the tool. The best designs do four things well: they support long boards, keep cuts aligned, offer storage, and stay stable during use.
Before you start cutting wood, think about how you will use the table. Will it stay in one place? Do you need it to roll? Do you cut trim, framing lumber, or wide boards? Your answers change the size and layout.
A smart design usually keeps the saw at the center with support wings on both sides. These wings can be fixed or foldable. The table height should feel comfortable when you stand in front of it. If the surface is too high, your cuts feel awkward. If it is too low, you bend too much and tire faster.
One detail beginners often miss is the relationship between the saw bed and the support surfaces. The board should stay level from left to right when it rests on the table. If the supports sit too high or too low, your cut line can shift slightly as you slide long stock into the blade.
Materials, tools, and a simple plan
You do not need expensive materials to build a solid miter saw table. Plywood, construction lumber, screws, and a few brackets are usually enough. If you want a smoother and longer-lasting build, you can use hardwood trim on the edges, but that is optional.
Here is a practical material list for a basic setup:
- 3/4-inch plywood for the top and cabinet parts
- 2×4 lumber for the frame
- 1×4 or 1×3 lumber for fence parts and trim
- Wood screws, 1 1/4-inch and 2 1/2-inch
- Construction adhesive, optional but helpful
- Cabinet hinges if you want fold-down wings or storage doors
- Leveling feet or shims if your floor is uneven
- Finish nails or brad nails for trim work
Useful tools include a circular saw or table saw, drill, clamps, tape measure, square, level, sander, and a miter saw for the build itself. A pocket-hole jig can help, but it is not required.
If you want a reference for safe saw use, the OSHA website is a good authority for basic workshop safety ideas. Safety matters here because a miter saw table is built around a powerful cutting tool, and good layout is part of safe use.
Basic dimensions to consider
There is no single perfect size, but this simple starting point works for many garages and small shops:
| Part | Common size | Why it works |
|---|---|---|
| Main table height | 34 to 36 inches | Comfortable for most adults standing at the saw |
| Table depth | 24 to 30 inches | Enough support without wasting floor space |
| Wing length | 24 to 72 inches each side | Longer wings support trim and boards better |
| Fence height | 4 to 6 inches above table surface | Supports stock while leaving blade clearance |
These numbers are starting points, not rules. The best size depends on your saw and the boards you cut most often.
Measure your saw first
This is one step you should never skip. Many DIY builds fail because the saw is not measured before the table is made. Every miter saw has a different base size, handle shape, and cutting range. If you assume the dimensions, you may build a table that blocks the blade swing or leaves the fence too low.
Place the saw on a flat surface and measure the base width, depth, and total height. Then check how far the blade and guard move when you tilt and rotate the saw. Also measure where the blade lands at 90 degrees and at your most used angles. Those numbers help you position the table opening correctly.
Here is another detail many beginners miss: some saws need extra room behind the blade for the dust chute or rear rails. If you build the table too tight, the saw may fit at first but become hard to clean or service later.
Mark the center point of the blade on the saw base. That mark becomes your main alignment guide when you install the saw in the finished table. If the centerline is off, every cut will be slightly off too.
Build the base frame
The base frame carries the full weight of the table, the saw, and your workpieces. It must be stiff, square, and level. A simple 2×4 frame works very well for most home shops.

Credit: thepowertoolwebsite.com
Cut the frame parts
Cut two long side rails and several cross pieces. The exact lengths depend on your table size, but the goal is a rectangle with support where the saw will sit. Add at least one extra cross brace directly under the saw area. That is the zone where weight and vibration are highest.
Assemble the rectangle
Lay the pieces on a flat floor if possible. Check the corners with a square before driving screws. If the frame is not square now, the top will fight you later. Use clamps to hold the pieces tight while you fasten them.
For stronger joints, predrill screw holes so the wood does not split. Apply a small amount of construction adhesive if you want extra stiffness. This is especially useful if your frame will hold heavy stock or drawers.
Add legs or cabinets
You can build simple legs from 2x4s or make cabinet-style sides from plywood. Legs are quicker. Cabinets give you storage. If you plan to store blades, clamps, or fasteners, cabinet sides are worth the extra time.
Make sure the frame sits level. If the floor is uneven, install leveling feet or prepare to use shims during final setup. A table that rocks slightly will make accurate cuts harder.
Make the top and saw opening
The top surface needs to be flat, durable, and easy to replace if needed. Plywood is the most common choice. A 3/4-inch top is strong enough for most builds, and you can double it up around the saw area if you want more support.
Cut the top panels
Cut the main top panel to size and dry-fit it on the frame. Then mark the saw opening carefully. You want enough room for the blade, guard, and dust chute, but not so much room that debris falls everywhere or the saw shifts.
A clean way to do this is to mount the saw roughly where it belongs, raise the blade slowly by hand with the saw unplugged, and trace the safe opening area. Do not rush this part. A careful opening saves you from later adjustments.
Install the saw flush with the top
The saw base should sit flush with or slightly above the surrounding top. The goal is smooth board movement. If the saw is too low, boards dip as they cross the cut line. If it is too high, the stock catches on the edges.
Use thin shims under the saw base if needed. Take your time and check with a straightedge across the top and onto the saw base. This is one of the most important steps in learning how to build a miter saw table that cuts accurately.
Fasten the top securely
Screw the top down from underneath so the surface stays clean. Space the screws evenly and avoid overtightening, which can distort the plywood. If your design includes removable saw mounting boards, make sure they are fixed firmly enough that they do not shift during use.
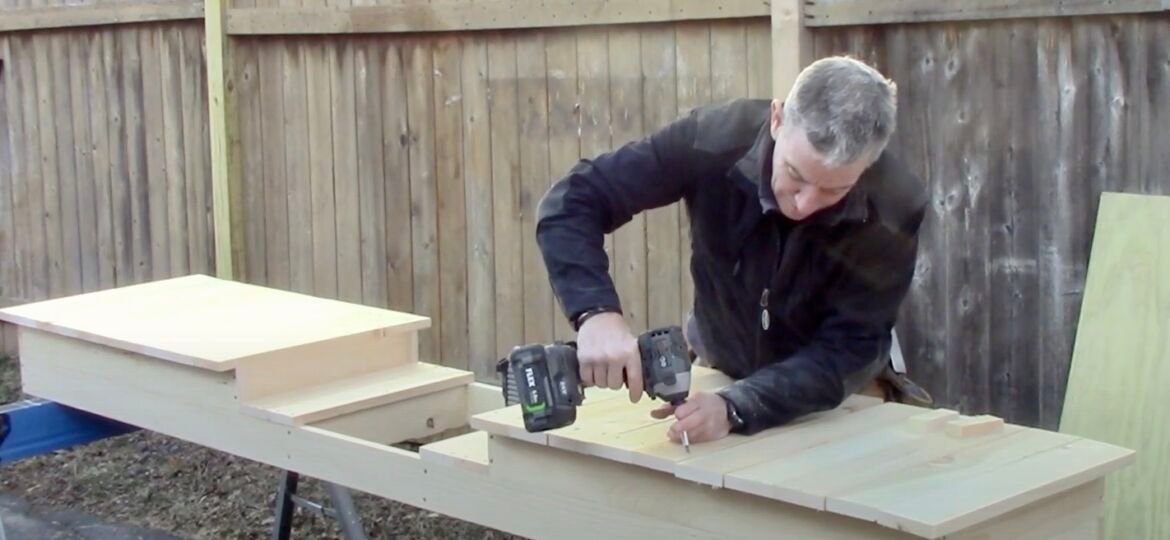
Build support wings for long stock
Support wings are what make the table truly useful. They hold long boards level before and after the cut. Without them, you will struggle with trim, baseboard, and long lumber.
Each wing should match the height of the saw table exactly. Even a small difference can cause the board to lift or dip while cutting. That can affect accuracy and may also make the saw feel harder to control.
You can build fixed wings from plywood tops on simple frames. Another option is folding wings if space is tight. Folding wings save floor space, but fixed wings are usually more rigid. If you cut large amounts of trim often, rigidity matters more than storage convenience.
One beginner mistake is making wings too narrow. A narrow wing may support only the immediate area near the blade. A wider wing gives you room for stop blocks, measuring tools, and longer stock. If space allows, plan for at least 24 inches on each side, and more if you regularly cut long material.
Add a flat fence
The fence helps keep the workpiece square and steady. Use straight lumber or plywood strips and make sure the fence faces are dead straight. Any bow or twist can transfer into the cut.
If you want a cleaner setup, make the fence in two parts so you can remove a center section behind the blade. This leaves room for the saw travel and dust clearance. It also makes it easier to replace a damaged section later.
Stop blocks can save time
Stop blocks are a small upgrade that make a big difference. They let you cut many pieces to the same length without measuring each one again. Attach a stop block to the fence or wing using a clamp track, T-track, or a simple bolt slot.
This is especially helpful for trim jobs and repeated framing cuts. Just remember to use a stop block only on pieces that do not need the saw to cut all the way through the stop zone.
Plan for dust and power
A miter saw creates a lot of dust. If your table design ignores dust control, the surface gets dirty fast and the saw area becomes harder to see. Good dust planning makes the whole workstation better.
Start by leaving clear space behind the blade for the dust chute. If possible, connect the saw to a shop vacuum using the correct adapter. Even basic vacuum collection helps a lot. You do not need a perfect dust system, but every bit of capture improves visibility and cleanup.
Also think about power routing. Add an outlet strip or mount a power strip to the side of the table, not where the blade or moving stock can hit it. Keep cords short and tidy. Loose cords are easy to snag when you are handling long boards.
Another small but valuable idea is a shelf below the saw for storing the vacuum hose and extra clamps. That keeps the top cleaner and reduces clutter around the cut area.
Credit: coohom.com
Finish the surface for daily use
Before calling the build done, smooth the edges and seal the surfaces. Sand any sharp corners that could catch your clothes or scratch your workpieces. A light finish on the top helps glue, paint, and dust clean off more easily.
You can use paint, polyurethane, or a simple shop-grade seal coat. Dark paint on the fence can make cut marks easier to see, while a lighter top can help you spot dust and sawdust buildup faster.
If your table will live in a damp garage, sealing the plywood edges is especially important. Plywood edges absorb moisture more quickly than the flat surface. A little edge protection can extend the life of the whole table.
Do not make the finish slippery. The table should be smooth, but stock still needs grip. Avoid wax-heavy finishes on the main support surfaces if they make boards slide too easily.
Set up and calibrate the table
This final setup stage is what turns a homemade frame into a useful tool station. Even a well-built table needs calibration. Start with the saw unplugged. Check that the blade is square to the fence and that the fence is square to the top surface.
Use a reliable square and test on scrap wood. Make a 90-degree cut, flip one piece, and check if the edges match cleanly. If there is a gap, adjust the saw or fence until the cut is correct.
It also helps to mark a permanent zero line on the fence and top. That mark becomes your reference point for future setup and blade changes.
Before full use, test the table with a long board. Slide it across both wings and watch for dips, bumps, or snag points. Fix these problems now, not after you start a project.
Common mistakes to avoid
- Building the table before measuring the saw.
- Making the wings a different height from the saw bed.
- Using plywood that is too thin for the frame.
- Forgetting dust clearance behind the saw.
- Skipping the square check during assembly.
- Mounting the saw so tightly that blade movement is blocked.
These mistakes are easy to avoid, but hard to fix after the table is finished. A few extra minutes of measuring can save hours later.
Simple upgrades that improve the table
Once the basic table works, you can improve it in small ways over time. A drawer for blades and hardware keeps tools close. A measuring tape stuck to the fence can speed up repeat cuts. A T-track in the wing makes stop blocks easier to adjust.
Some woodworkers add removable inserts around the blade area. That way, if the insert gets damaged, they can replace it without rebuilding the whole table. This is a practical choice if you cut a lot of different materials.
Another smart upgrade is a dedicated shelf for offcuts. Small pieces often pile up on the table, then get in the way. A simple bin under the workstation solves that problem.
If your shop is small, consider making the side wings fold down. That keeps the same cutting setup but frees up walking space when the saw is not in use.
Why this build is worth the effort
Learning how to build a miter saw table is not just about saving money. It is about making your work more accurate and less tiring. A good table supports the board, reduces mistakes, and gives your saw a permanent, safer place to work.
It also changes how you think about repeat tasks. Instead of fighting your tools, you work with them. That is a big deal in woodworking, even for simple home projects. Once the table is built and adjusted, cutting trim, shelves, or framing pieces becomes smoother and faster.
The biggest advantage is consistency. A stable table gives you the same setup every time you walk into the shop. That consistency is what helps beginners improve quickly and lets experienced users work with less stress.
Credit: myfixituplife.com
Final thoughts before you start cutting
Keep the design simple on your first build. A strong frame, a flat top, correct saw placement, and level support wings are more valuable than fancy extras. If you get those basics right, your table will already be a major upgrade.
Take your time with the measurements. Check every surface before fastening it. If something feels off, stop and correct it. That habit will give you a better result than rushing through the build.
Most of all, build for the kind of work you really do. A miter saw table should match your space, your saw, and your projects. When it does, the whole workshop feels more organized and easier to use.
FAQs
1. What is the best height for a miter saw table?
Most people find 34 to 36 inches comfortable, but the best height depends on your body and how you work. Stand naturally beside the saw and see where your hands rest. The table should let you place boards without bending too much.
2. Can I build a miter saw table from plywood only?
Yes, you can build much of the table from plywood, especially the top, sides, and cabinets. Many builders still use 2×4 lumber for the frame because it adds strength and is easy to work with. A full plywood build is possible if the design is well braced.
3. How do I make sure the saw is flush with the table?
Place the saw on the surface and use a straightedge across the top. Add shims under the saw base until the saw bed matches the support surfaces. Check this from left to right and front to back.
4. Do I need foldable wings on both sides?
No. Fixed wings are stronger and simpler. Foldable wings help if you have limited space, but they add hardware and more moving parts. Choose the version that fits your shop and how often you use the saw.
5. What is the most common mistake when building this table?
The most common mistake is poor alignment. If the saw, fence, and support wings are not level and square, cuts will not be accurate. Measure carefully, test with scrap wood, and adjust before you finish the build.
