
Using a nail gun can save a lot of time on framing, trim work, flooring, fencing, and many other projects. But speed is only helpful when you stay in control. A nail gun is a powerful tool, and one small mistake can cause a painful injury or a ruined piece of wood.
If you are learning how to use a nail gun, the goal is not just to drive nails fast. The real goal is to work with clean results, steady control, and safe habits every time. That means knowing your tool, choosing the right nails, setting the right air pressure or battery power, and keeping your hands and body away from danger zones.
This guide walks you through the full process in a simple way. You will learn how to prepare, how to fire the nail gun safely, how to get better results, and how to avoid the mistakes that beginners often make.
Understand Your Nail Gun Before You Start
Before you pull a trigger, learn what kind of nail gun you have. Different models work in different ways. Some use compressed air. Some use batteries. Some are designed for heavy framing, while others are made for finishing and trim.
The tool’s power, size, and nail type all affect how you use it. A framing nailer is stronger and often drives larger nails into thick lumber. A brad nailer or finish nailer is lighter and better for delicate woodwork. If you use the wrong tool for the job, the nail may bend, sink too deep, or split the material.
Read the manual before you begin. It may seem boring, but it gives you the exact details for your model. If you want a general safety reference from a trusted source, the Occupational Safety and Health Administration has useful guidance on tool safety and workplace hazards.
Main parts you should know
Most nail guns have a few key parts. Knowing them helps you control the tool better.
- Trigger — activates the nail gun.
- Safety tip or contact nose — must press against the work surface on many models.
- Magazine — holds the nails.
- Depth adjustment — controls how deep the nail goes.
- Air connector or battery pack — powers the tool.
- Jam release — lets you clear stuck nails.
Know the firing modes
Many nail guns offer more than one firing mode. This matters a lot for safety and control.
- Sequential mode: You must press the safety tip and then pull the trigger for each nail. This is safer and better for beginners.
- Bump mode: The tool fires when you hold the trigger and bump the nose against the surface. This is faster, but it is easier to make mistakes.
If you are still learning how to use a nail gun, start in sequential mode whenever possible. It gives you more control and reduces accidental firing.
Gather the Right Safety Gear and Work Area Setup
Good safety starts before the tool is turned on. A clean, stable work area makes the job safer and more accurate.
Wear eye protection every time. Even small nails can bounce, and wood chips can fly. Hearing protection is smart too, especially with framing nailers and long work sessions. Gloves can help with grip, but choose gloves that still let you handle the tool well.
What to wear
- Safety glasses or a face shield
- Hearing protection
- Close-fitting clothes
- Non-slip shoes
Avoid loose sleeves, jewelry, or anything that can catch on the tool or material.
Prepare the work area
- Clear the floor of cords, scraps, and loose nails.
- Make sure the material is flat and supported.
- Keep bystanders, children, and pets away.
- Work in good lighting so you can see the nail line clearly.
One mistake beginners often miss is poor support under the material. If the wood moves while you nail, the nail may go in at an angle or split the piece. Use clamps or a solid workbench whenever you can.
Choose the Right Nails and Set the Tool Correctly
The nail gun and the nails must match. Using the wrong size or type can jam the tool or damage the material. Check the nail length, gauge, and style recommended by the manufacturer.
For example, finish work may need thinner nails to avoid visible damage. Framing work usually needs larger, stronger nails. Outdoor projects may need galvanized or stainless nails to resist rust.
Credit: wikihow.com
Before loading nails
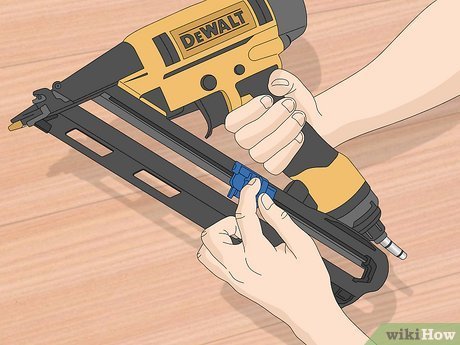
- Disconnect power or air supply.
- Open the magazine according to the manual.
- Insert the correct nail strip facing the right direction.
- Close the magazine fully.
- Check that the nails move smoothly inside the track.
Another detail beginners often miss is nail angle. Some nailers use straight strips, while others use angled strips. If the angle does not match, the nails will not feed properly. This is one of the most common causes of jamming.
Set depth before you begin work
Depth adjustment controls how far the nail goes into the wood. Test it on a scrap piece first. You want the nail head to sit flush or slightly below the surface, depending on the project.
If the nail sits too high, the wood may not hold well. If it goes too deep, it can damage the surface and weaken the joint. Start with a medium setting and fine-tune from there.
| Project type | Common nailer type | Depth goal |
|---|---|---|
| Framing | Framing nailer | Flush or slightly recessed |
| Trim and molding | Finish nailer | Just below the surface |
| Craft and light trim | Brad nailer | Flush without splitting |
| Flooring | Floor nailer | Secure with consistent spacing |
Hold the Nail Gun the Right Way
Good control begins with a strong, balanced grip. Hold the main handle firmly with your dominant hand. Keep the tool flat and aligned with the surface before firing. Do not tilt it unless the tool and job specifically require that angle.
Your other hand should stay far from the firing point. Never place your free hand behind or near the spot where the nail may come through. This sounds obvious, but it is one of the most dangerous beginner mistakes.
Body position matters
Stand with your feet stable and your body slightly to the side, not directly behind the tool. If the nail misfires or the tool recoils, this position gives you better control.
Do not stretch too far to reach a spot. Move your body or the workpiece instead. Overreaching makes the tool less stable and increases the chance of a slip.
Keep your focus on the nail line
Before each shot, pause and look at the exact point where the nail should enter. A nail gun is not a “spray and pray” tool. Even when working fast, each shot should be deliberate.
Step-by-Step: How to Use a Nail Gun Safely
Here is a simple process you can follow for most nail gun jobs. The exact details may vary by model, but the basic workflow stays the same.
Inspect the tool. Check for damage, loose parts, leaks, or a stuck nail. Never use a broken tool.
Put on safety gear. Wear eye protection and other gear before loading the tool.
Load the correct nails. Make sure the strip matches the tool’s size and angle.
Connect power or air. Attach the battery, plug in the charger if needed later, or connect the air hose firmly.
Set pressure or power level. Start low and adjust based on test shots. Too much power can drive nails too deep or damage the wood.
Test on scrap wood. Fire several nails into the same type of material you will use in the project.
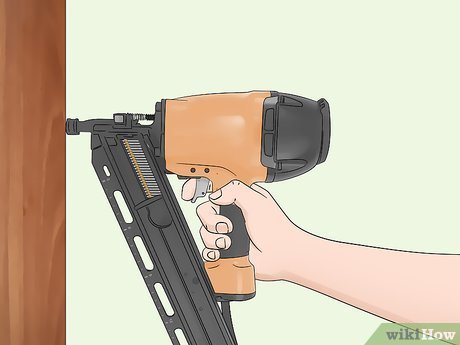
Place the nose of the tool firmly. Press it flat against the surface where the nail should go.
Fire one nail at a time. In sequential mode, press the trigger only after the safety tip is fully in place.
Check every shot. Look at the nail depth and alignment before moving to the next point.
Disconnect the tool when done. Remove power or air before clearing jams, changing nails, or storing it.
This simple method helps you build safe habits. It also teaches you to pay attention to the tool instead of rushing through the work.
Use the Right Firing Technique for Better Results
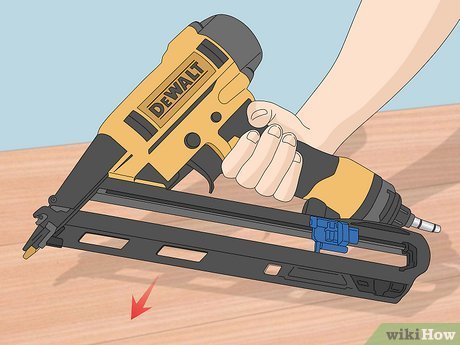
Many people think nail guns are all about speed. In reality, the best results come from steady technique. Hold the tool square to the surface. Press it firmly so the contact tip is fully engaged. Then fire without jerking the tool.
When working on trim or finish wood, slight movement can change the final result. A small tilt may send the nail out of line. If you are doing precision work, take your time and place each nail carefully.
Credit: wikihow.com
When to use sequential mode
Use sequential mode for most jobs if you want safer, more controlled placement. It is better for beginners, detailed trim work, and jobs close to edges or corners.
When bump mode makes sense
Bump mode can help with large projects like framing, where speed matters and the nail line is wide and simple. Even then, only use it if you already have good control and enough experience to avoid accidental firing.
A key insight many beginners miss is that fast nailing often creates more cleanup later. A slightly slower pace usually gives a better final result and fewer repairs.
Avoid Common Nail Gun Mistakes
Learning what not to do is just as important as learning the proper steps. These mistakes cause many accidents and poor results.
- Using the wrong nail size — this can jam the tool or damage the material.
- Pointing the tool at any part of your body — never even for a second.
- Bypassing the safety tip — this removes a major layer of protection.
- Firing without firm contact — this can cause double fires or skipped nails.
- Nailing near knots or edges without care — this can split wood.
- Using too much pressure — this can sink the nail too deep or leave marks.
- Ignoring jams — forcing the tool can make the problem worse.
Another non-obvious issue is angle placement near edges. Wood is more likely to split when the nail goes too close to the edge or when the grain runs in a weak direction. If possible, test the area first or shift the nail slightly inward.
How to Clear Jams and Maintain the Tool
Jams happen even with good tools. What matters is how you respond. Never try to clear a jam while the tool is still connected to power or air. Disconnect it first, then follow the manual.
- Turn off the tool or remove the battery.
- Disconnect the air hose if it is pneumatic.
- Open the jam release or nose area carefully.
- Remove the bent nail with the right tool if needed.
- Check the magazine and driver blade for damage.
- Close the tool fully before reconnecting power.
Regular maintenance keeps the tool safe and reliable. Wipe off dust after use. Check for loose screws. Store the nail gun in a dry place. If your model uses air, drain the compressor line when needed to reduce moisture buildup.
Simple maintenance habits
- Clean the nose and magazine after each project.
- Inspect the trigger and safety tip often.
- Keep nails dry and free from rust.
- Replace worn seals or damaged parts quickly.
A well-maintained nail gun fires more consistently, which also makes it safer. Poor maintenance often shows up as weak shots, frequent jams, or uneven nail depth.
Finish the Job the Right Way
When your work is done, disconnect the power source and remove the nails before storing the tool. This is not just a good habit. It reduces the chance of accidental firing during transport or storage.
Inspect your work. Check whether the nails are seated properly and whether any boards shifted during nailing. If you used finish nails or brads, fill the nail holes if the project needs a clean look. If you see a bent nail or a split board, fix it now instead of leaving a weak point behind.
For the best long-term results, store the nail gun in its case or a dry cabinet. Keep it away from moisture, heavy dust, and children. A safe storage routine is part of learning how to use a nail gun the right way.
Credit: wikihow.com
Quick reference for safer, cleaner nailing
These simple habits can make a big difference on almost any project.
- Always wear eye protection.
- Use the right nail size and nail type.
- Test on scrap wood before starting.
- Keep both hands away from the firing zone.
- Choose sequential mode if you want better control.
- Disconnect power before clearing jams or changing nails.
- Check depth settings often during the job.
Good nail gun work is not about rushing. It is about repeatable control. Once you build the right habits, the tool becomes much easier and safer to use.
FAQs
1. What is the safest way to learn how to use a nail gun?
The safest way is to start with the manual, wear eye protection, use sequential mode, and practice on scrap wood before working on your real project. Keep your free hand away from the firing area at all times.
2. Can I use a nail gun without wearing goggles?
No, you should not. Small nails, wood chips, and dust can fly back toward your face. Safety glasses are a basic part of nail gun safety.
3. Why does my nail gun keep jamming?
Common causes are the wrong nail size, bent nails, low pressure, dirty parts, or a damaged magazine. Always disconnect the tool before clearing a jam.
4. Should I use bump mode or sequential mode?
Sequential mode is usually better for beginners because it gives more control and lowers the chance of accidental firing. Bump mode is faster, but it is less forgiving.
5. How do I know if the nail depth is correct?
Test on scrap wood first. The nail head should usually sit flush or slightly below the surface, depending on the project. If it is too deep or too high, adjust the depth setting and test again.
