
Concrete walls are strong, but they can feel difficult when you want to add storage or organize a garage, basement, workshop, or utility room. Pegboard is a smart solution because it gives you flexible wall storage without taking up floor space. Once it is mounted well, you can move hooks, bins, and tools around anytime you need.
If you are wondering how to hang pegboard on concrete wall, the good news is that the job is very doable with the right anchors, drill bit, and layout plan. The important part is not just attaching the board. It is making sure the board sits flat, stays secure, and leaves enough space for hooks to work properly.
This guide walks you through the full process in simple steps. You will learn what materials to use, how to prepare the wall, how to drill into concrete safely, and how to avoid common mistakes that can make pegboard weak or uneven.
What You Need Before You Start
Before you drill a single hole, gather everything first. This saves time and helps you work more accurately. Concrete does not forgive mistakes easily, so preparation matters more than speed.
For a basic pegboard installation on concrete, you will usually need:
- Pegboard panels
- Concrete drill or hammer drill
- Masonry drill bit
- Concrete screws or masonry anchors
- Screwdriver or drill driver bit
- Level
- Tape measure
- Pencil or marker
- Safety glasses
- Dust mask
- Spacers or furring strips if needed
If you want a stronger setup, use furring strips between the pegboard and the concrete wall. This creates a small gap behind the board, which lets pegboard hooks fit correctly. Without this space, many hooks will not lock in properly.
Why the gap behind the board matters
This is one detail many beginners miss. Standard pegboard hooks need room to slide into the holes and hook behind the board. If the pegboard is mounted flat against concrete, the hooks may pop out or sit too loose. A small gap, often about 1/2 inch to 3/4 inch, makes the system work much better.
That gap can be created with wood furring strips, plastic spacers, or a pre-made mounting frame. If you plan to hang heavier tools, a support frame is often the safest choice.
Choose the Right Pegboard and Mounting Method
Not all pegboard is the same. The board material, thickness, and mounting style affect how well it works on concrete.
The most common options are:
- Hardboard pegboard – affordable and common, but best for light to medium items
- Metal pegboard – stronger and longer lasting, but usually more expensive
- Plastic pegboard – moisture-resistant and easy to clean, but not always ideal for heavy loads
For concrete walls, many people use hardboard pegboard with furring strips. This is a budget-friendly solution for garages, laundry rooms, and basements. If your wall is damp or your items are heavy, metal pegboard or a reinforced system may be better.
If you want extra guidance on safe drilling and anchor choice for masonry surfaces, a reliable source like Ansell’s masonry drilling safety guide can help you understand basic safety concerns before you begin.
Plan the Layout Before Drilling
A neat pegboard wall starts with planning. Do not rush this step. Once holes are drilled into concrete, moving the board is much harder.
Start by deciding where the pegboard will go. Think about what you will hang on it. Tools, kitchen items, craft supplies, and garage gear all need different spacing. A good rule is to place the board at a comfortable reach height and leave enough room above the floor or workbench for easy use.
Then measure the pegboard panel size and mark the wall area. Use painter’s tape or a pencil to outline the board location. This helps you see the final result before drilling.
Also check the wall surface itself. Concrete walls are often uneven. Small bumps or dips can affect how flat the board sits. If the wall is very rough, you may need thicker spacers or a frame system to keep the pegboard straight.
Check for hidden problems
Even on a concrete wall, it is smart to look for any nearby pipes, wires, or vents. In some buildings, concrete walls may have embedded services or surface-mounted systems. Do not assume the wall is empty just because it is solid.
Also inspect for moisture. If the wall is damp, the pegboard can warp or mildew over time. In basements, this is a common problem. If you see signs of water seepage, fix that first before installing pegboard.
Mark the Mounting Points
Hold the pegboard or furring strip system against the wall and mark where the fasteners will go. Use a level to make sure the board will not tilt. Even a small slope is noticeable once tools are hanging.
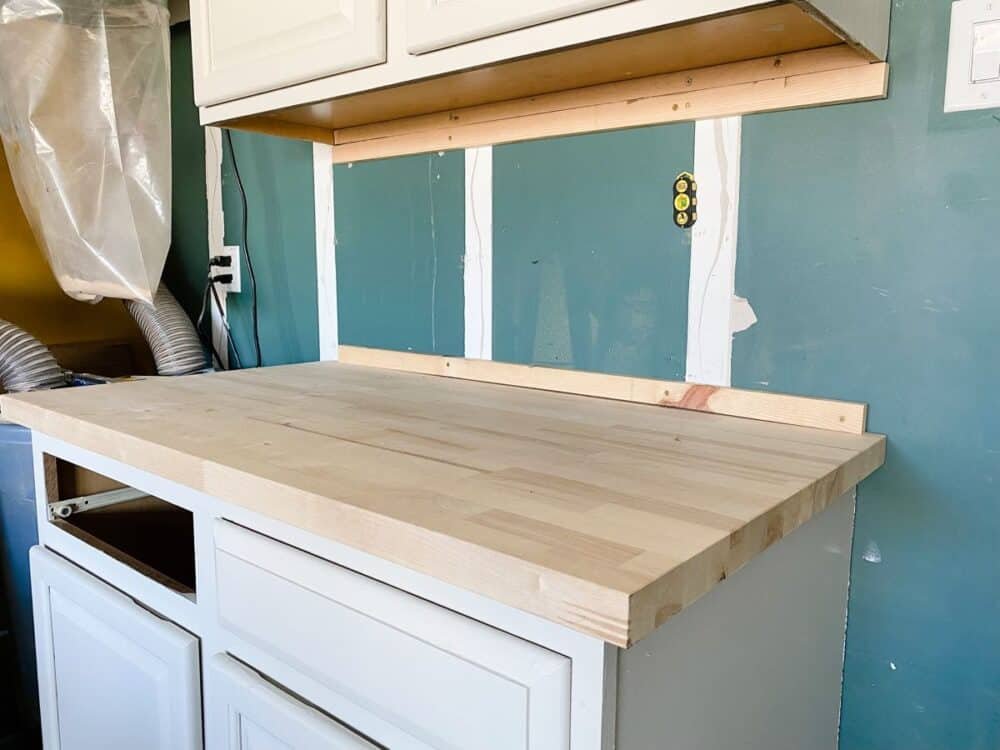
If you are using furring strips, mount the strips first, then attach the pegboard to the strips. This creates a more stable surface and makes it easier to get the pegboard properly spaced.
For large boards, use multiple fasteners across the top, middle, and bottom area. The exact number depends on board size, wall condition, and load weight. Do not rely on just two screws for a full sheet.
Here is a simple way to think about it:
| Board Size | Suggested Support | Use Case |
|---|---|---|
| Small panel | 4 to 6 anchors | Light storage |
| Medium panel | 6 to 8 anchors | General garage or workshop use |
| Large sheet | 8 or more anchors | Heavier tools or wide storage area |
This is only a general guide. If you expect heavier loads, add more support rather than less.
Credit: loveandrenovations.com
Drill into Concrete the Right Way
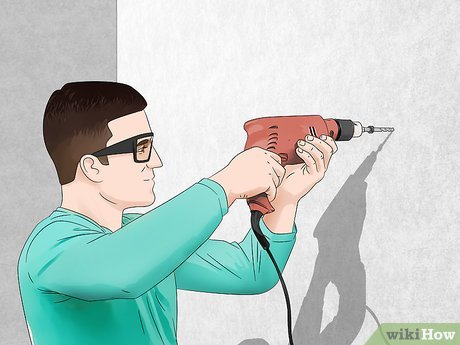
This is the point where the job becomes more serious. Concrete requires the right drill and the right bit. A regular wood drill bit will not do the job.
Use a masonry bit that matches the anchor size. If your anchors say to use a 3/16-inch hole, then choose a 3/16-inch masonry bit. Read the anchor packaging carefully. The hole size matters.
Drill slowly at first to keep the bit from slipping. If you are using a hammer drill, let the tool do the work. Do not force it. Pressing too hard can overheat the bit or crack weaker spots in the wall.
Drill to the depth recommended for your anchors. A small piece of tape wrapped around the bit can act as a depth marker. This is a simple trick that helps you avoid drilling too shallow or too deep.
Clean the hole after drilling
This step is easy to skip, but it is important. Concrete dust inside the hole can stop an anchor from sitting tightly. After drilling, blow out the dust or use a small vacuum. A clean hole helps the anchor grip better.
This is one of the most common beginner mistakes. People drill the hole correctly, but then leave dust inside. The anchor feels loose, and later the pegboard wobbles.
Install the Anchors or Furring Strips
Now that your holes are ready, install the anchors or fastening system. The exact method depends on your design.
If you are fastening furring strips directly to concrete, place the strip in position and drive the concrete screws or anchor system through the wood and into the wall. Check each strip with a level before tightening fully.
If you are mounting the pegboard directly without strips, insert the anchors into the drilled holes, then position the pegboard and secure it with screws.
For most pegboard setups on concrete, furring strips offer two major benefits:
- They create the necessary gap for pegboard hooks
- They make it easier to level the board on an uneven wall
That said, if your goal is only to hang very light items, direct mounting with spacers may be enough. But for a workshop or garage, a strip system is usually the better long-term choice.
Attach the Pegboard
Once the support structure is ready, place the pegboard against the wall or over the furring strips. Align it carefully with your marks.
Start fastening from one corner, then move across the panel while checking alignment. Do not fully tighten one screw before checking the whole board. Small shifts can change the fit.
Use washers if needed so screw heads do not pull through the pegboard holes. This is especially useful for hardboard pegboard. Tighten the screws just enough to hold the panel firmly. Over-tightening can damage the board.
If you are hanging more than one panel, leave a small, even gap between them unless you are using a trim piece or frame. This gives the wall a cleaner look and helps with expansion if the room has humidity changes.
Credit: wikihow.com
Make sure the board sits flat
Run your hand across the pegboard surface. It should not rock or bend. If one area sticks out, check whether the wall is uneven or whether a spacer is missing. A flat board makes hooks work better and looks more professional.
This is another detail beginners often miss: a pegboard that is slightly warped may still look fine, but hooks will not sit properly under weight. A flat install is more important than a fast install.
Test the Hooks and Load Capacity
After the pegboard is installed, test it before loading it up. Insert a few hooks and make sure they lock securely into place. Then hang a light item first and watch for movement.
If the hook wiggles too much or slips out, the board may not have enough rear space or support. In that case, check the gap, the fasteners, and the board thickness.
Then increase the weight gradually. Do not hang all your heavy tools at once. A proper test helps you spot weak areas before they become a problem.
For better long-term results, place heavier items closer to the support points or lower on the board, especially if the board is large. Spread the weight out instead of piling it into one small area.
Common Mistakes to Avoid
Many pegboard problems on concrete come from a few simple mistakes. If you avoid these, your project will last longer and look much cleaner.
- Using the wrong drill bit – Wood bits or metal bits will not drill concrete correctly.
- Skipping the gap behind the board – Hooks need space to hold properly.
- Not cleaning the dust from drilled holes – Dust reduces anchor grip.
- Mounting on a damp wall – Moisture can damage pegboard over time.
- Using too few fasteners – Concrete walls need strong, even support.
- Overloading the board too soon – Test first, then add weight slowly.
One more mistake is using pegboard as if it were the structure itself. Pegboard is a storage surface, not the main load-bearing part. The wall anchors and support strips do the real work.
Extra Tips for a Cleaner and Stronger Finish
If you want your pegboard wall to look and work better, a few small choices make a big difference.
Paint or seal the pegboard first if you want a cleaner finish, especially in a garage or basement. Sealed boards resist moisture better and are easier to wipe down.
Use trim around the edges if you want the wall to look more finished. Trim also helps cover small gaps and gives the installation a more polished look.
Label storage zones if the board will hold many tools. For example, keep hand tools in one area, garden tools in another, and small accessories in bins. This saves time later.
Leave room for future changes. Pegboard works best when it stays flexible. Do not pack it so tightly that every inch is already spoken for. A little open space makes the system easier to use.
Best uses for pegboard on concrete walls
Pegboard is a strong choice for garage tools, workshop supplies, cleaning items, craft tools, and utility accessories. It works especially well when you need fast access and want the freedom to move things around without rebuilding the wall system.
How to Hang Pegboard on Concrete Wall: Final Thoughts
Learning how to hang pegboard on concrete wall is mostly about doing the basic steps in the right order. Choose the right board, create enough space behind it, drill carefully, and use the right anchors. Once those parts are done well, pegboard becomes a very useful storage system that can last for years.
The biggest success factor is not strength alone. It is preparation. Measure well, support the board properly, and test the hooks before loading them. If you do that, your pegboard will stay useful, neat, and secure.
With a solid installation, a concrete wall becomes much more than a hard surface. It becomes a smart storage area that helps you keep tools visible, organized, and easy to reach.
Credit: wikihow.com
FAQs
1. Can I hang pegboard directly on a concrete wall?
Yes, but it is usually better to use spacers or furring strips. Pegboard hooks need a small gap behind the board to work properly. Without that gap, hooks may not hold well.
2. What anchors should I use for pegboard on concrete?
Concrete screws or masonry anchors are the most common choices. Pick anchors based on the weight you plan to hang and follow the size recommended on the anchor package.
3. Do I need a hammer drill for this project?
A hammer drill makes the job much easier and faster. It is not always required for very small projects, but for concrete, it is the best tool for drilling clean holes.
4. How much space should be behind pegboard?
A gap of about 1/2 inch to 3/4 inch is usually enough for standard pegboard hooks. This space helps the hooks lock in and stay secure.
5. What is the best pegboard material for a concrete wall?
Hardboard is common and affordable, but metal pegboard is stronger and better for heavier use. If the area is damp, choose a moisture-resistant option or seal the board well.
